
Overview
Tasks are the things that need to be done in order to deliver on a deal’s terms. Each task must have a subject and due date. You can assign each task to the person (or people) responsible for it.
Most tasks are associated with an instance of an asset. Once a deal is made and an asset is added to it, use tasks to track what needs to be done to deliver that asset. A task can also be associated with the deal itself instead of an asset. This might be used for invoicing, business renewal preparations, or attempting to close a tentative deal.
All team members can view, create, and edit tasks. A non-team member can also create a task if they are a member of the deal. Non-team members can only see or edit a task if they are a task member. See user roles and permissions for more details.
Open the Create New Task window
Note: If you are adding a task to an asset, you must still select Deals—not Assets—in the left pane. Tasks can be assigned to an instance of an asset, not to the asset itself independently of any deal.
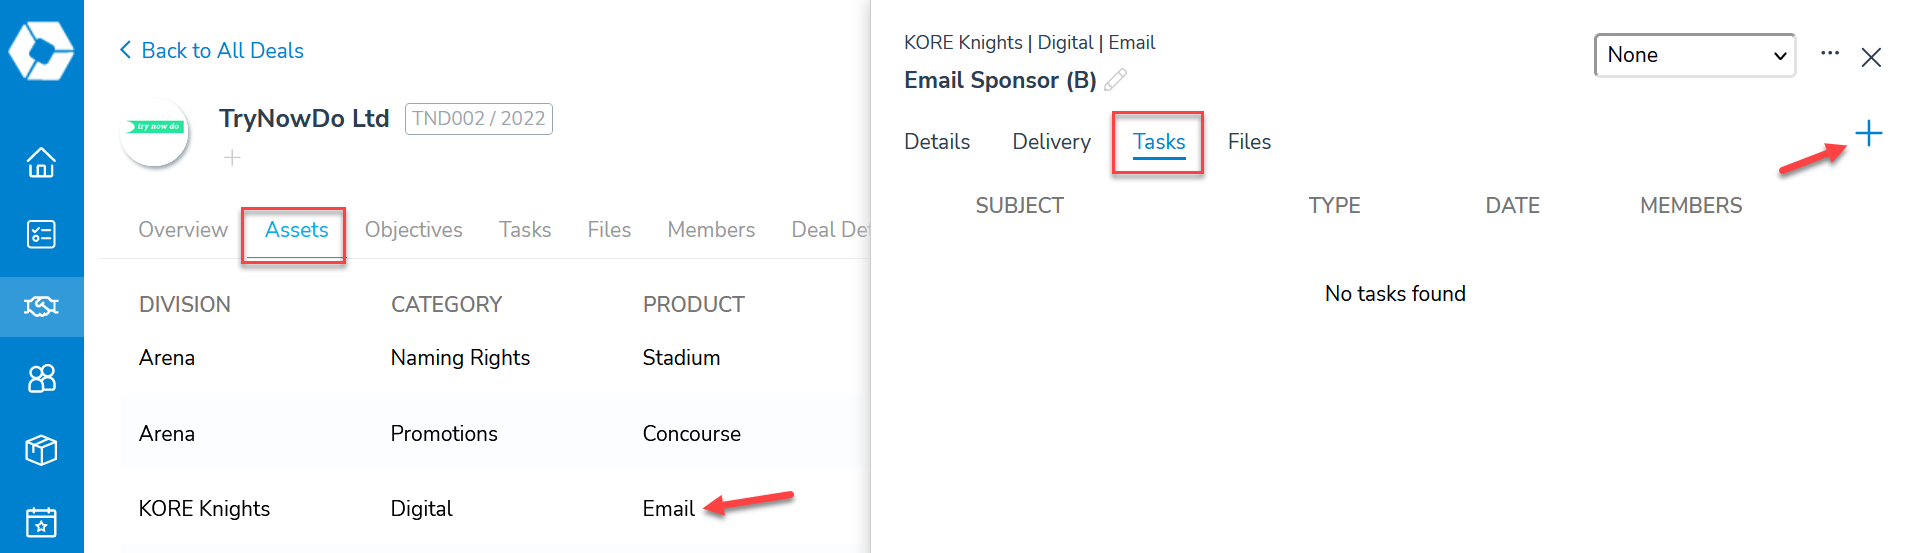
For an asset
- Select Deals from the left pane and open the relevant deal.
- Select the Assets
- Select the asset you want to create a task for.
- In the asset details window, find the Tasks section and click the +
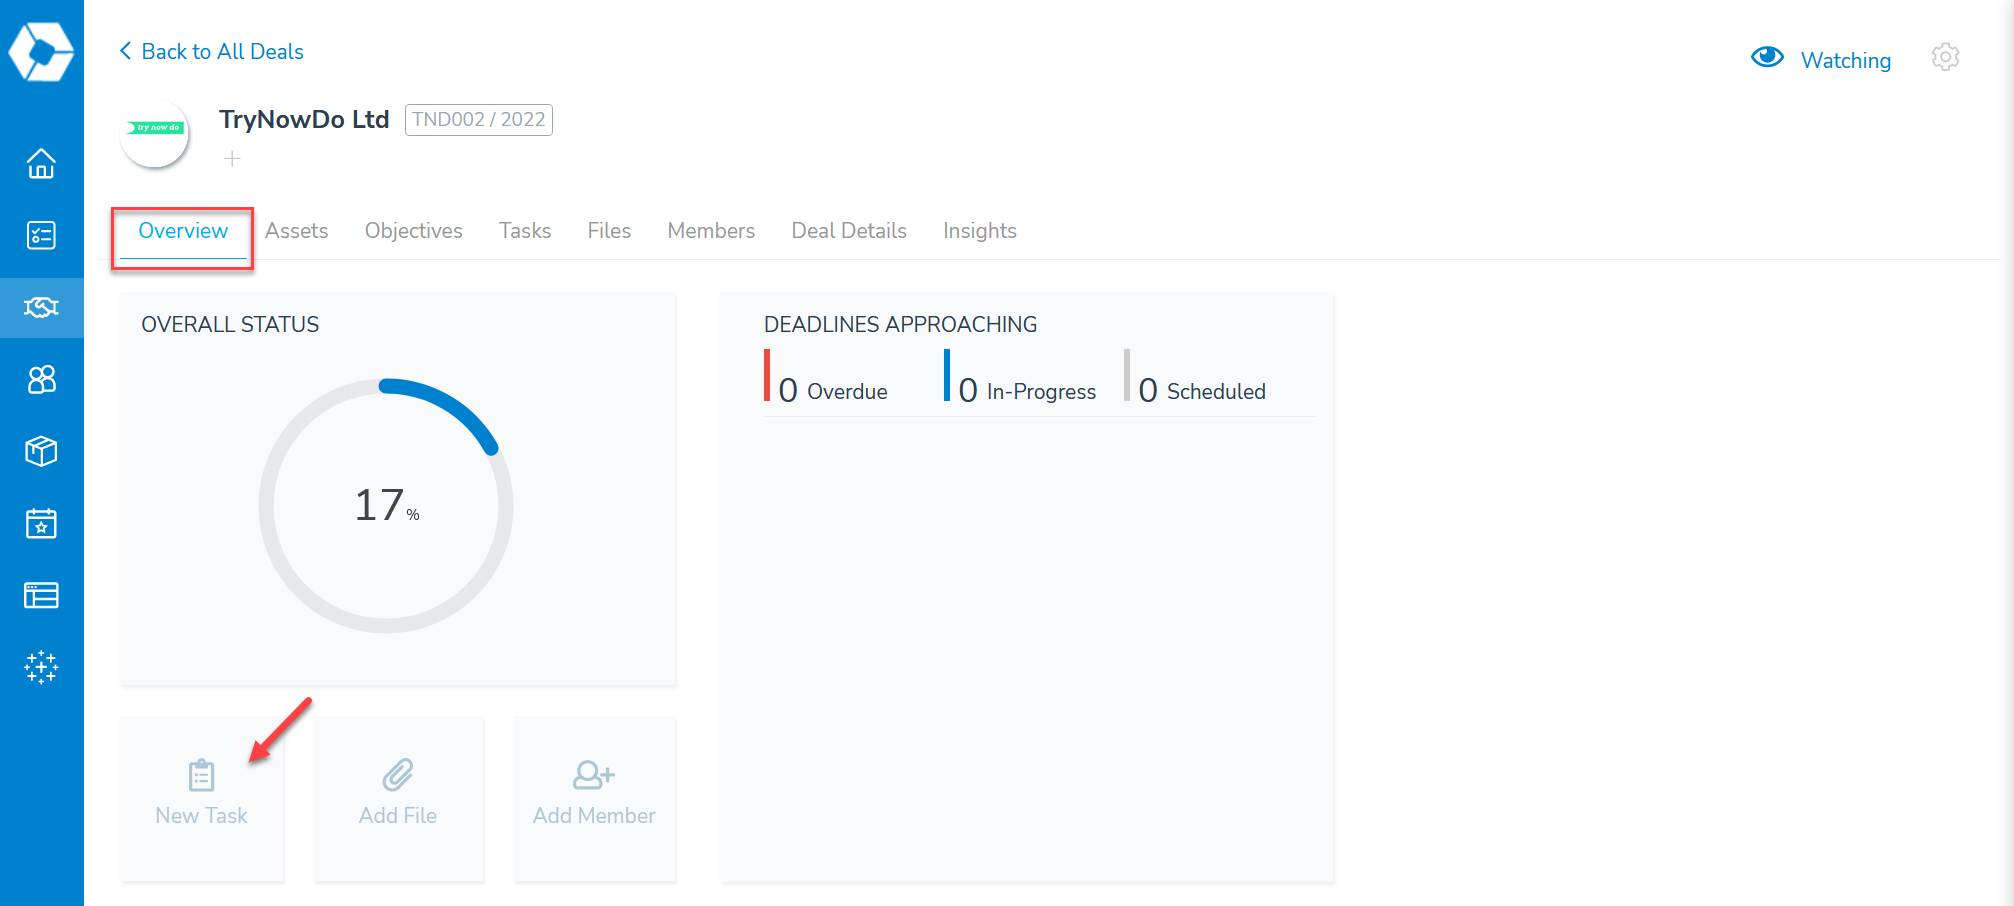
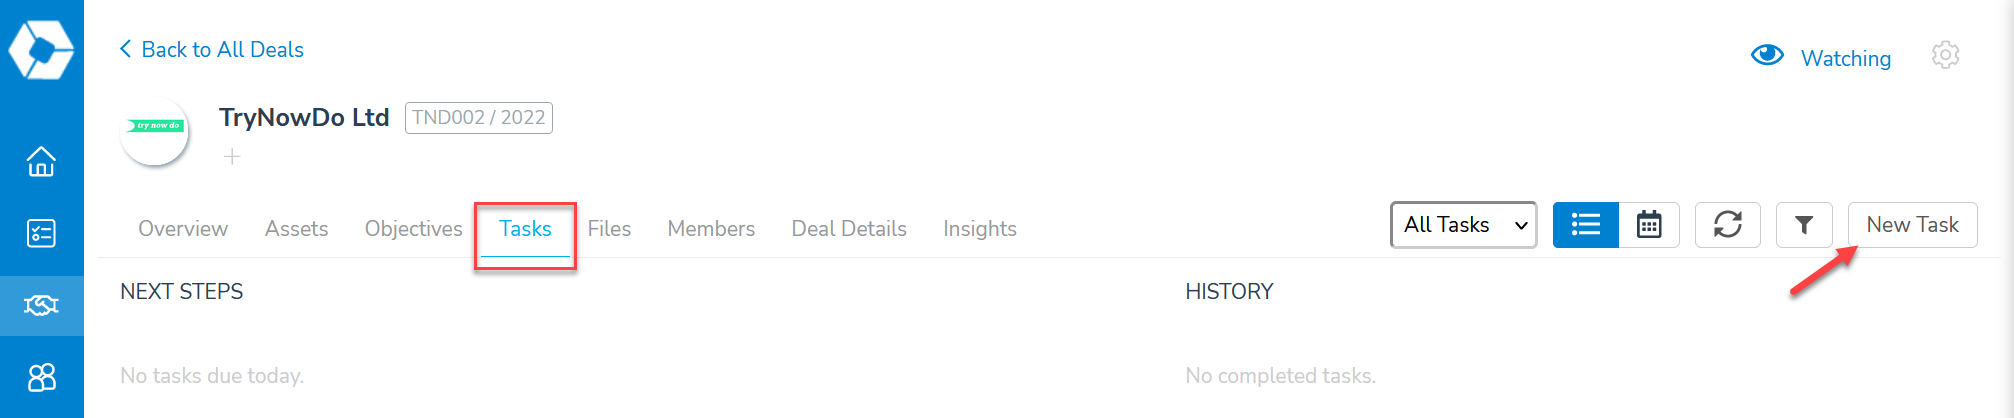
For a deal
- Select Deals from the left pane and open the relevant deal.
- Click New Task on either the Overview or Tasks tab.
—or—
Enter the task details
The Create New Task window is the same for both assets and deals. There are two required fields: Subject and Due Date. It is strongly recommended to add a member to the task.
- Type: This list is set by your organization’s admin. Follow their guidance for choosing one.
- Status: The default is Not Started, but you can change this if it’s already In Progress or Completed.
- Subject: A brief title for the task which is shown prominently in the user interface.
- Due Date: The date this task should be completed by. Click the calendar icon to choose a date from a calendar.
- Department: The group within your organization responsible for this task.
- Description: A more detailed explanation of the task to be completed.
- Attachments: Files associated with this task, such as images or audio recordings. (Max 2GB per file.)
- Members: The person (or people) responsible for this task. The task will appear in their dashboard.
To add members, click the +Add button. Here, you can add members by clicking their user icons or searching for them by name or email address. A blue check mark will appear after selecting the user. However, non-team members must be deal members before you can make them task members. The non-deal members section will only include team members.
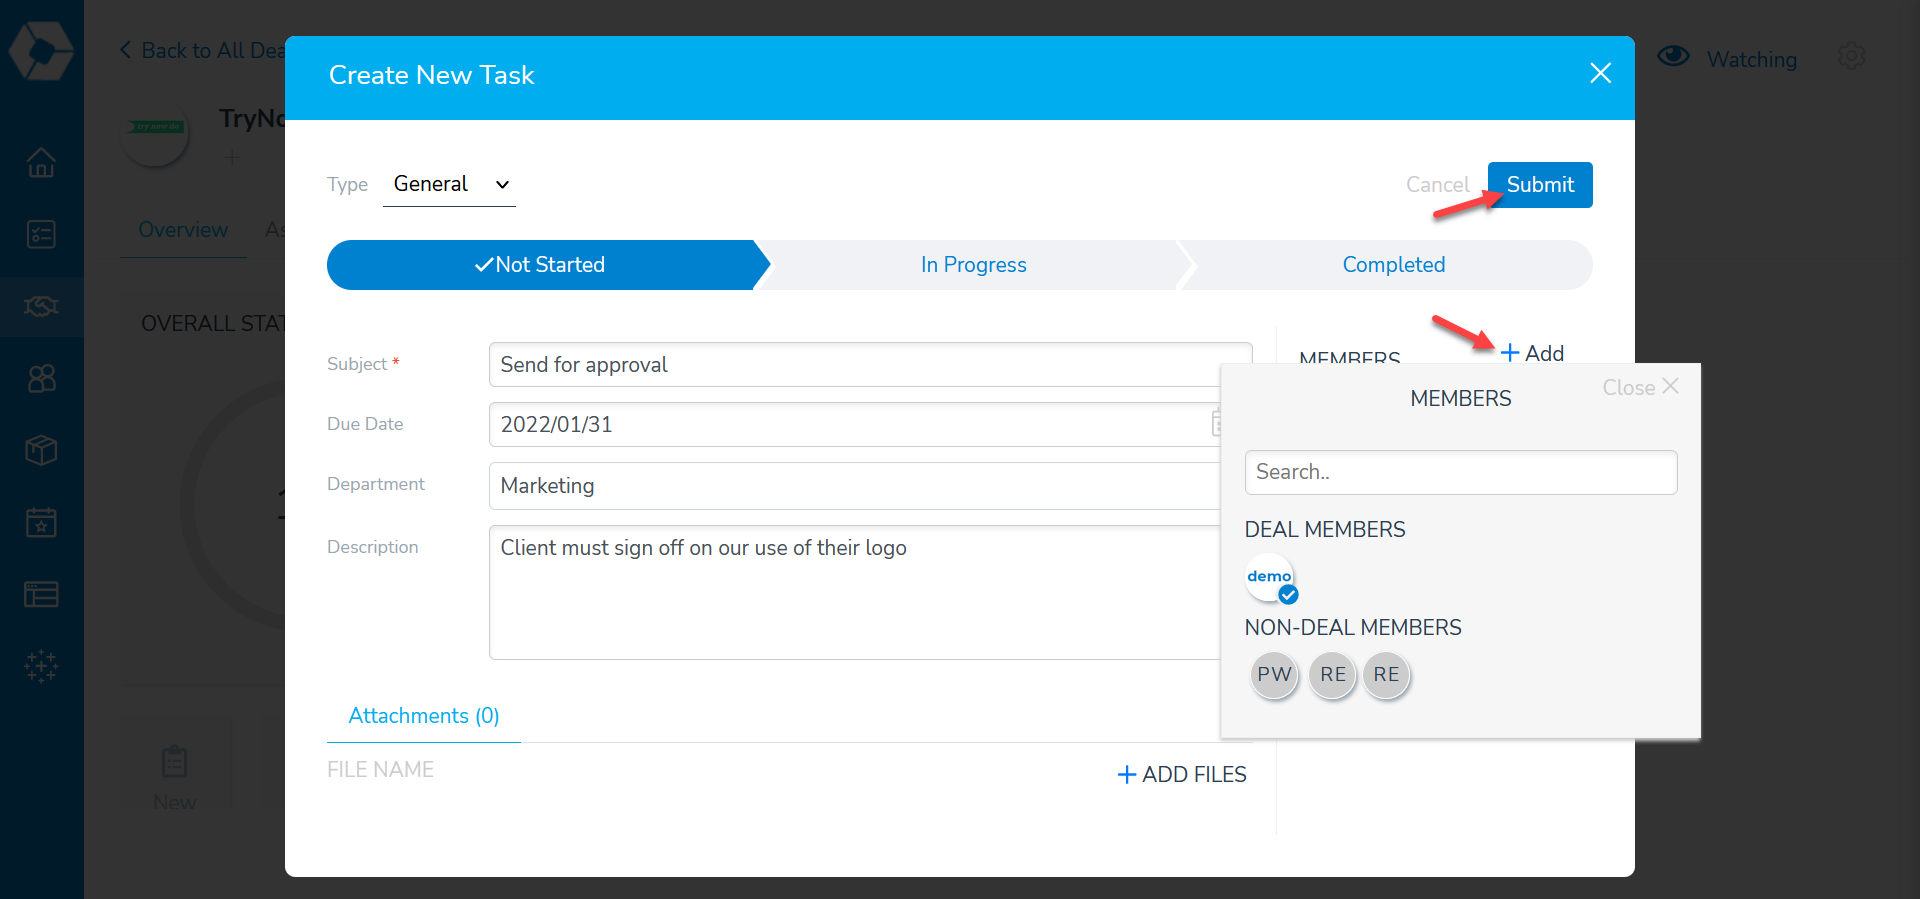
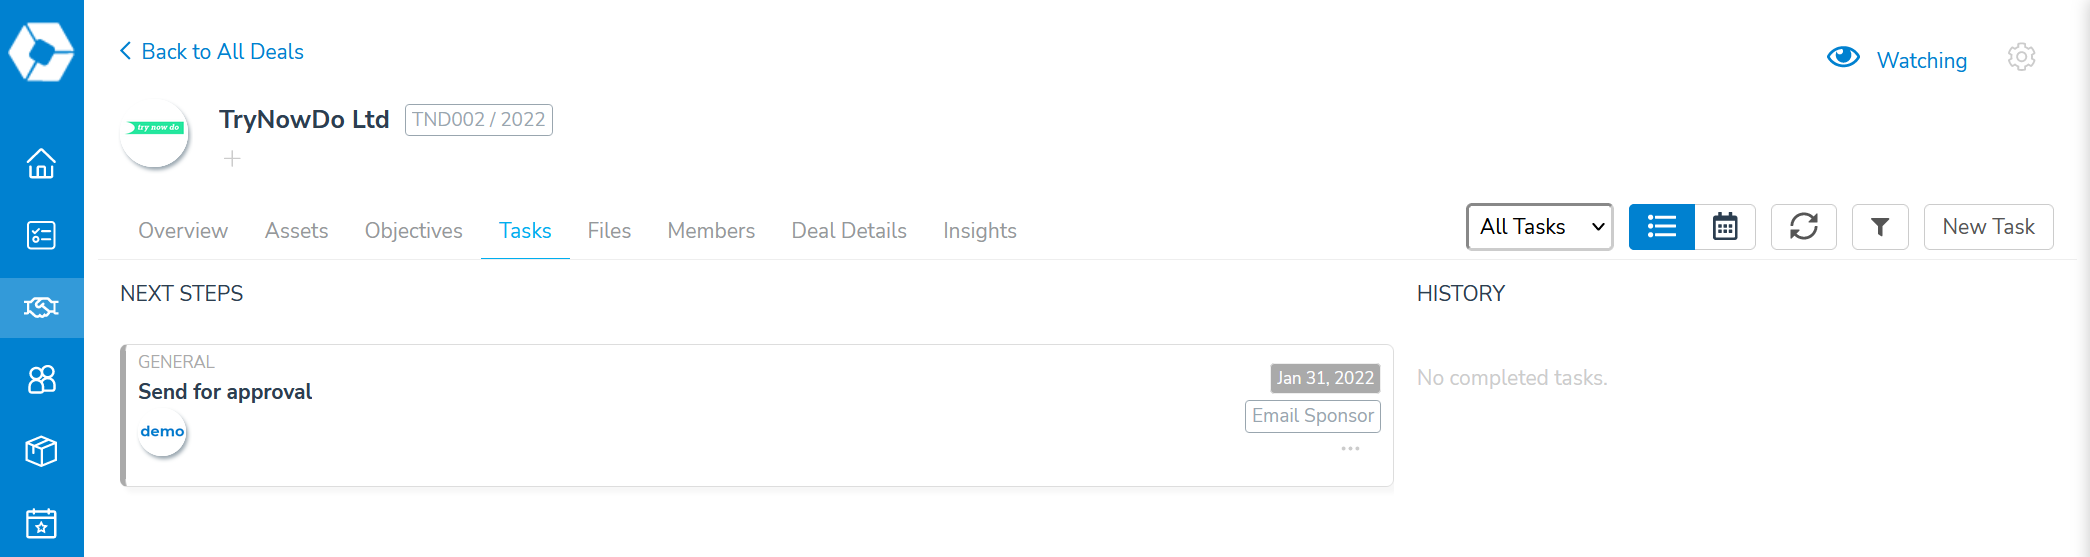
When finished, click Submit to create the task. It will now appear in the Tasks tab.
Edit a task
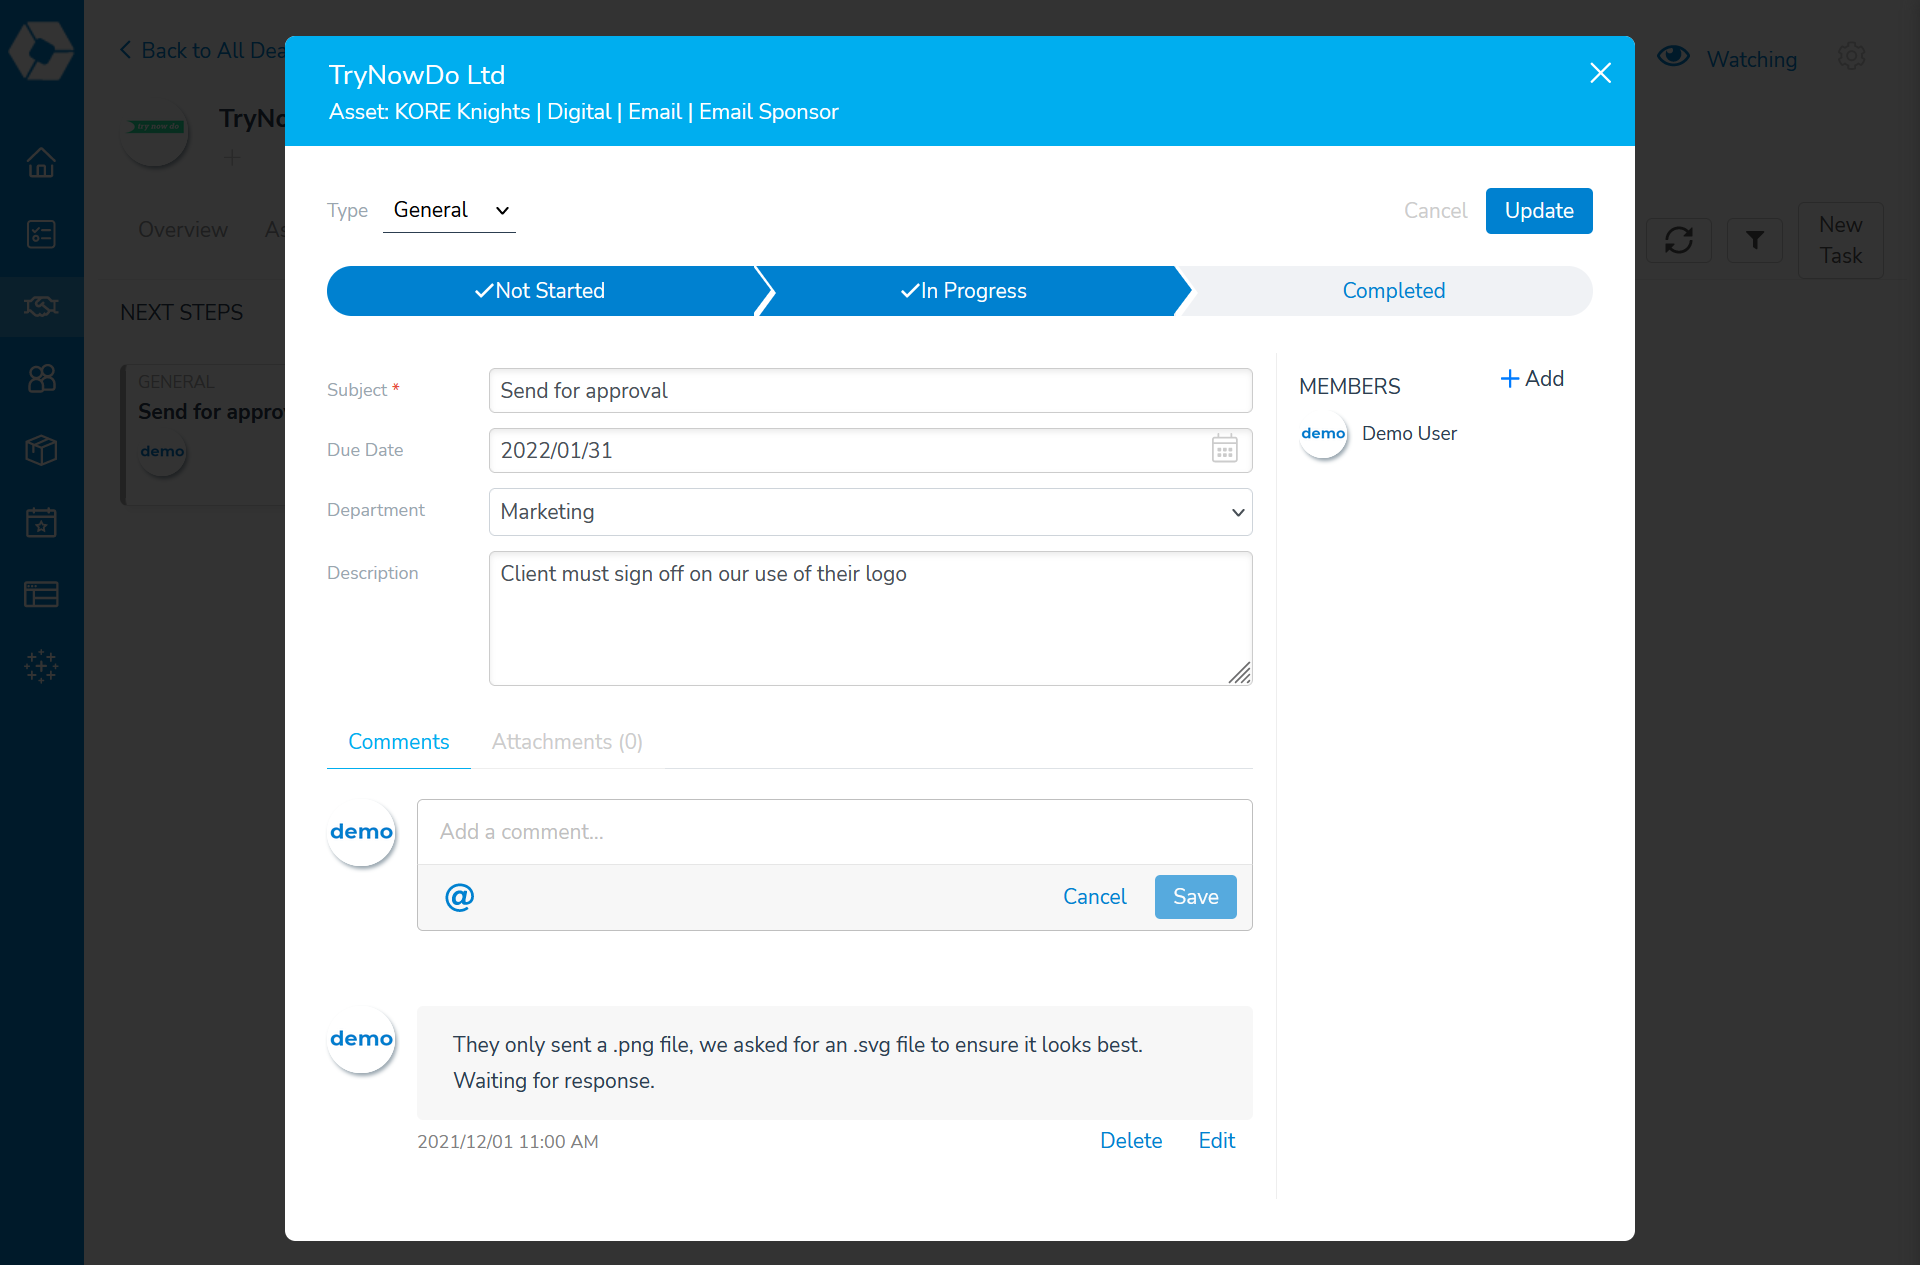
Once a task has been created, you'll typically want to change its status to In Progress or Completed as you work on it. You may also want to add comments, attach files, or add more task members. To make changes or updates to a task, find the task in the interface and click on it.
The edit window is very similar to the create window. The account's name is shown in the window title. If the task is related to an asset, the asset's division, category, product, and name are also shown just beneath the title. The Comments tab lets any task member add notes or discuss the task. Use "@name" to mention a specific task member.
You can also use the Attachments tab to upload files for any deal member to use.
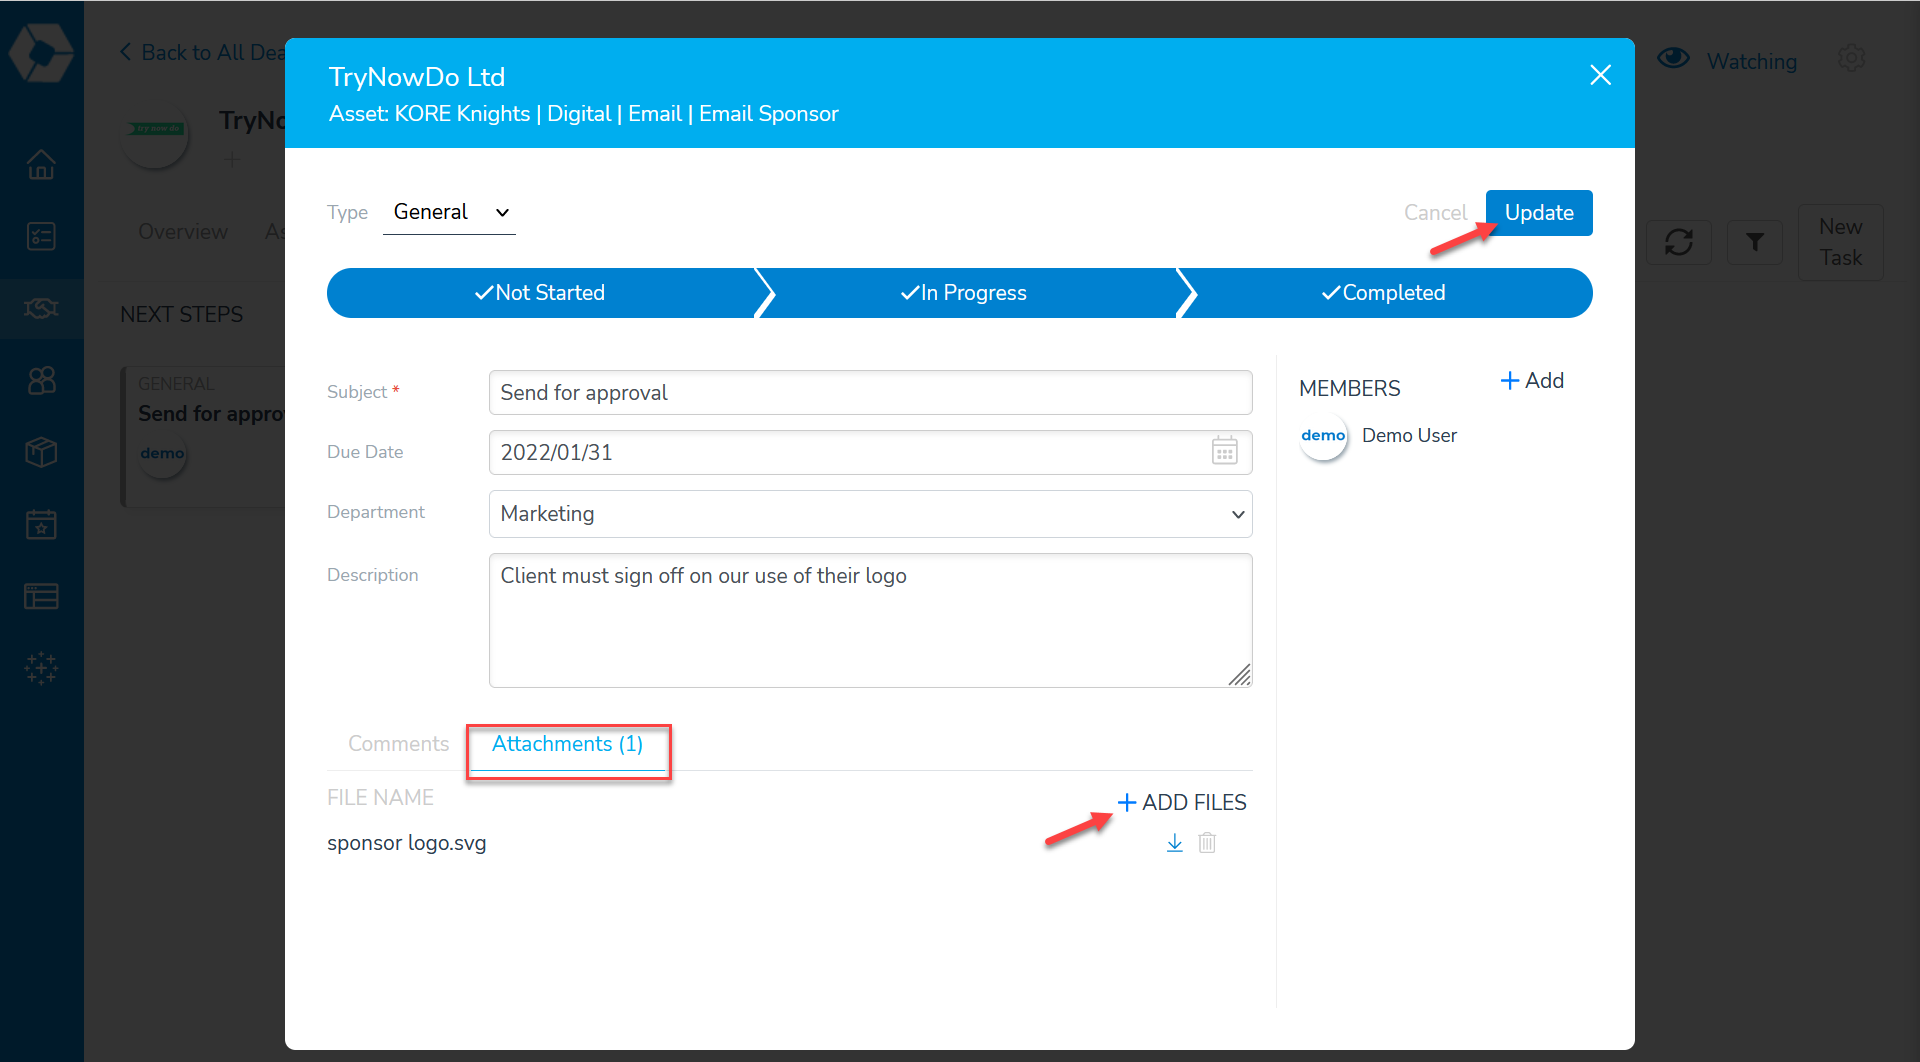
Make the desired changes, then click Update.