Overview
Fan Finder is a powerful tool for creating campaigns and marketing lists. You can search for and select contacts in your CRM using multiple criteria, and also exclude some of those contacts based on other criteria. To access the tool, click on Fan Finder in the menu. The tool will open in a new window. (If your browser blocks this pop-up, there is a link you can click instead.)

Step 1: Intro
First, decide how you want to search for fans. Several options are available.
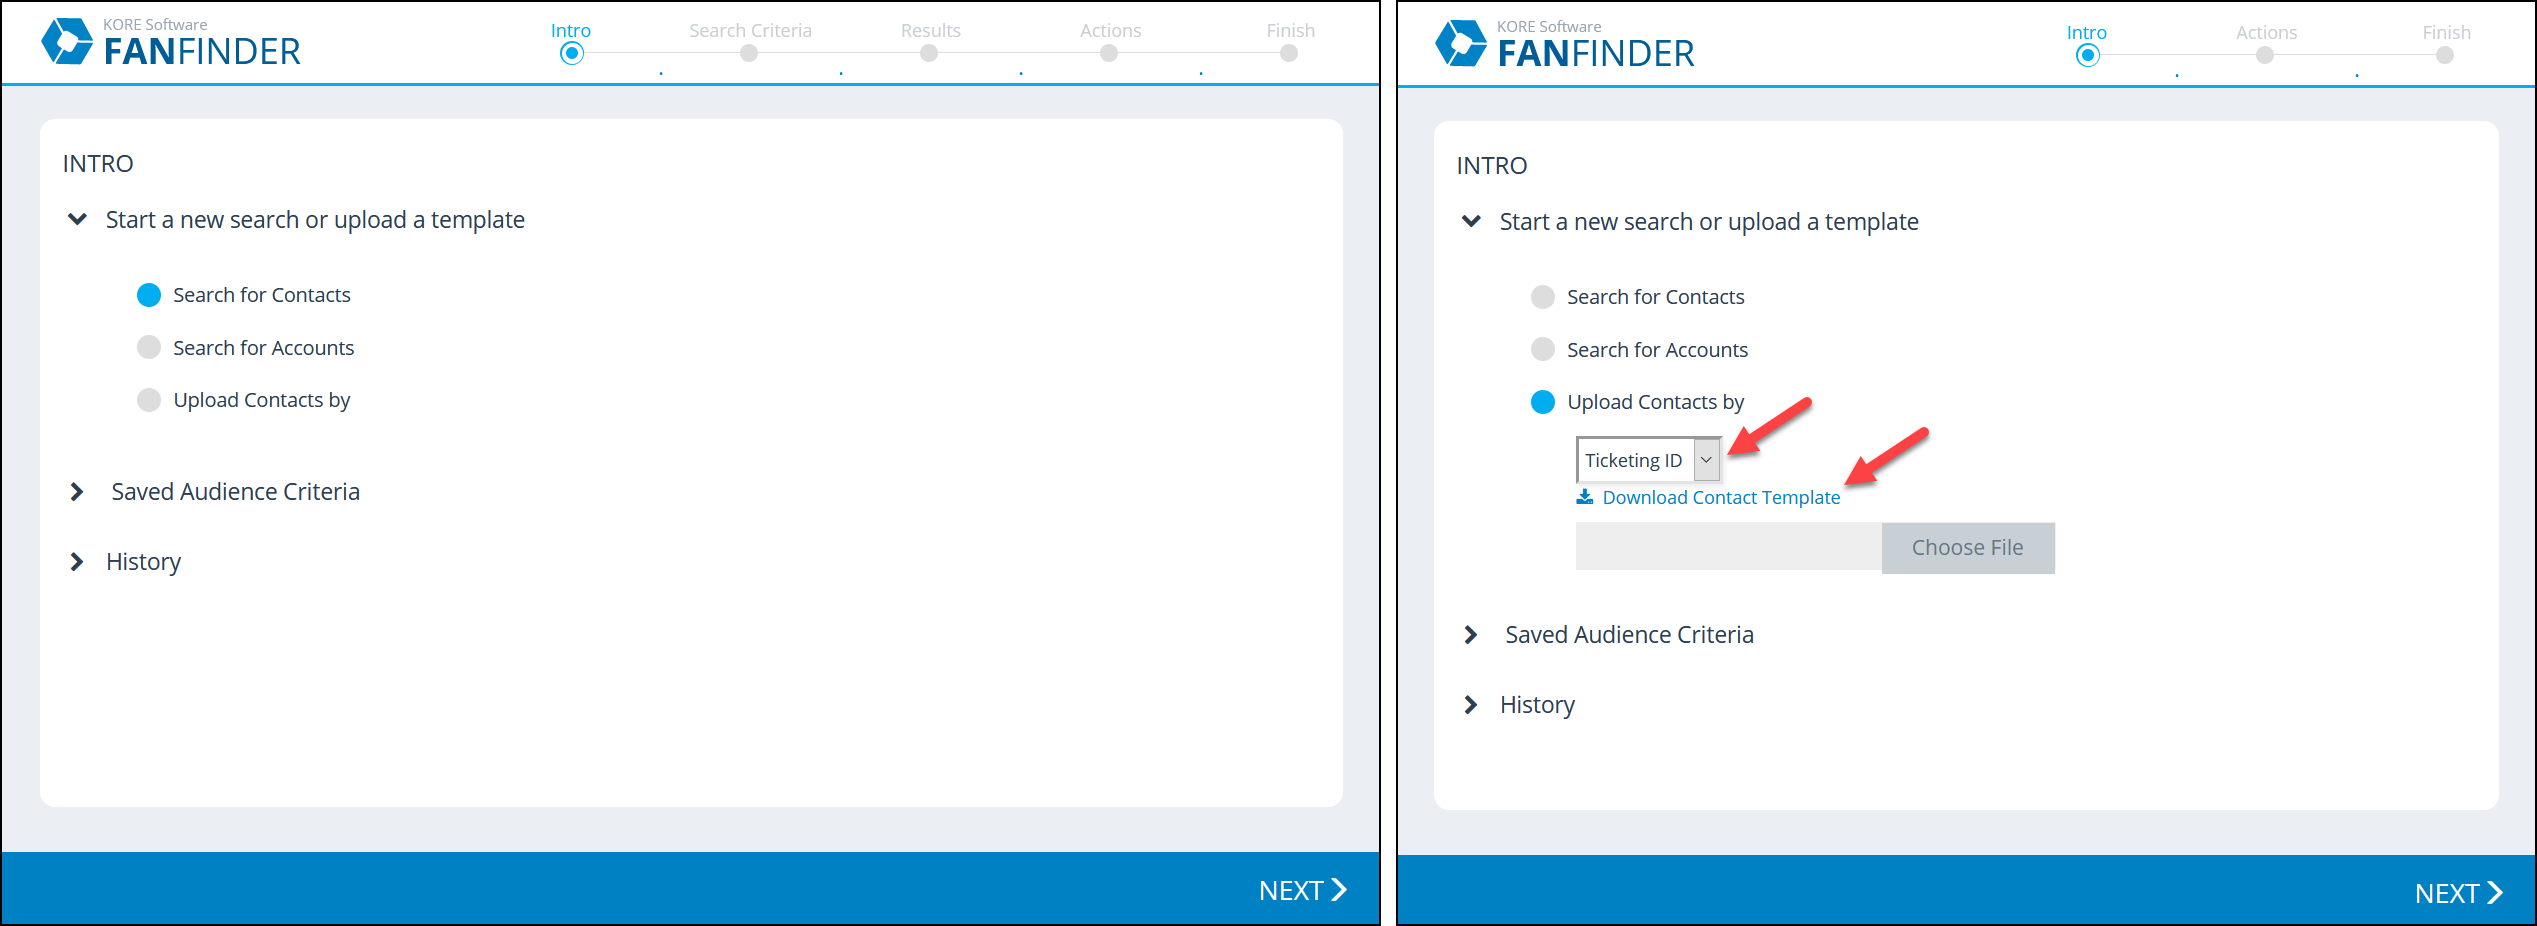
Start a new search or upload a template: You can choose to search for ticketing accounts or for contacts. You can also upload an existing list of fans using an Excel sheet. To do so, tick “Upload Contacts by” and use the drop-down menu to select which type of identifier you’ll provide: Ticketing IDs, Contact IDs, or email address. The “Download Contact Template” link will provide you with the correct template for whichever selector you chose.
(If you upload a list of contacts, click the Next button and skip to Step 4 below.)
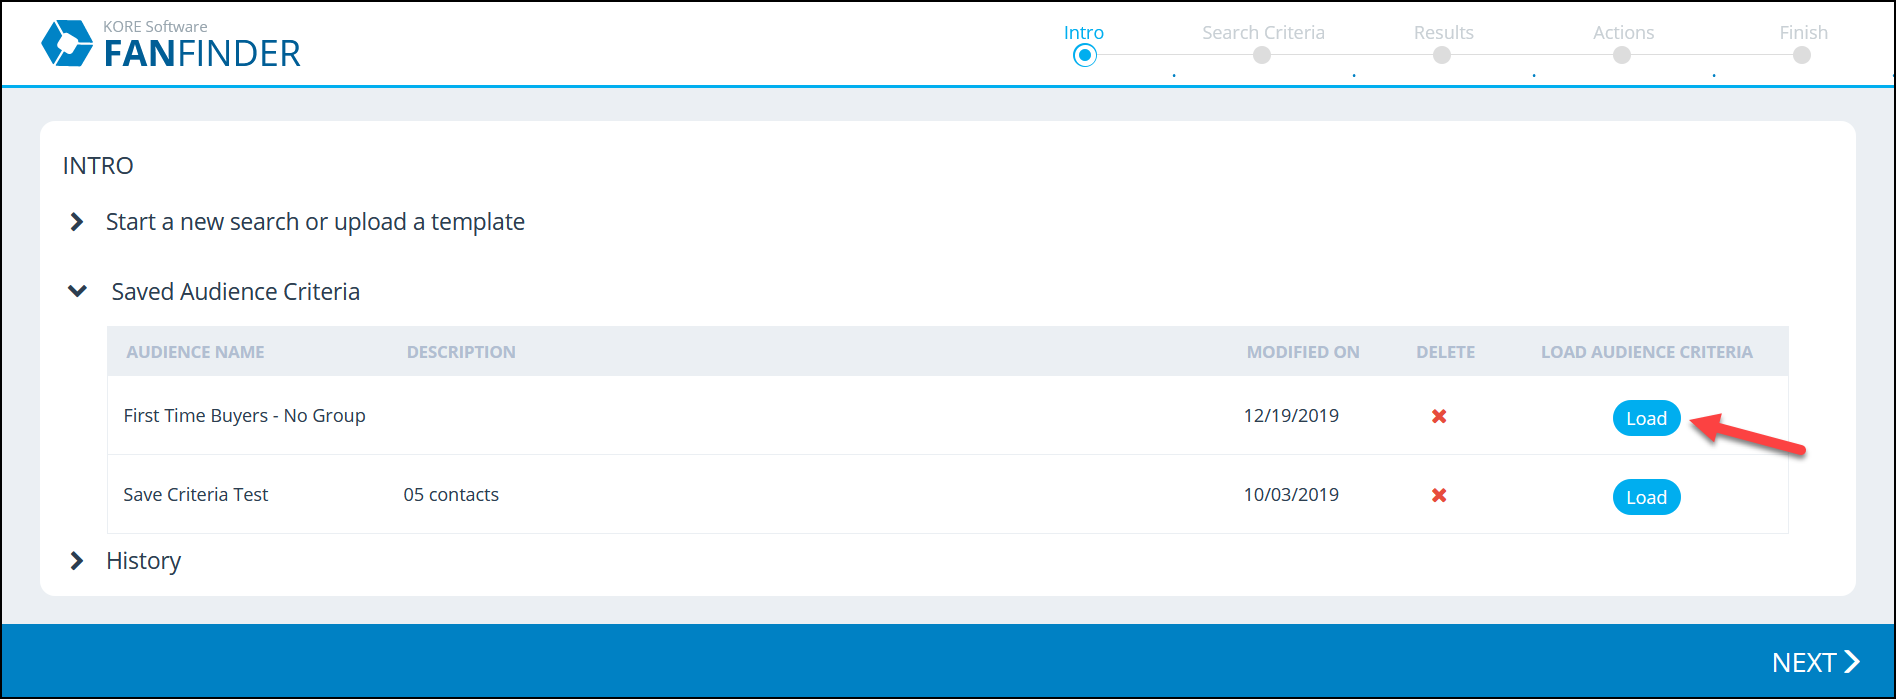
Saved audience criteria: If you want to use the same criteria that someone in your organization has previously configured, there’s no need to enter everything again. Expand this section, find the desired audience, and click the Load button.
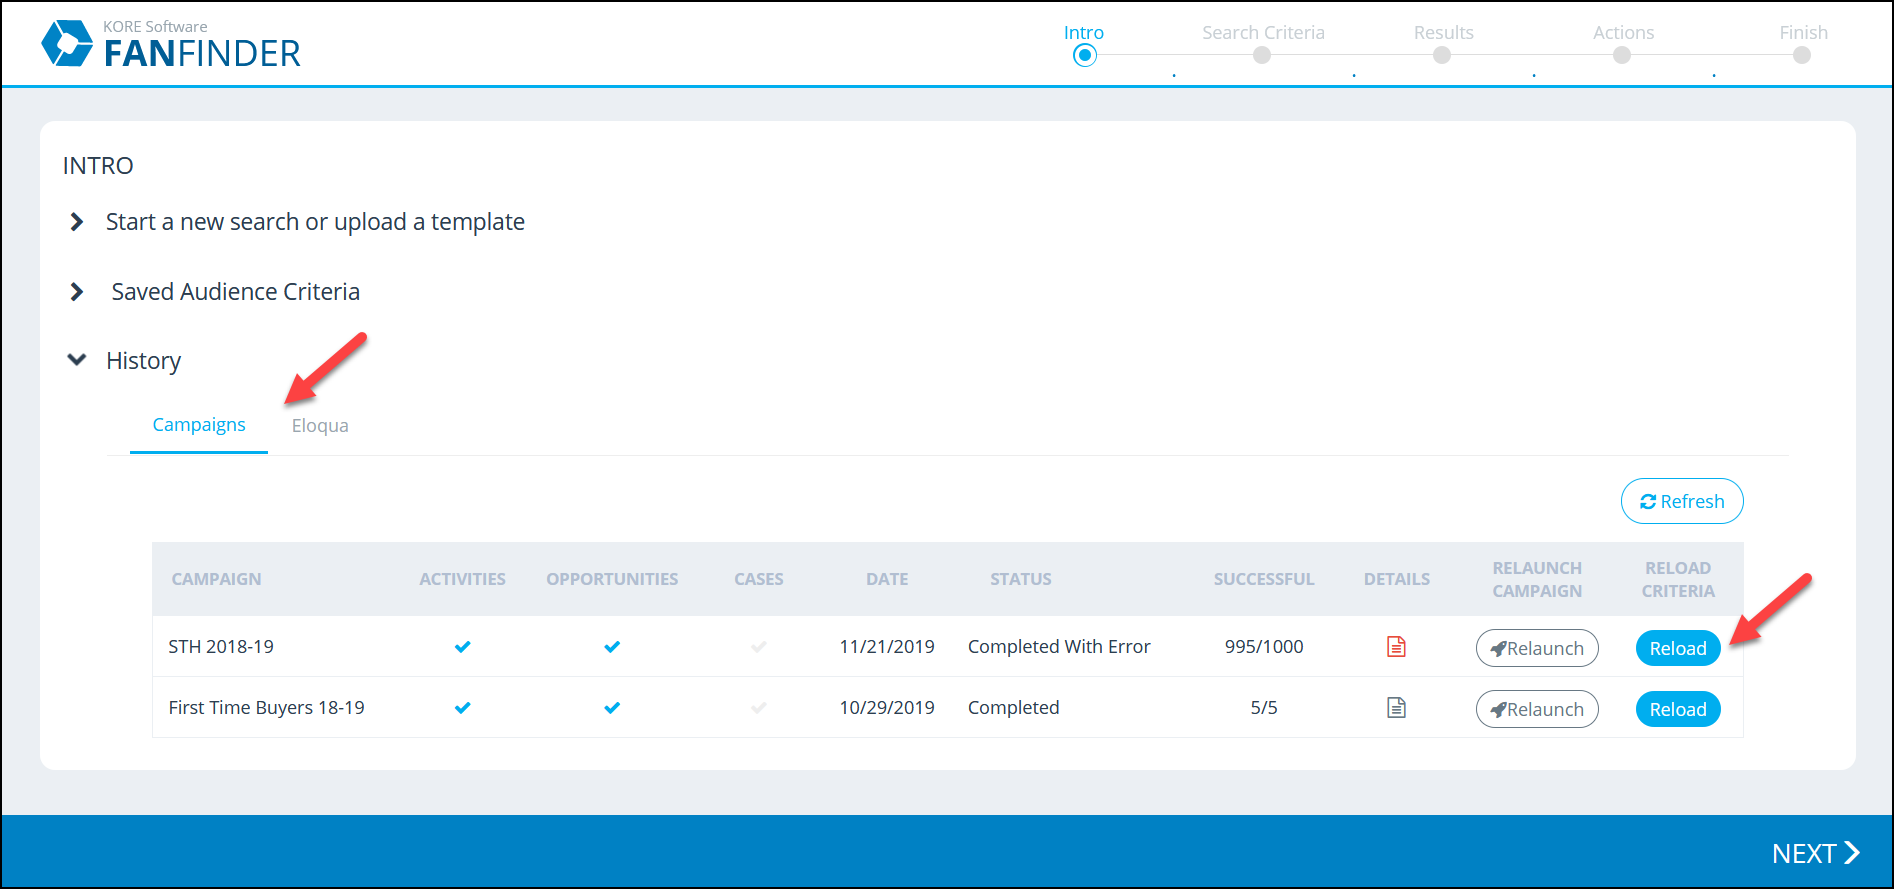
History: If you want to use the same criteria that was used for a past campaign, locate it in this section and click the Reload button under “Reload Criteria”. You can also relaunch a past campaign or use information from Eloqua if your organization uses it and enables the Eloqua integration.
Click the Next button to proceed.
Step 2: Search criteria
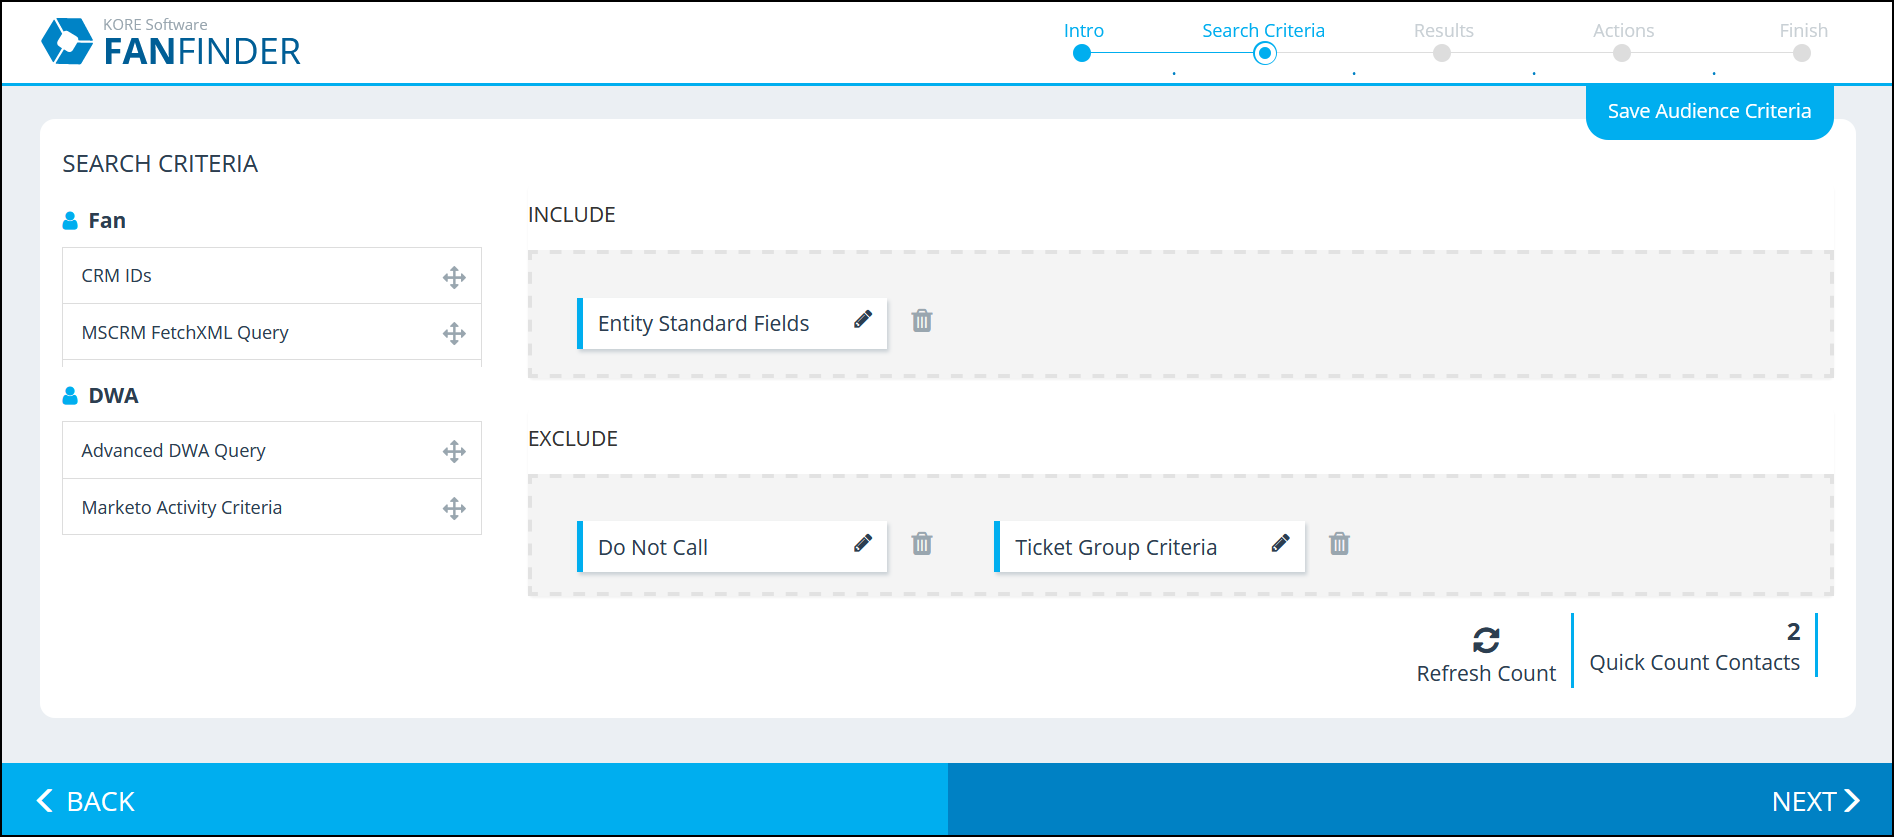
Fan Finder lets you define an audience by choosing who to include and/or exclude. If a person meets criteria in both sections, the Exclude criteria takes precedence—they will not be included in the audience.
There are several categories of criteria to use. Additionally, organizations that subscribe to KORE Data Warehouse & Analytics (DWA) can use advanced queries in their Fan Finder criteria.
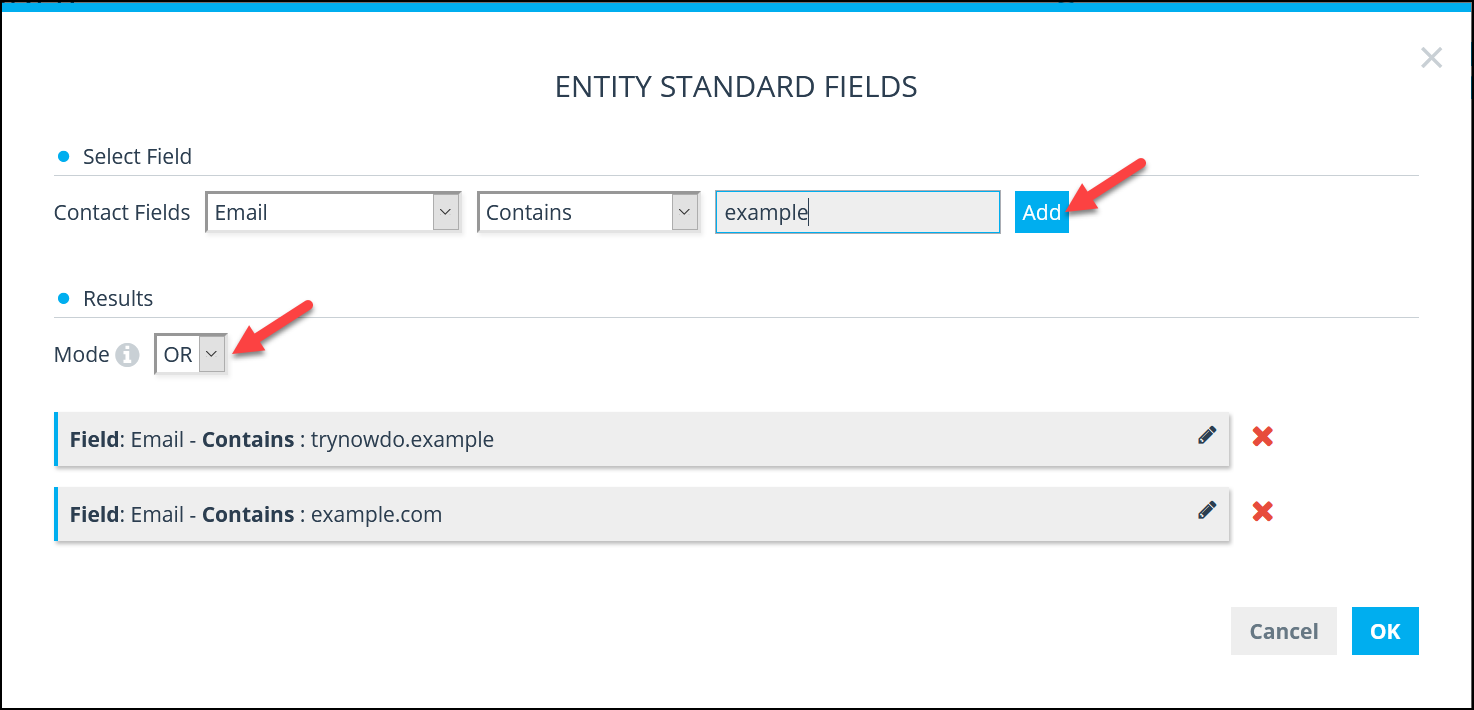
Begin by finding a type of criteria, then drag it into either the Include or Exclude box with your mouse. In the window that automatically appears, set the specific rules. For example, we can use the Entity Standard Fields to include anyone whose email address contains a particular domain. Use the drop-down menus to choose criteria, then click Add. You can include more than one rule, and you can use the Mode drop-down menu to choose whether an audience member needs to match all the criteria (“AND”) or if they only need to match one (“OR”).
You can use as many criteria as you’d like. However, a contact will only be in the audience if they meet all of the Include criteria and none of the Exclude criteria. Click the Refresh Count button to see how many contacts would match the current rules. This can also help you spot any mistakes.
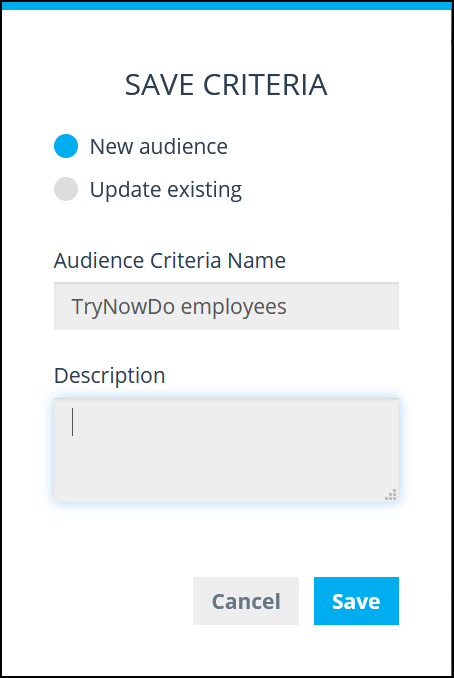
If you may want to use these same criteria again in the future, click the Save Audience Criteria button. You can then save this as a new audience, or as an update to a previously saved one. The name is required, but the description is optional.
Click the Next button to proceed.
Step 3: Results
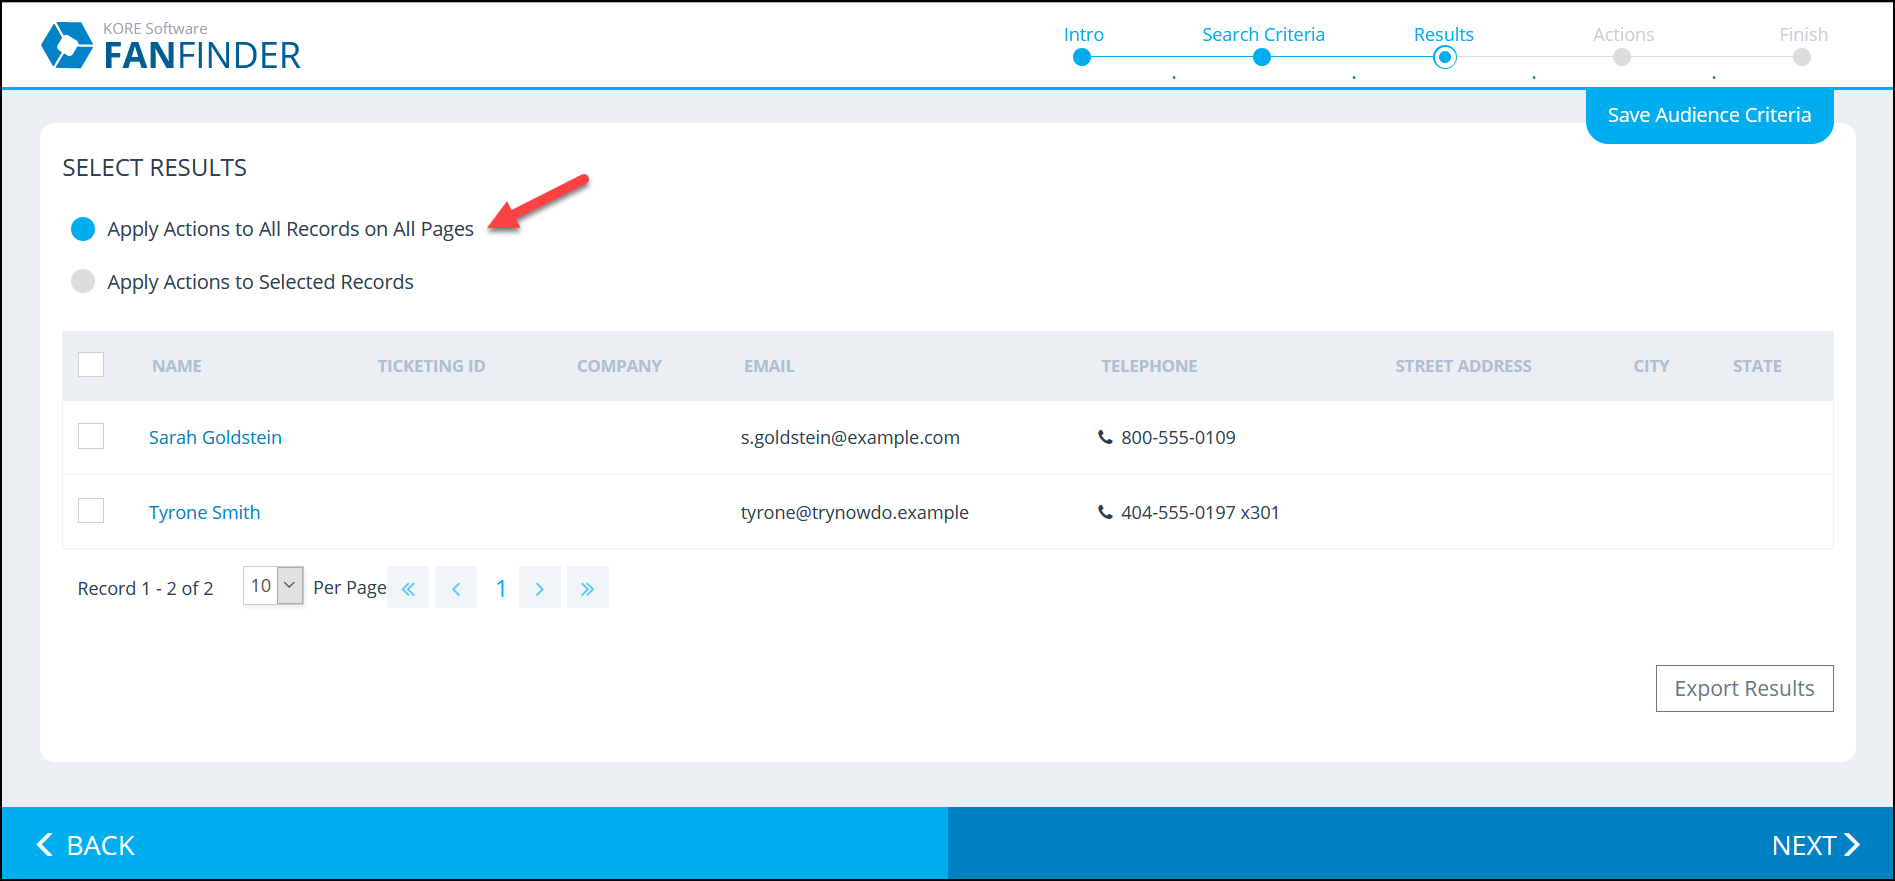
Fan Finder provides a list of all the contacts that matched your criteria. You can spot-check the results to make sure they’re what you expect. Next, you can choose which of these contacts the actions in the following step will apply to. The default choice includes all matches, but you can manually choose from the list as well.
Optionally, you can click Export Results to download a .csv (comma separated values) file which you can edit with Excel or any other spreadsheet software.
Click the Next button to proceed.
Step 4: Actions
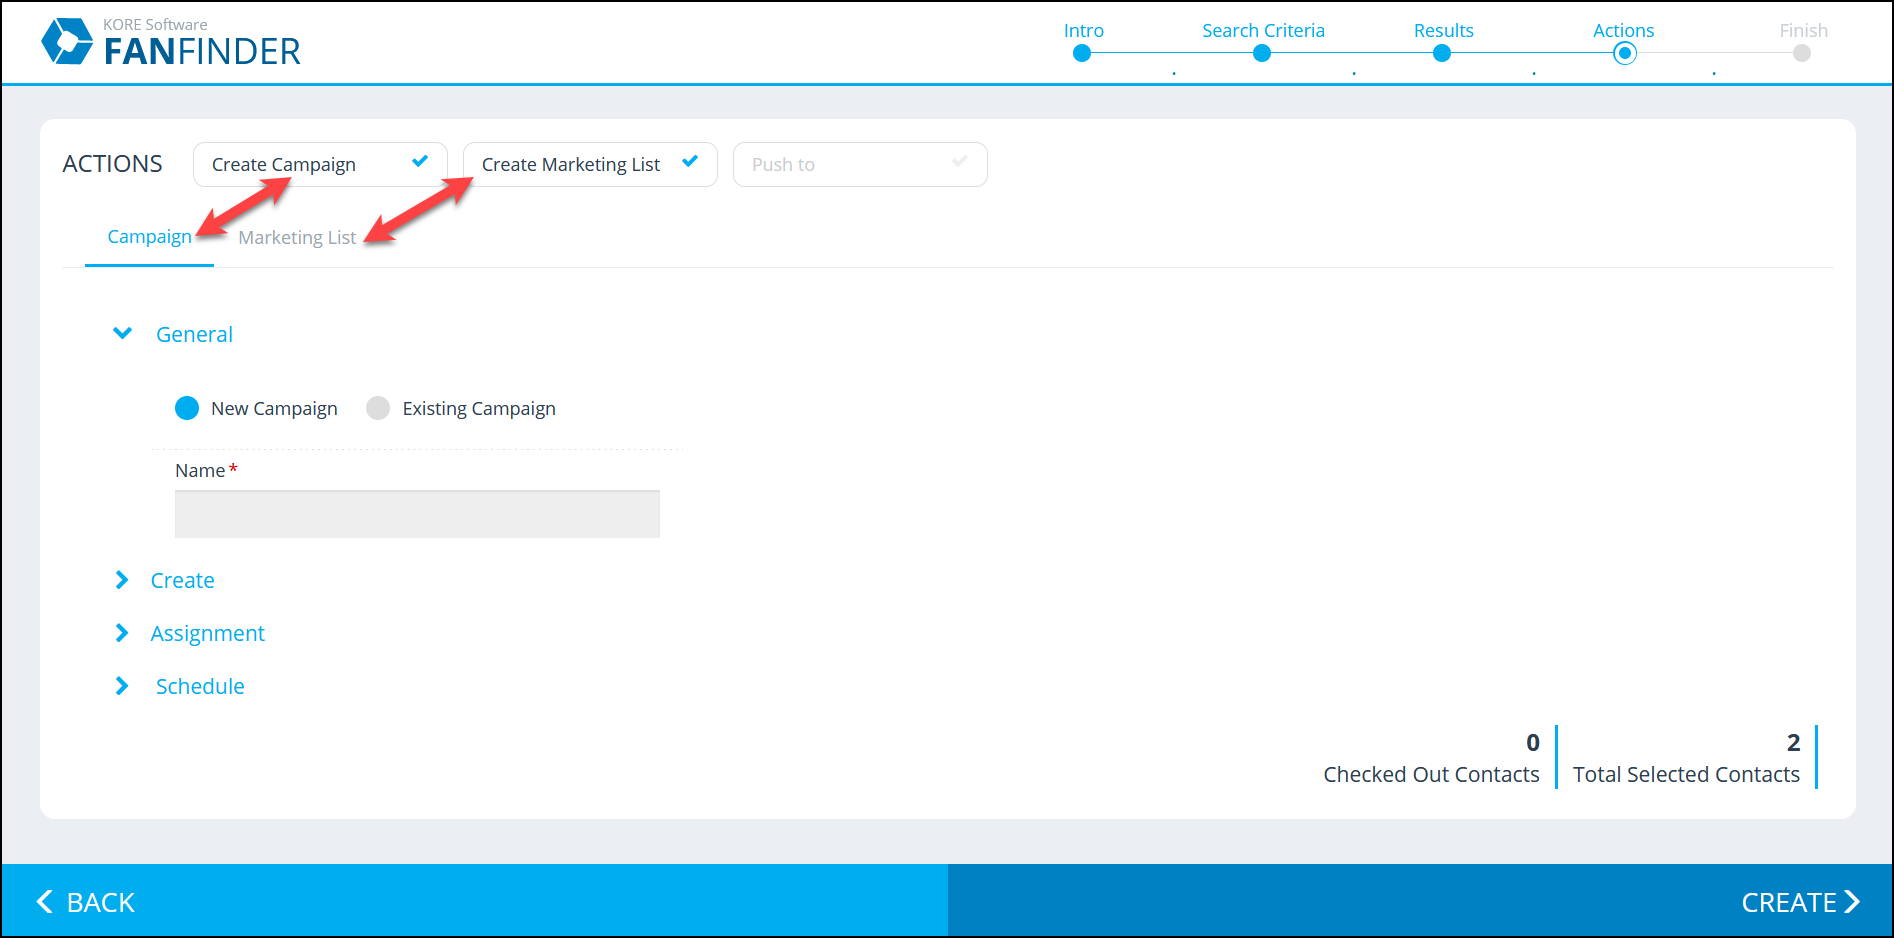
From here, you can create a campaign, create a marketing list (Dynamics) or campaign members (Salesforce), and/or push the list to Eloqua (if your organization uses that integration). Choose the actions using the check buttons at the top, then click on the tabs to open the action’s details.
Campaign
General
In the General section, choose between creating a new campaign or adding to an existing one. If you will create a new campaign, give it a name.
Create
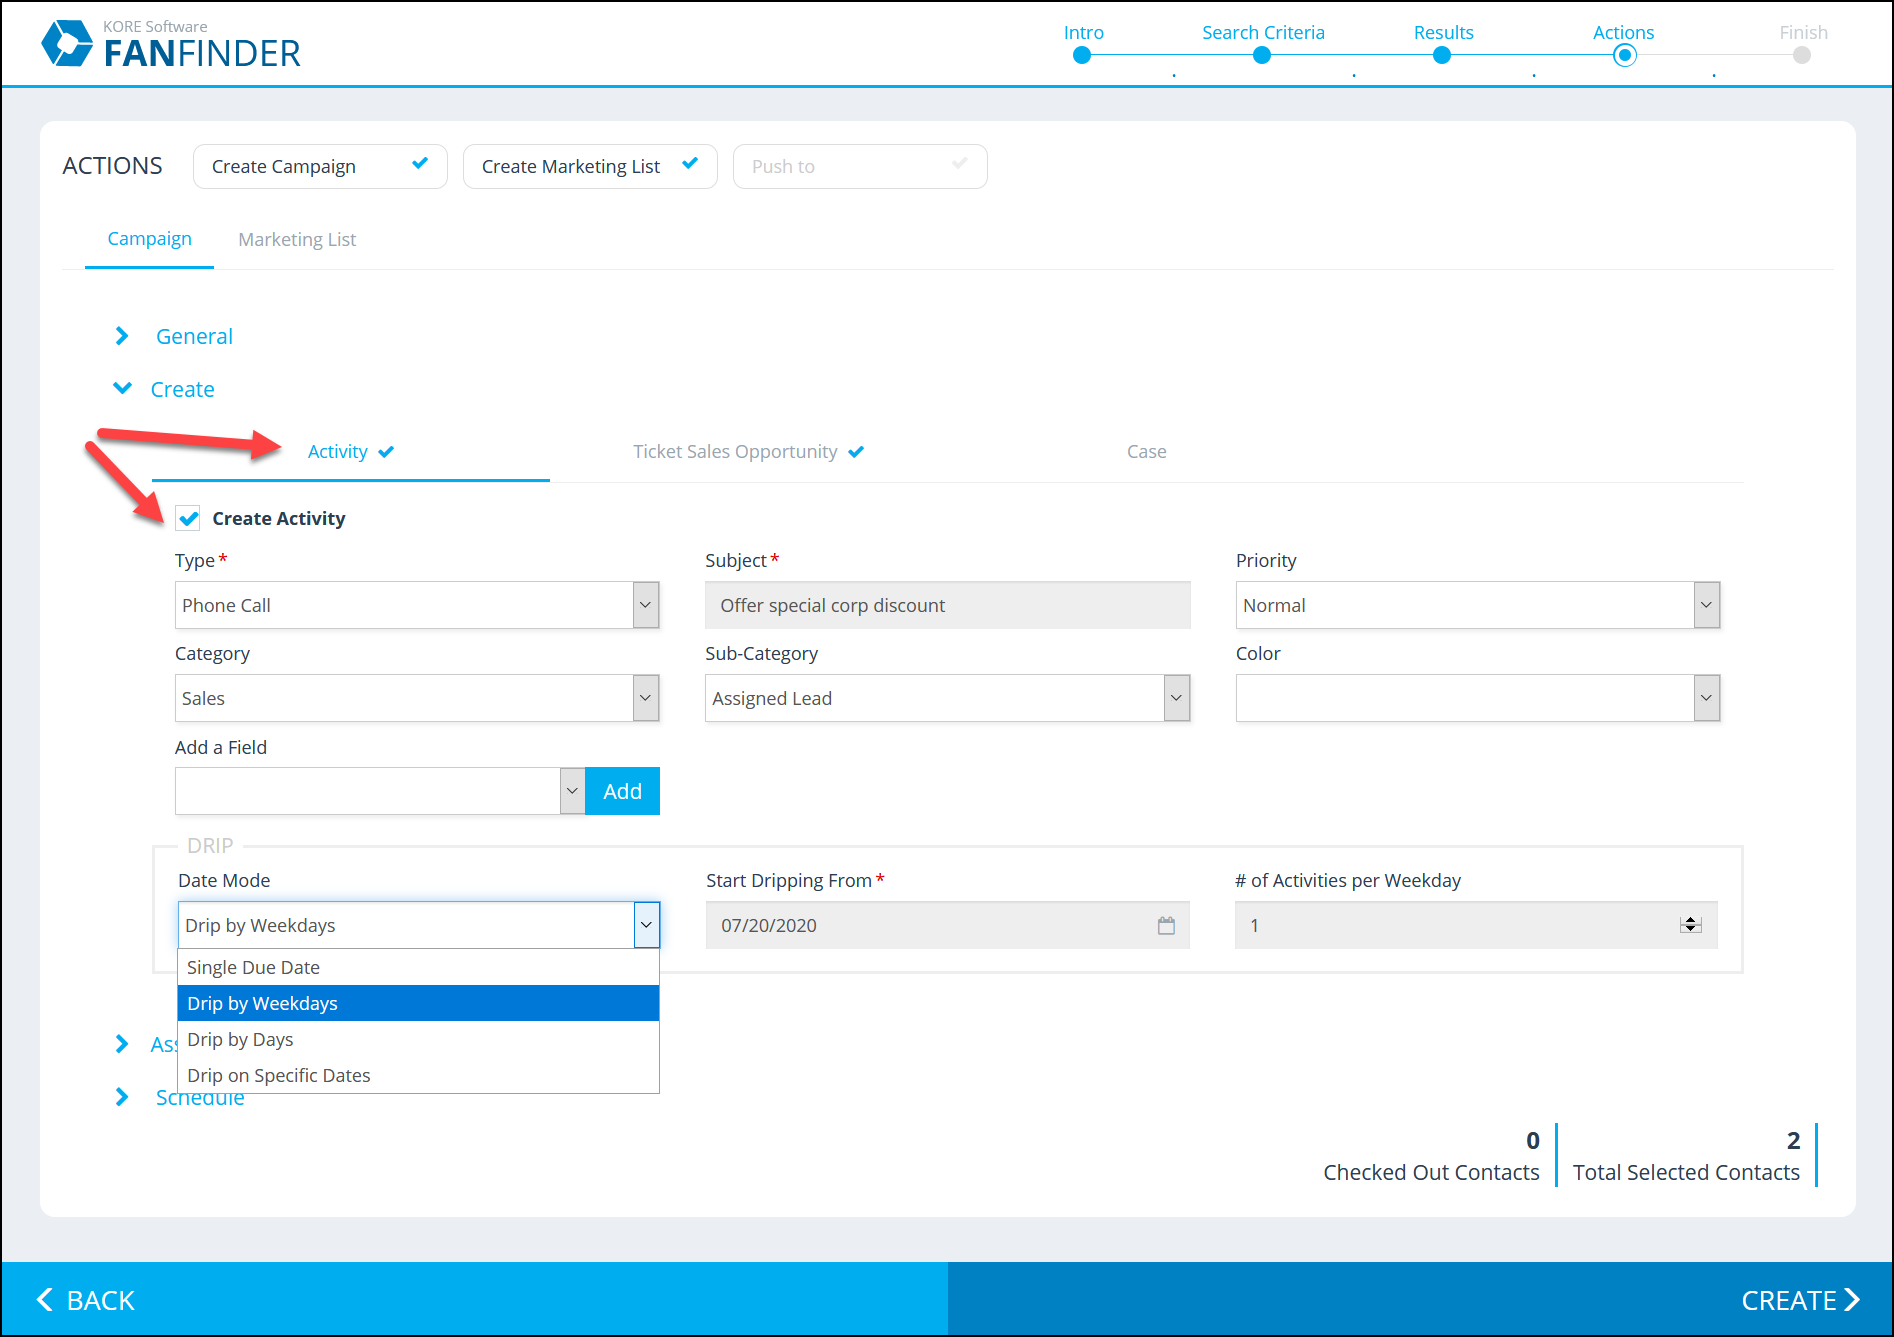
In the Create section, you can create activities, TSOs, and/or cases for each contact in the audience. Click each tab and tick the “Create” box for each one you want to use.
To create an activity, fill in the fields as usual. In the Date area, you can select a due date for the activities. You can also use Drip mode to gradually assign the activities to your reps. This helps to keep your team from feeling overwhelmed during a large campaign.
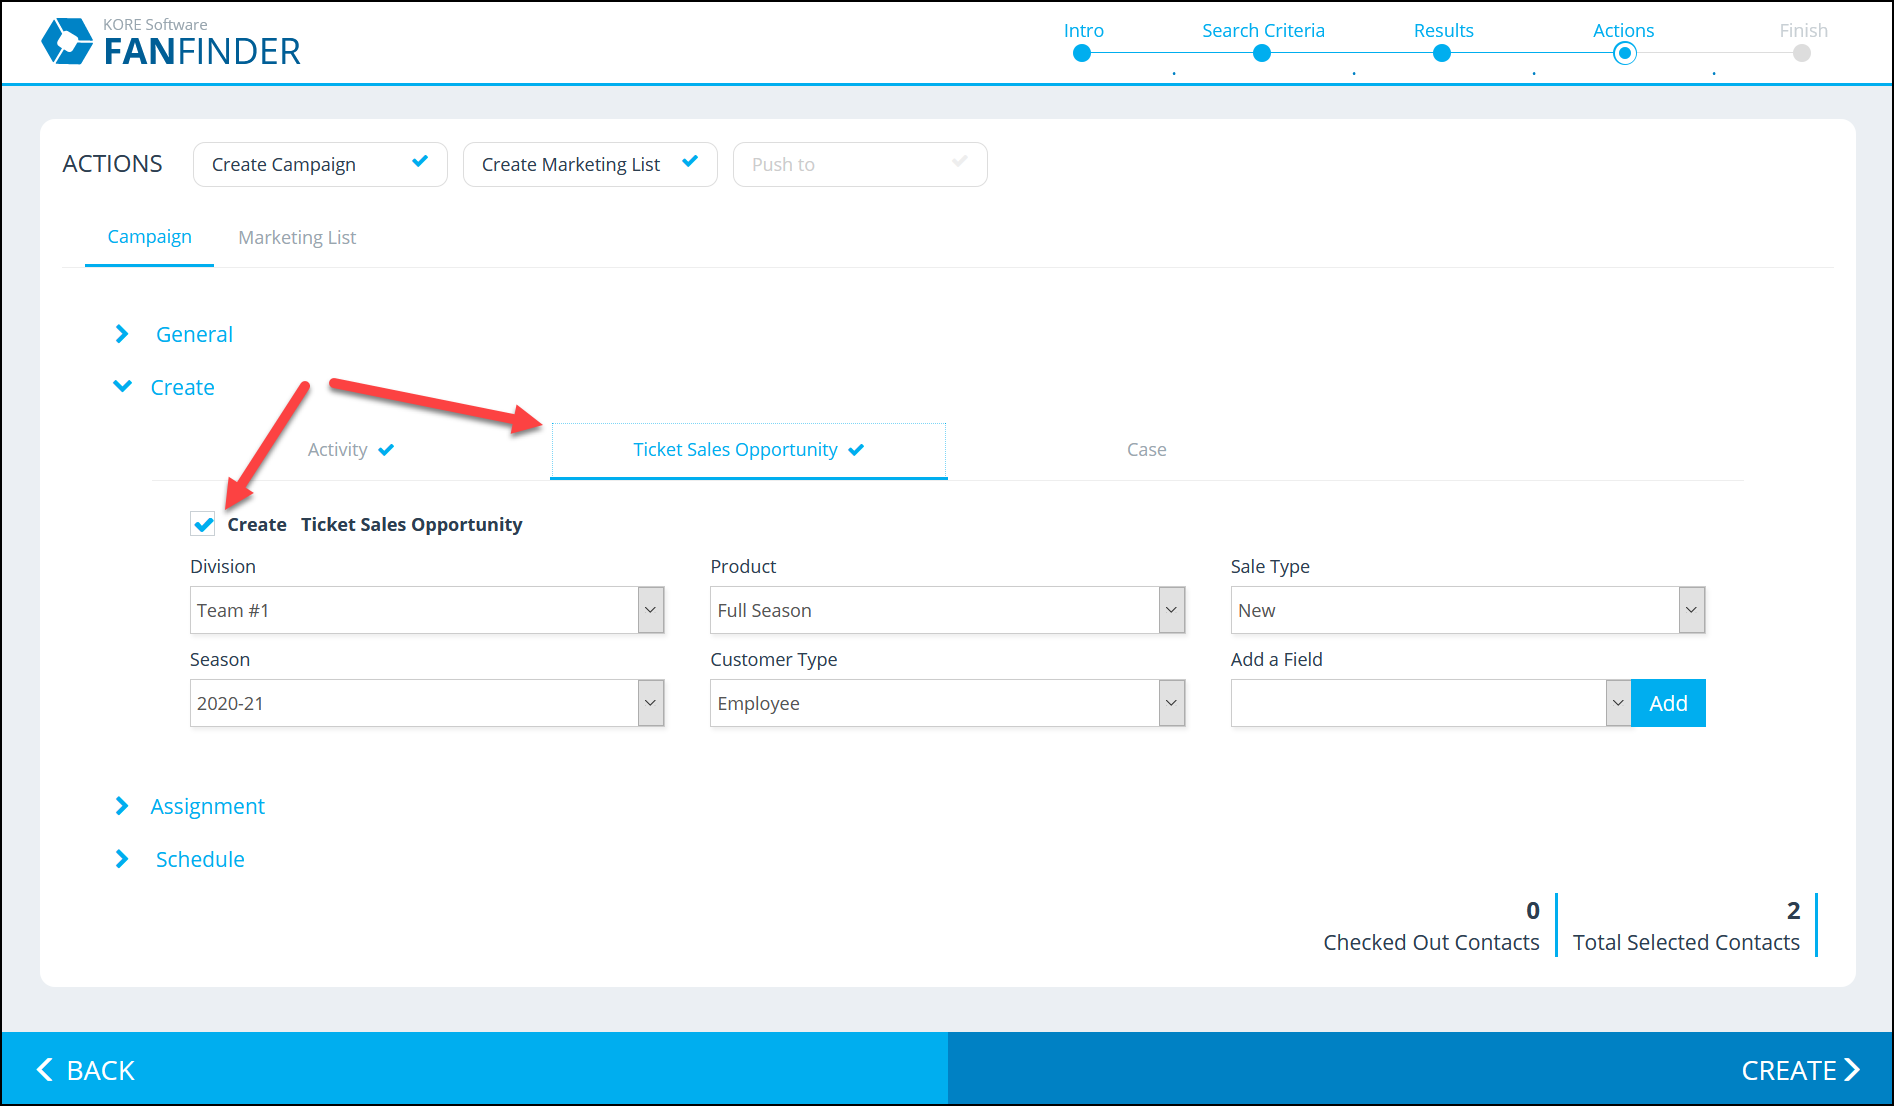
Likewise, fill out the fields as usual to create TSOs or Cases. It’s very common to create TSOs at the same time as Activities since your sales reps will be getting in touch with these contacts. Notice that the tabs both have a checkmark next to the title after you’ve ticked the Create box in each.
Assignment
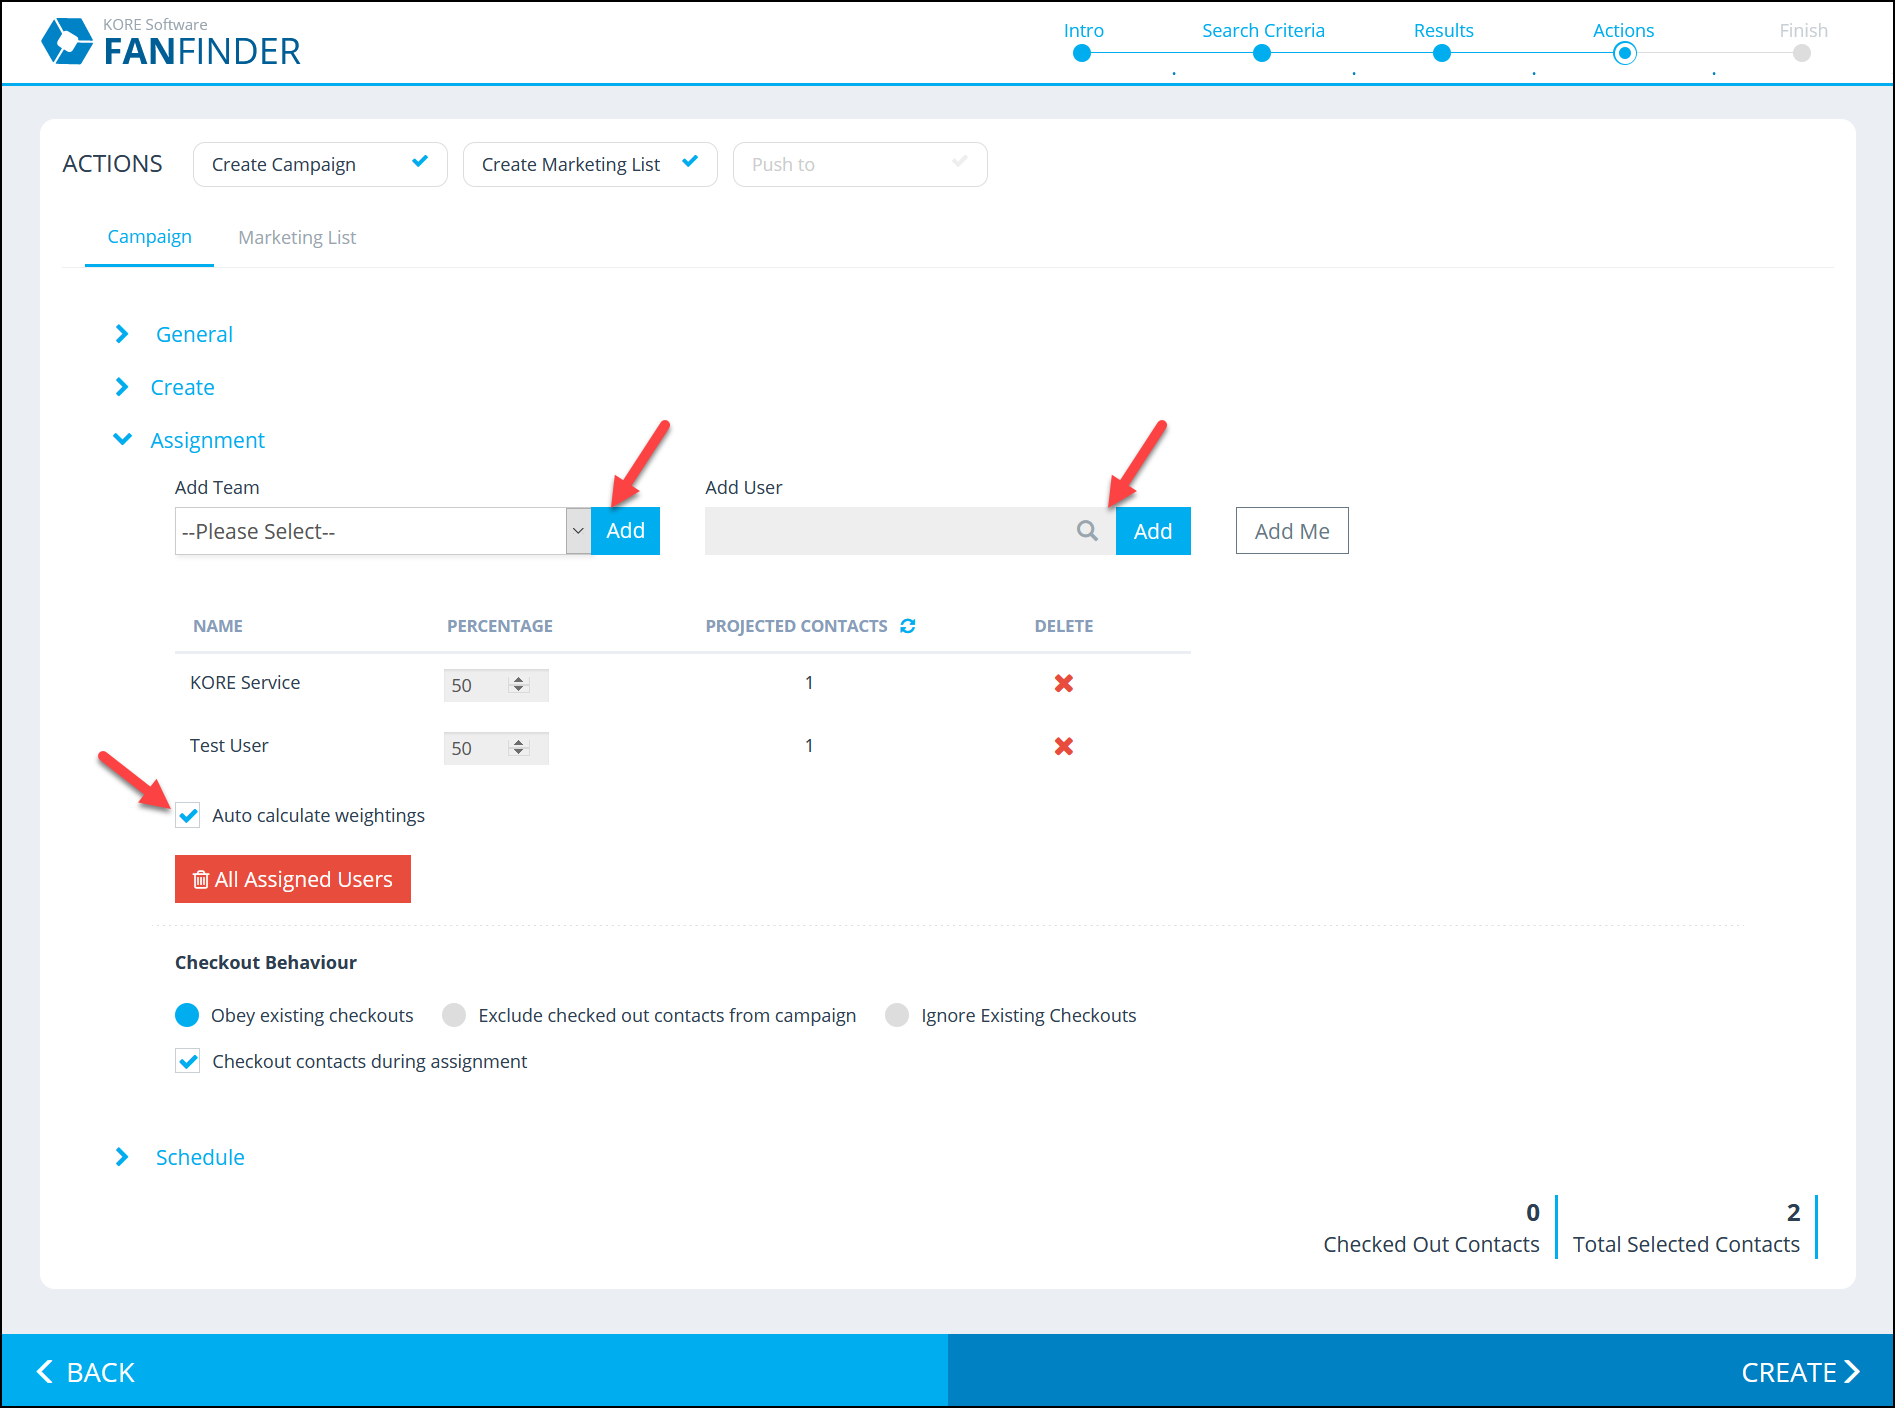
In the Assignment section, you configure who the new tasks will be assigned to. If you have an existing Dynamics team or Salesforce opportunity team you want to use, you can select it in the drop-down menu and click Add. Alternatively, you can search for individual reps and click Add for each one.
By default, Fan Finder distributes the tasks as evenly as possible. You can override this if needed, such as if some of your sales reps only work part-time while others work full-time. Remove the checkmark next to Auto Calculate Weightings if you wish to manually adjust the percentages.
Additionally, you can choose to respect or override any contacts that have already been checked out. If you choose to, Fan Finder will checkout each contact as they are assigned to reps.
Schedule
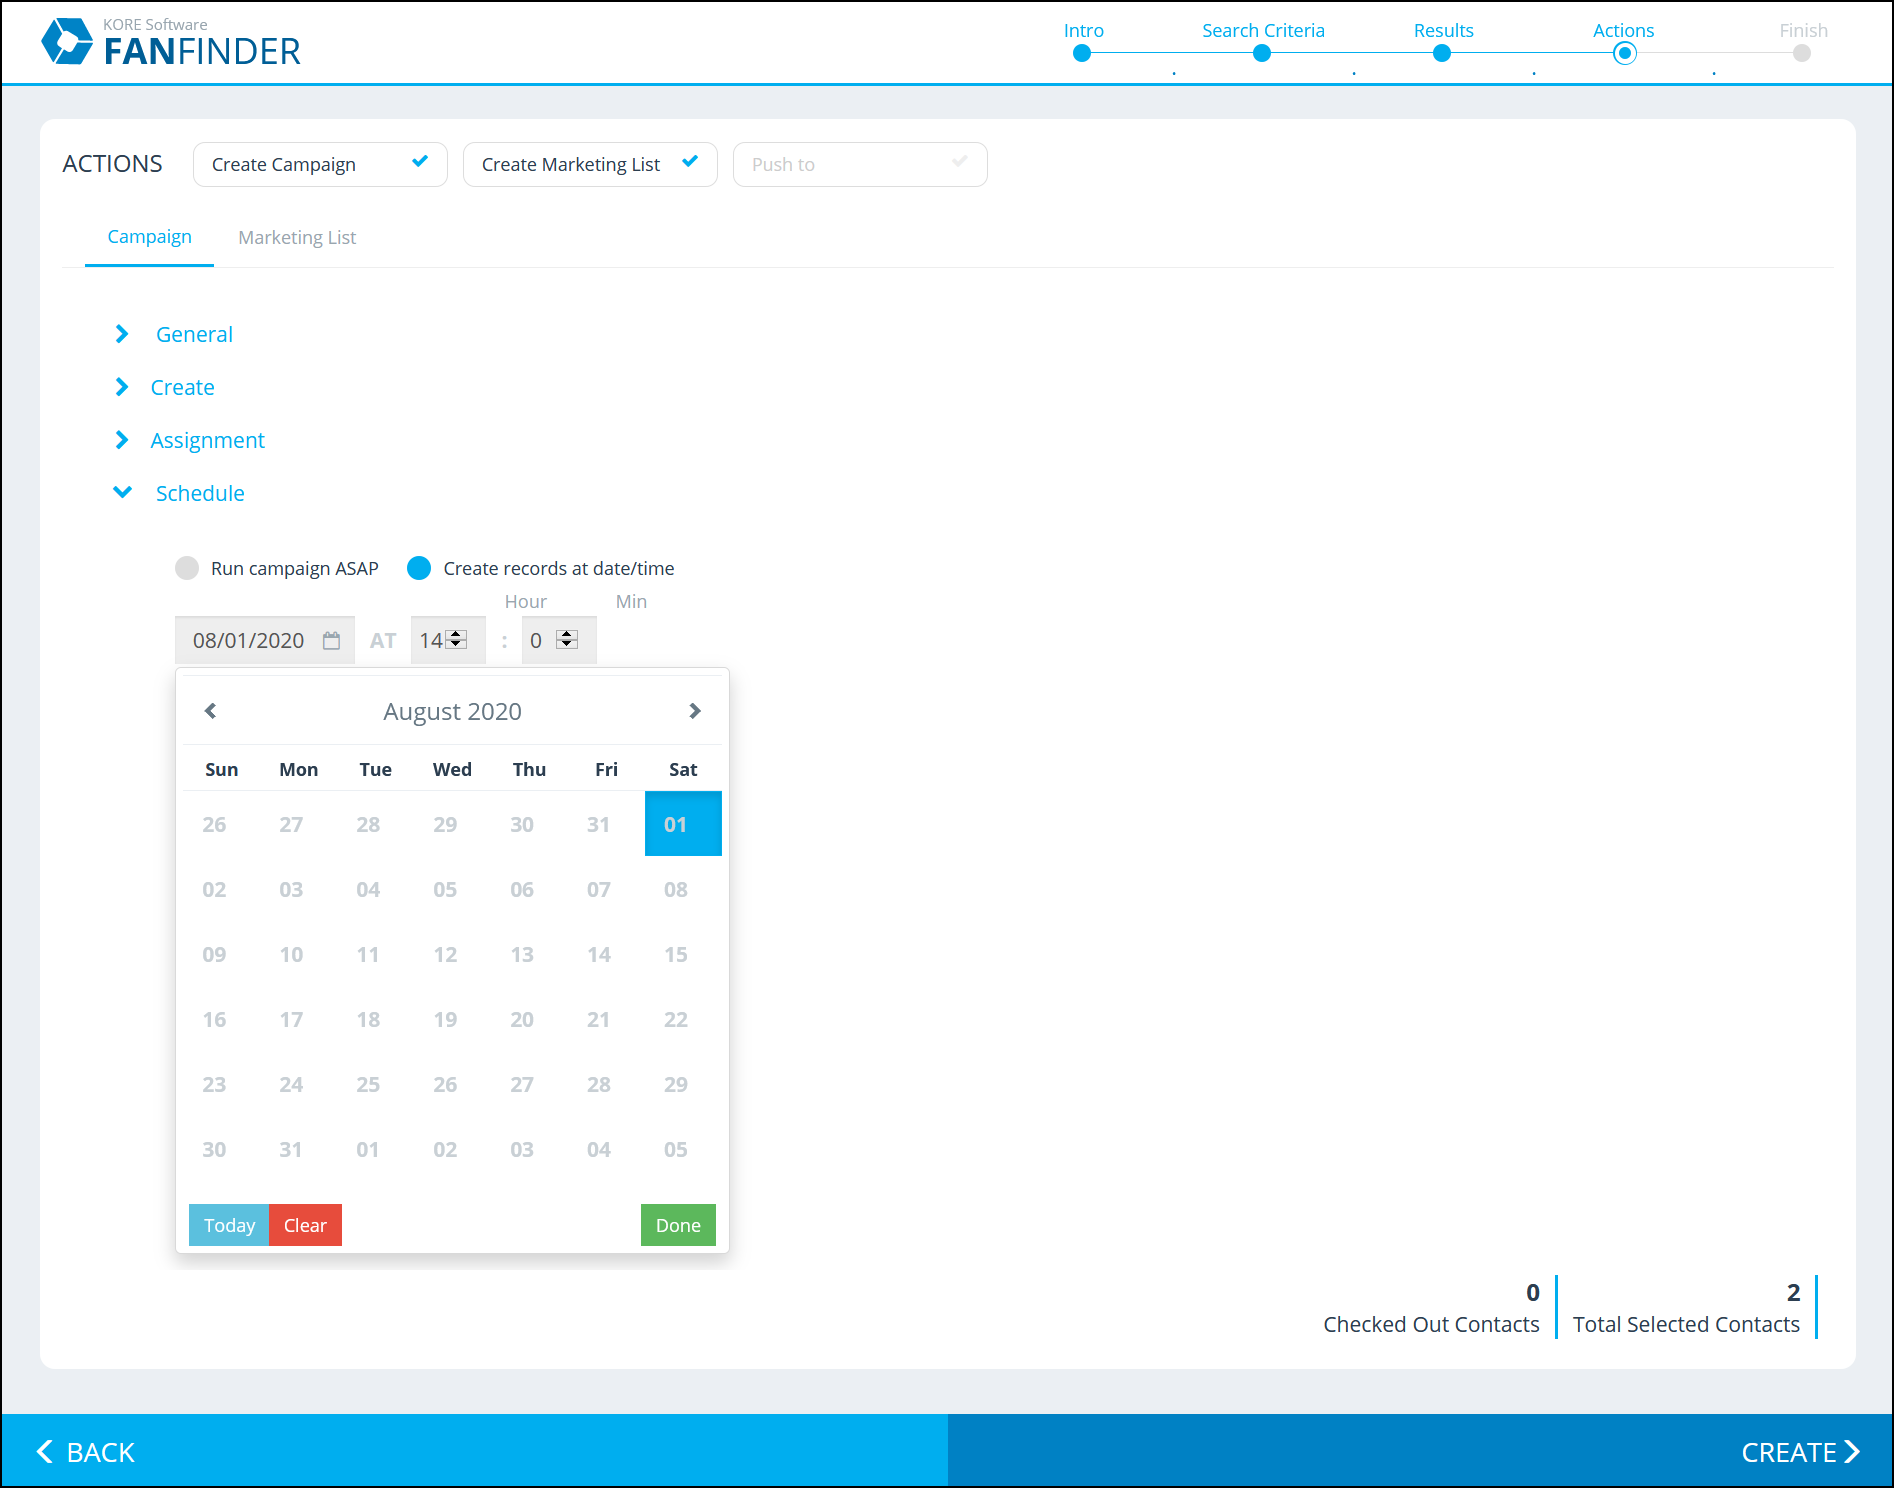
Finally, choose when the campaign should begin. You can either choose ASAP or select a future date and time. The clock uses the 24-hour format and your local time zone (configured in the CRM).
Next, click on the Marketing List or Eloqua tab if you will also create those actions. Otherwise, click Create.
Marketing list
In this tab, select whether to create a new marketing list or add to an existing one. Enter a name for it or select one from the drop-down menu, respectively.

Next, click on the Eloqua tab if you will also create that action. Otherwise, click Create.
Push to Eloqua
Here, you can update the information in Eloqua using data in your CRM. Select whether to create or exclude any contacts that don’t already exist in Eloqua, then create a name for the list.
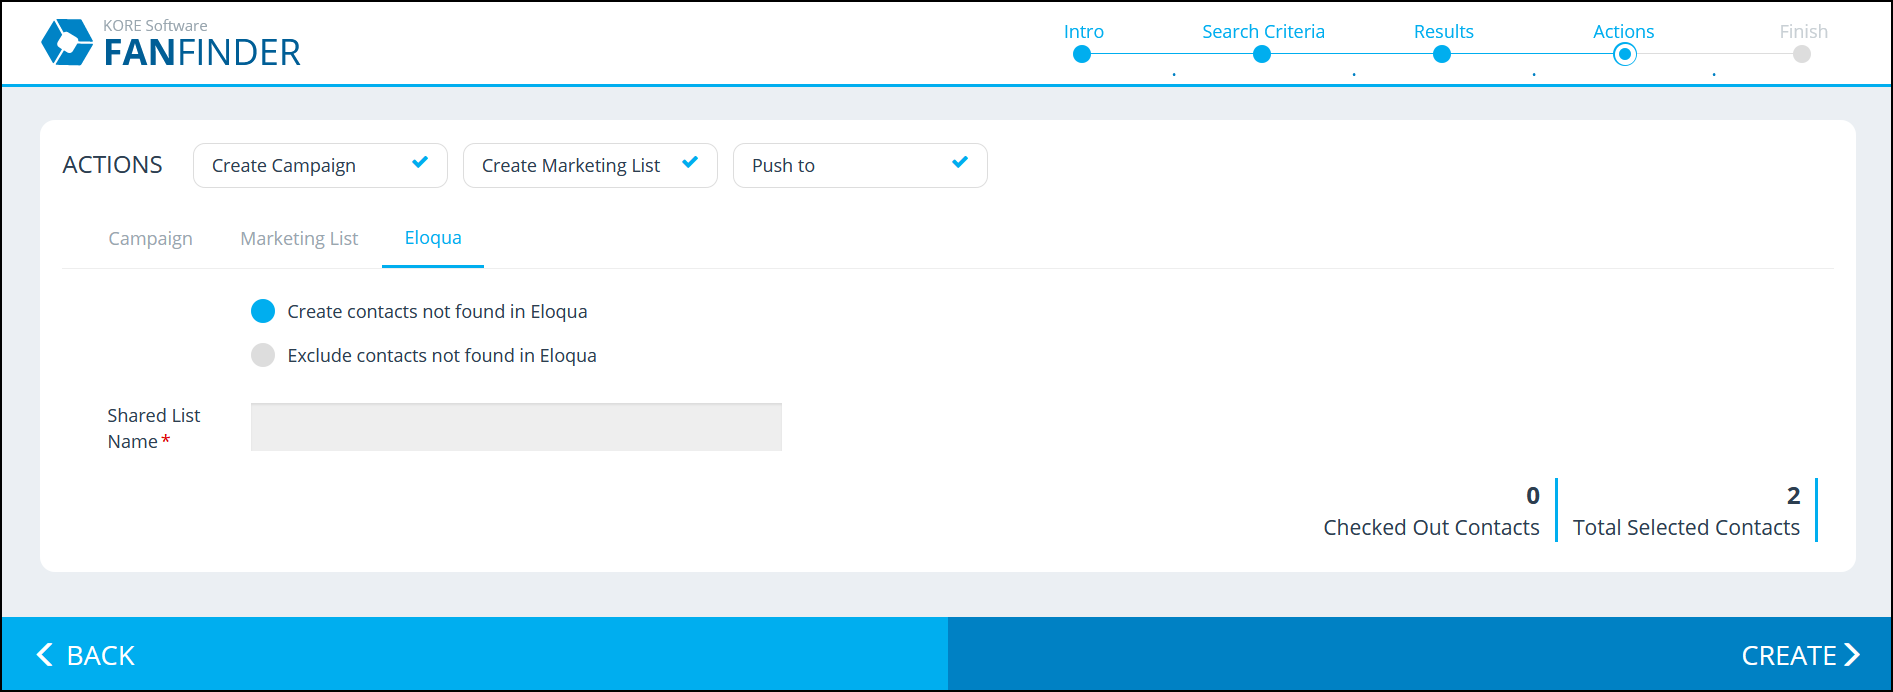
Once you’ve configured all the actions, click the Create button.
Step 5: Finish
Finally, review the Action Summary and ensure it matches your intentions. If it looks good, click that last Create button!
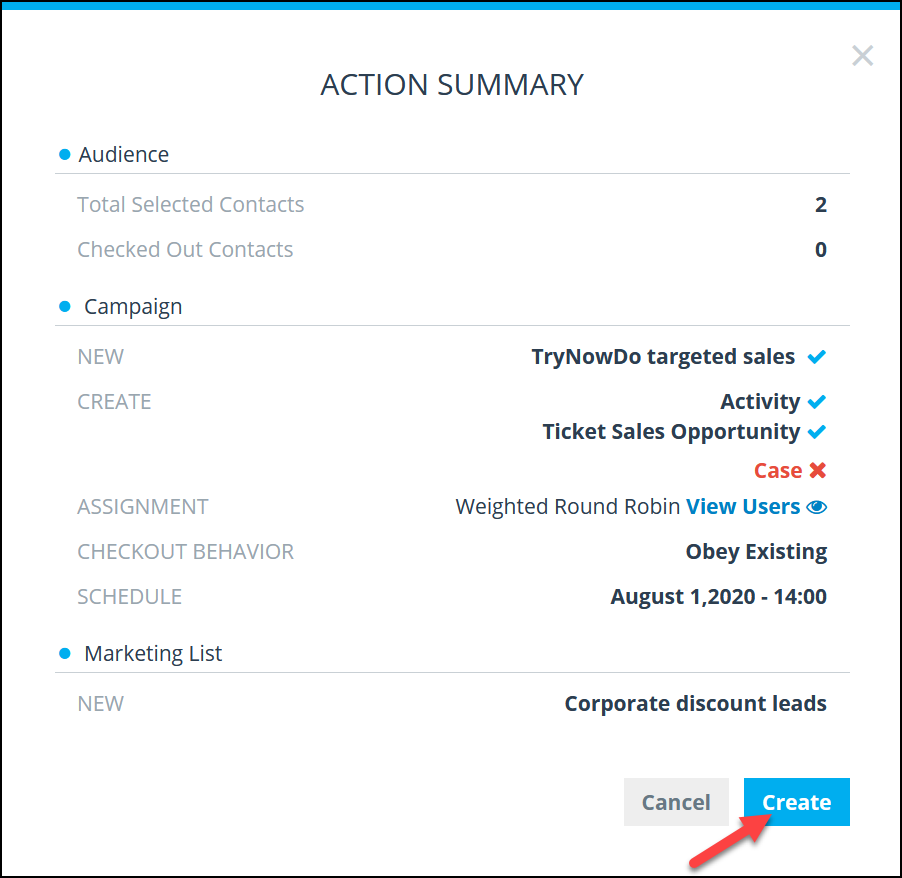
The system will go through all of the selected contacts and create the actions you requested. When it finishes, it will display a status screen showing the results. The criteria will now also be available in the History section in step 1.
