Overview
CRMs provide tools for tracking your organization’s interactions with clients, but that information isn’t always handy or easily customizable. With KORE Sponsorship, everything you need is in one place—no more frantically clicking around in the middle of a phone call.
The activity screen provides a form where you can record details during or after an activity (like a phone call or an email). You can also schedule future activities here. Past activities are listed on the activity screen for quick reference, as well as in the activity grid on each account page.
KORE Ticketing also uses the activity screen. In general, Sponsorship activities are tied to CRM accounts while Ticketing activities are tied to CRM contacts. However, this isn't an absolute rule—the true distinction between Sponsorship and Ticketing activities comes from the "regarding" field, described below.
Note: The activity screen is sometimes referred to as the call screen. They’re the same thing.
Note: The activity screen can be customized for your organization's needs, so it will likely differ from the images on this page.
Create an activity
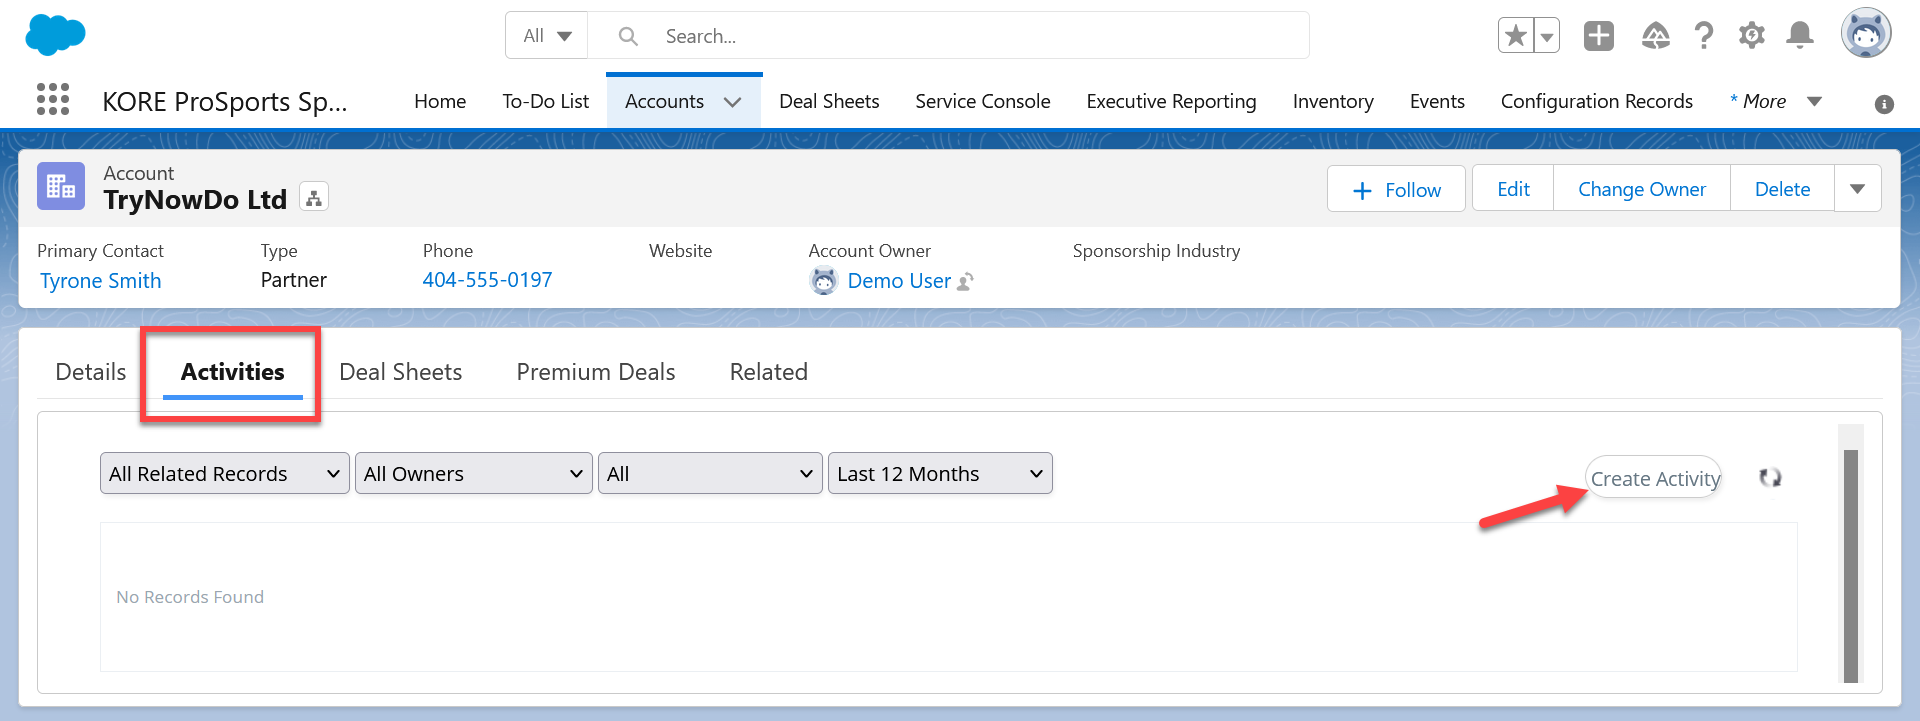
Open an account page and navigate to the activities grid. Here, you can view any past activities with this account. Click the Create Activity button to open the activity page in a new window.
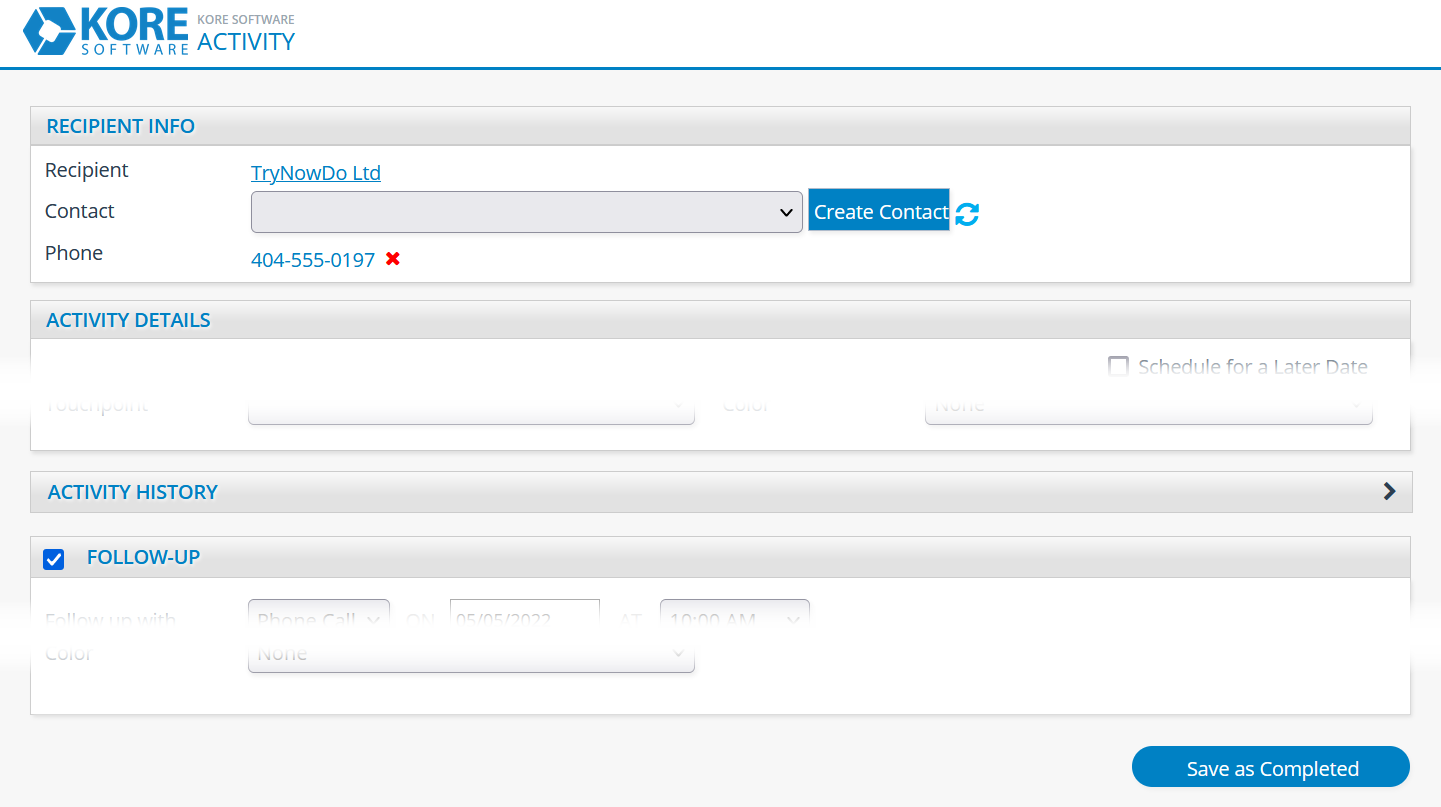
The activity screen is divided into various sections. When finished, click Save as Completed at the bottom.
Recipient info
The recipient and phone number are automatically set using the account you opened the activity page from. Choose a contact from the dropdown to specify the individual you're working with. Contacts only appear in this list if their CRM record connects to the account via the "account name" field. Check an account's "Contacts" tab in Dynamics 365 or "Related" tab in Salesforce to view the list of associated contacts. (The account's "primary contact" field does not establish this connection by itself; the contact still must map to the account.)

If you're working with someone not yet in your CRM (such as a client's new employee), use the Create Contact button to open the appropriate form. But to avoid duplicate CRM contact records, we strongly encourage you to first search for a matching contact which should be connected to the account.
The "phone number" field is taken from the account, not the contact. For this reason, we show the contact's title and phone number on the contact line. It's very common for the contact's phone number to match the account's number but also specify an extension.
Business phone numbers are typically ineligible for government do-not-call lists. However, you can still use the red x icon to set a "do not call" flag on the number.
Warning: The icon next to the phone number is a button used to change its status, not to show its current status. A green check mark does NOT mean you can call that number! There is an open request to change this which you may vote for.
Warning: In Salesforce, we show the number from the contact's "phone" field which Salesforce defines as the contact's primary phone number. We assume this to be a business number, as there are other designated fields for home and cell phone numbers. Business numbers are typically ineligible to be included on government do-not-call lists. However, it is possible that the "phone" field could contain a non-business number which is on a do-not-call list. If in doubt, open the contact's page to check the DNC status of the phone number.
(In Microsoft Dynamics, we use the number from the contact's "business phone" field.)
Activity details
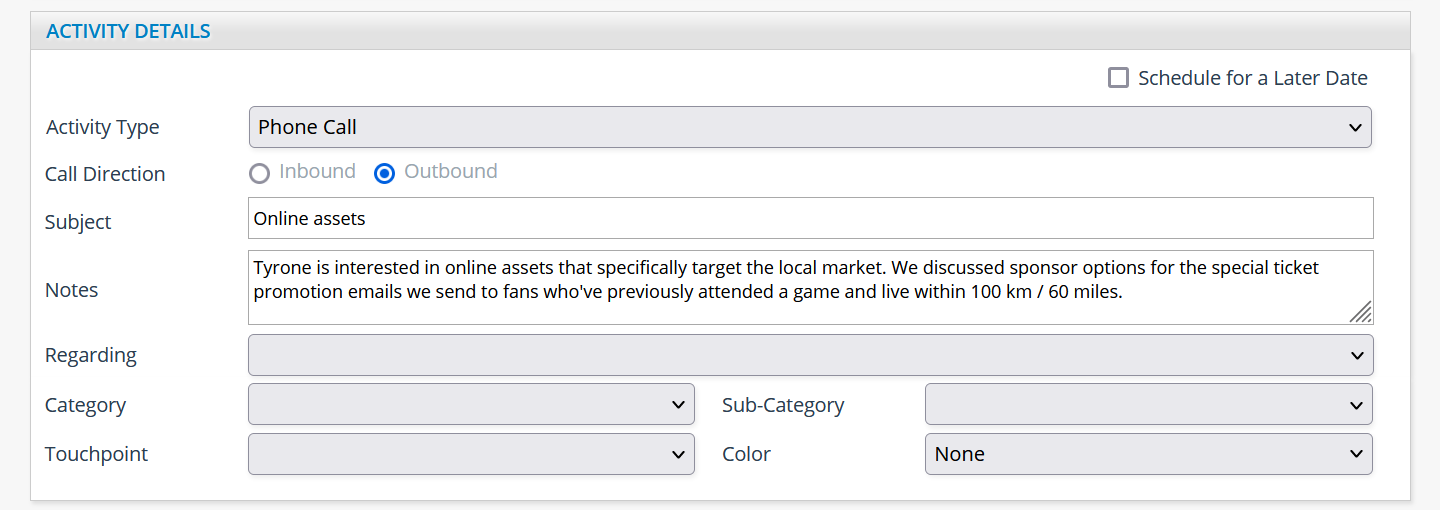
By default, we assume you’re entering the activity during or just after completing it. But if you’re instead scheduling a future activity, select the Schedule for a Later Date checkbox to choose a date and time. Once saved, the scheduled activity will be available on your to-do list. (Upon checking the box, the Save as Completed button at the bottom of the screen will change to Save.)
Select an activity type from the drop-down menu. CRM managers can customize this list with new types (such as a text message or LinkedIn message) via Configuration Records > KORE > Task Types. Depending on the selected type, the fields in this section may change slightly.
Each activity requires a subject. The notes field is optional—use it to provide additional details.
The "category", "sub-category", and "touchpoint" fields are primarily used with KORE Ticketing. Some organizations use the "color" field to indicate a particular status. Your organization's admin will instruct you if you should use any of these.
Regarding
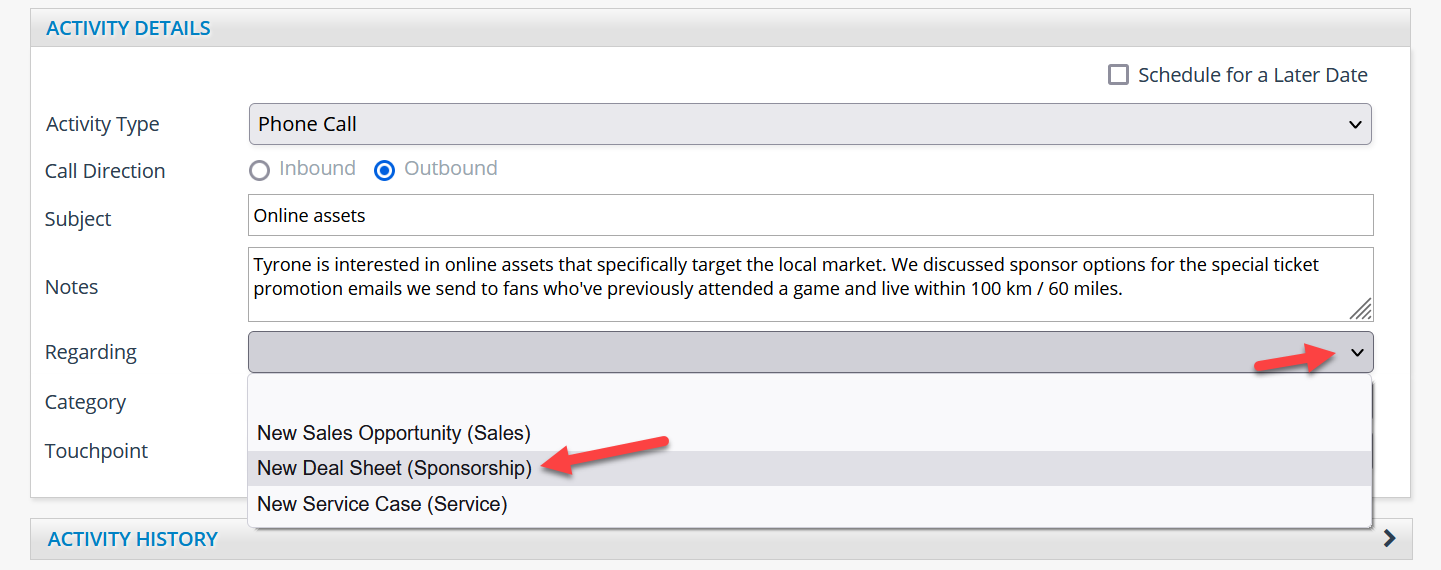
Use the "regarding" field's drop-down menu to choose an existing deal sheet, if applicable. You can also choose "New Deal Sheet (Sponsorship)" from the list. When you choose an option applicable to Sponsorship, the "deal opportunity" section of the activity screen becomes available.
Activity history
Open this section to view a list of other activities recorded for this account and whether they were completed. (This is the same list shown in an account's Activities grid, but without the edit actions and contact names.)
Deal opportunity
First, select a deal stage. Organizations customize this list via Configuration Records > Sponsorship > Stage.
The available fields and their required status change based on the selected deal stage. These are configured via Configuration Records > KORE > Call Screen Field Configuration. You can also click the Open Deal Manager button to edit the deal sheet in more detail—this may be useful if you're on the phone describing available inventory, for example.
Note: If the deal sheet was previously opened in Deal Manager, some fields may be locked on the activity screen. Open the deal sheet in Deal Manager to make changes.
Follow-up
Use this section to add a future activity to your to-do list at the same time you're recording an in-progress or just-finished activity. You can also use the "owner" field to assign a follow-up activity to another user in your organization. The "color" field is used by some organizations to represent a status; your administrator will provide details if your organization uses it.
To skip creating a follow-up activity, uncheck the box at the top of the section.

Manage a scheduled activity
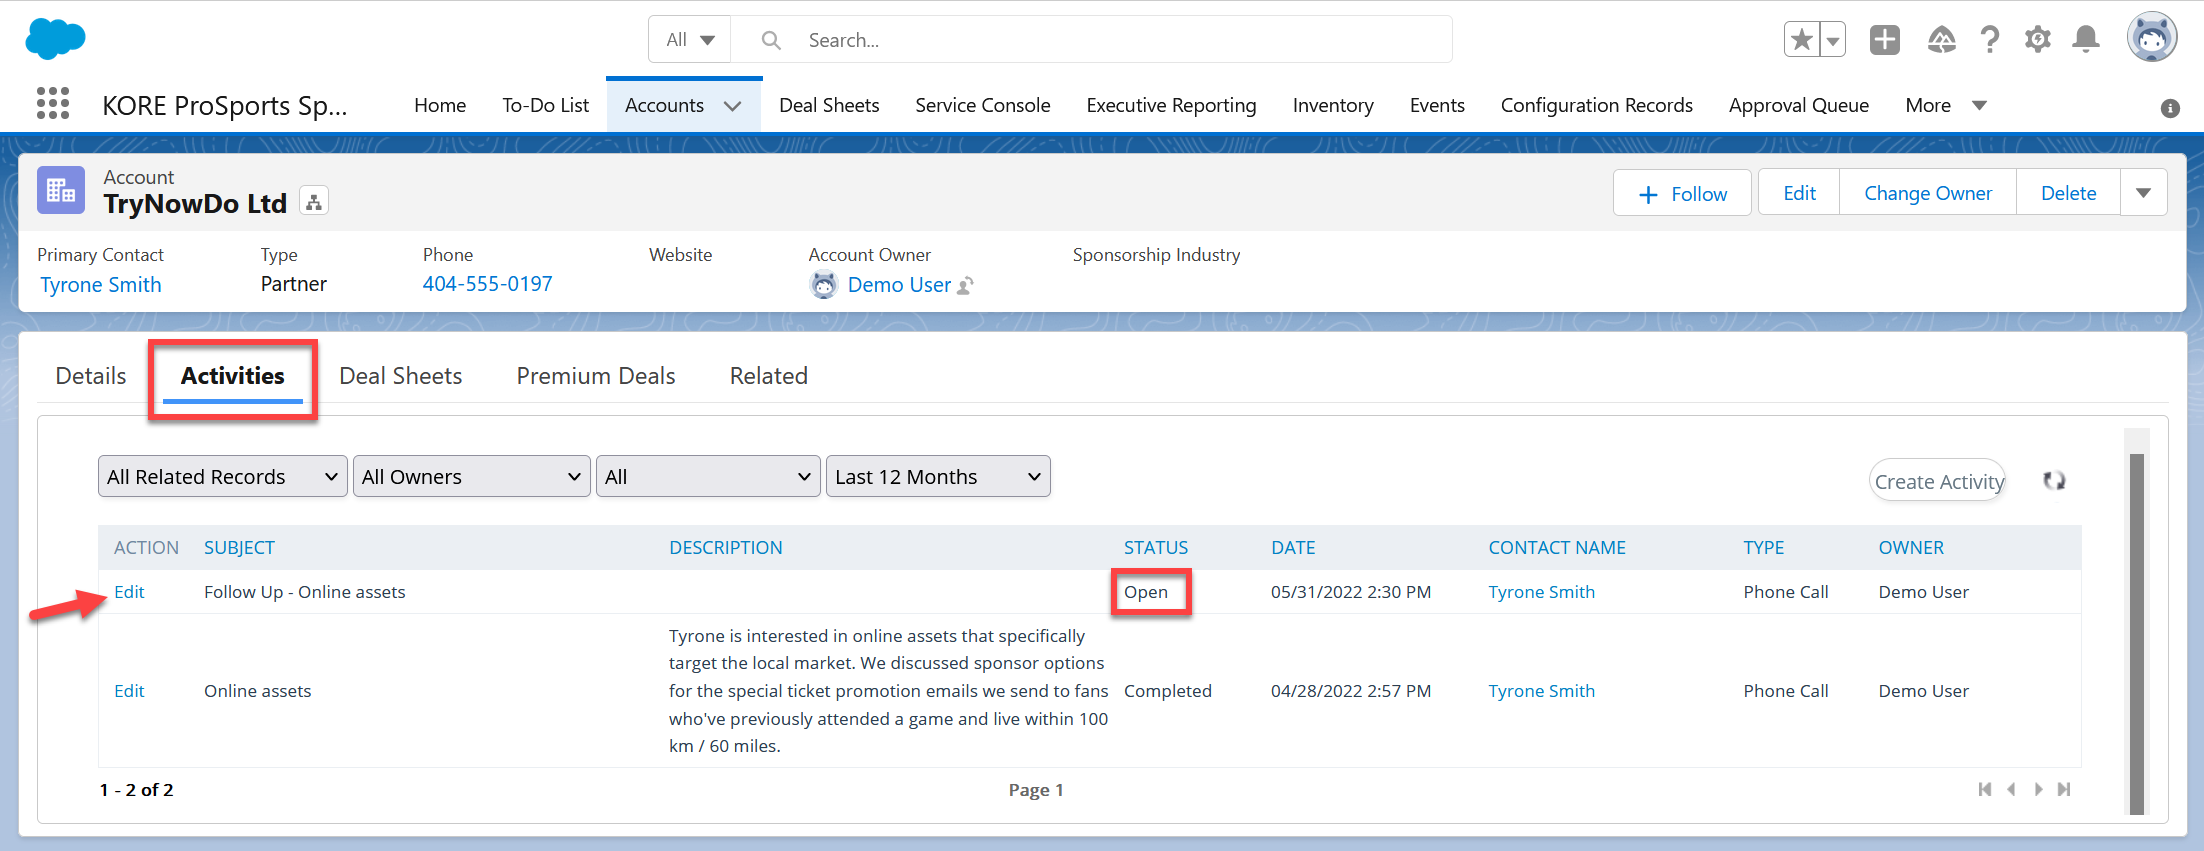
On an account page's activity grid, scheduled activities have the "open" status. You can click the Edit button to open an activity in the activity screen.
Complete or reschedule
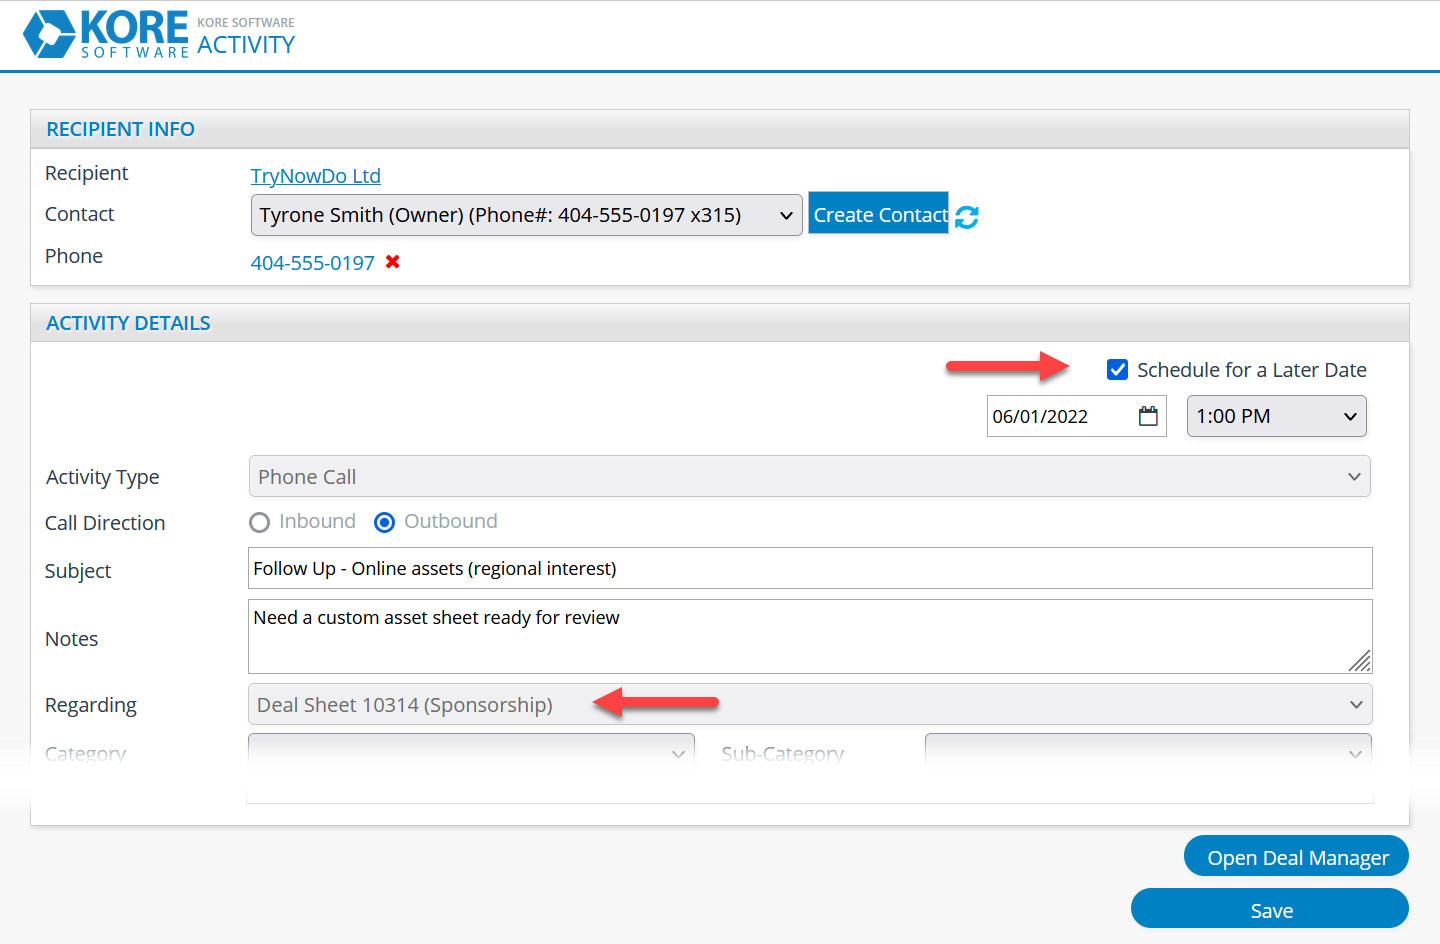
When you click Edit to open a scheduled activity, Schedule for a Later Date will no longer be checked. Instead, we assume that you're completing the activity now, regardless of what date it was scheduled for. Fill in the activity details and click the Save As Completed button.
If you instead need to reschedule the activity, check the box again and enter the new date and time. The button will change to a Save button since you aren't completing the activity at this time. You can also make other changes to a planned activity, such as changing the subject or adding notes. (You must check Schedule for a Later Date and enter the planned date and time even if you aren't changing it.)
If this is a follow-up activity, the "regarding" field will be set and cannot be changed. If the previous activity was regarding a new deal sheet, the newly-created deal sheet is automatically selected here.
Cancel
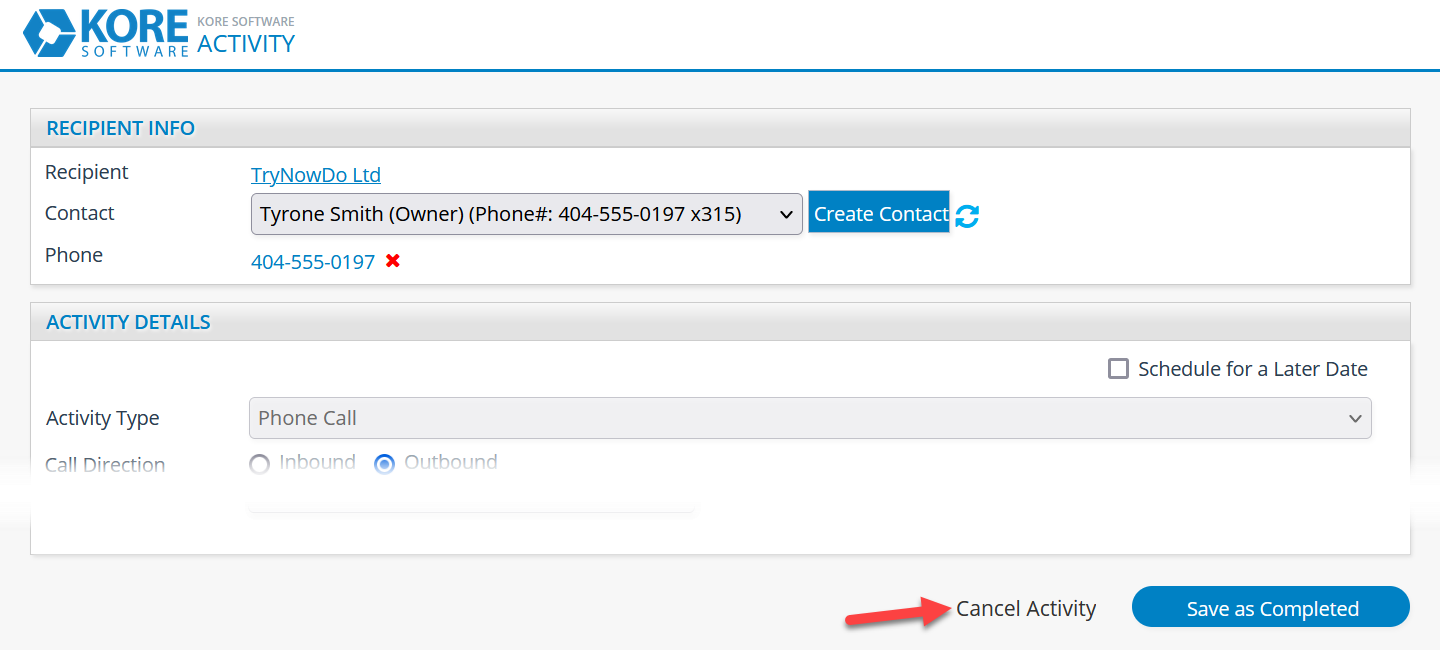
If for some reason you no longer want to complete a scheduled activity, click Edit to open the scheduled activity. At the bottom of the activity screen, click the Cancel Activity button. This action cannot be undone, so you will be prompted to confirm the cancellation.
Reassign
To reassign a scheduled activity to another user, use your CRM's built-in activity management.
- Dynamics: Open the account's activity grid, select the activities to reassign, and select Assign Activities from the menu.
- Salesforce: Open the App Launcher and select the Tasks app, locate the desired activity, and click the pencil icon next to the assignee.
