
Note: The Billing Manager may occasionally be referred to as the Finance Console, a retired interface that the Billing Manager replaced.
Overview
The Billing Manager provides an interface for finding bills, batching them together, generating invoices, and recording payments. Although “bill” and “invoice” are used interchangeably in casual speech, they have different meanings in KORE Sponsorship.
Bills (also called billings) are CRM records generated during the Deal Manager process according to the terms you specify (e.g., four bills for “four equal installments”). You can think of them as a schedule. Each bill has its own bill number, no matter how many bills belong to the same deal. The bill record also tracks due dates, amounts invoiced, payment status, and more. Bills exist even if the deal’s status is still draft.
Invoices are what you can actually send to sponsors. They are generated on-demand using the same templating system used for generating contracts, and you can download them as PDF files to print or email.
Search for bills
Select Billing Manager in the menu. This takes you to the search interface.
Here, use filters to find the bills you’re interested in. The drop-down selectors allow you to choose “All” to ignore that filter, and you may leave any of the other fields blank. When done, click the Search button.

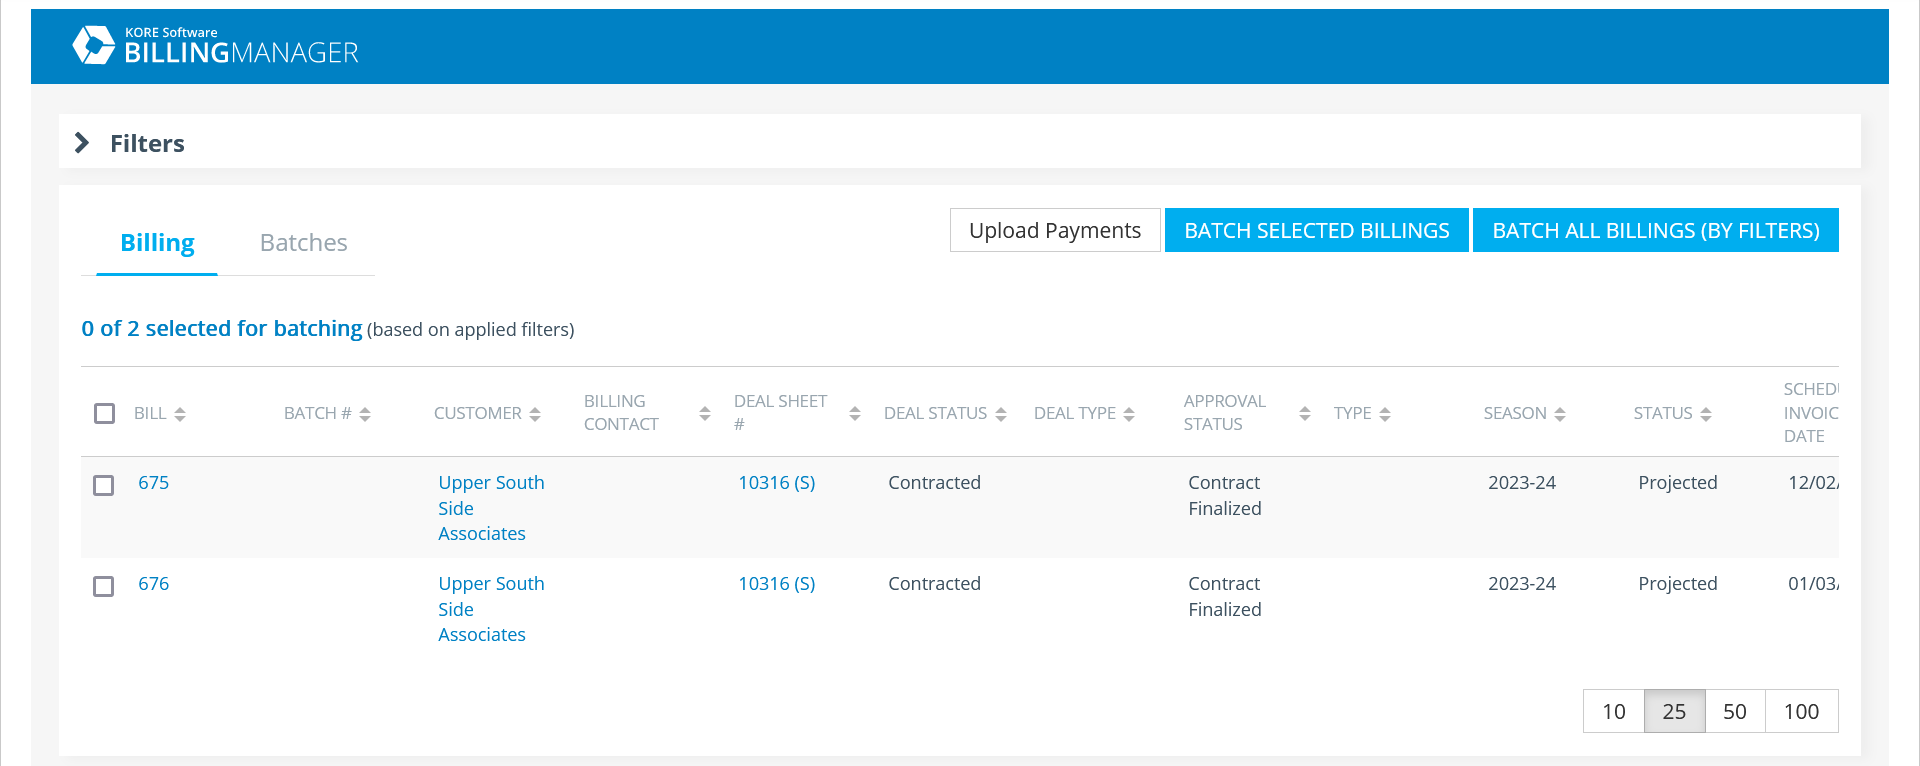
When you search, the Filters section will collapse, and the page will display all matching bills.
Saved searches
If you frequently use the same filters, you can make them your personal default. These filters will be automatically filled in whenever you return to the Billing Manager.
First, set the desired filters. Then click Advanced Actions and choose Save My Filters.
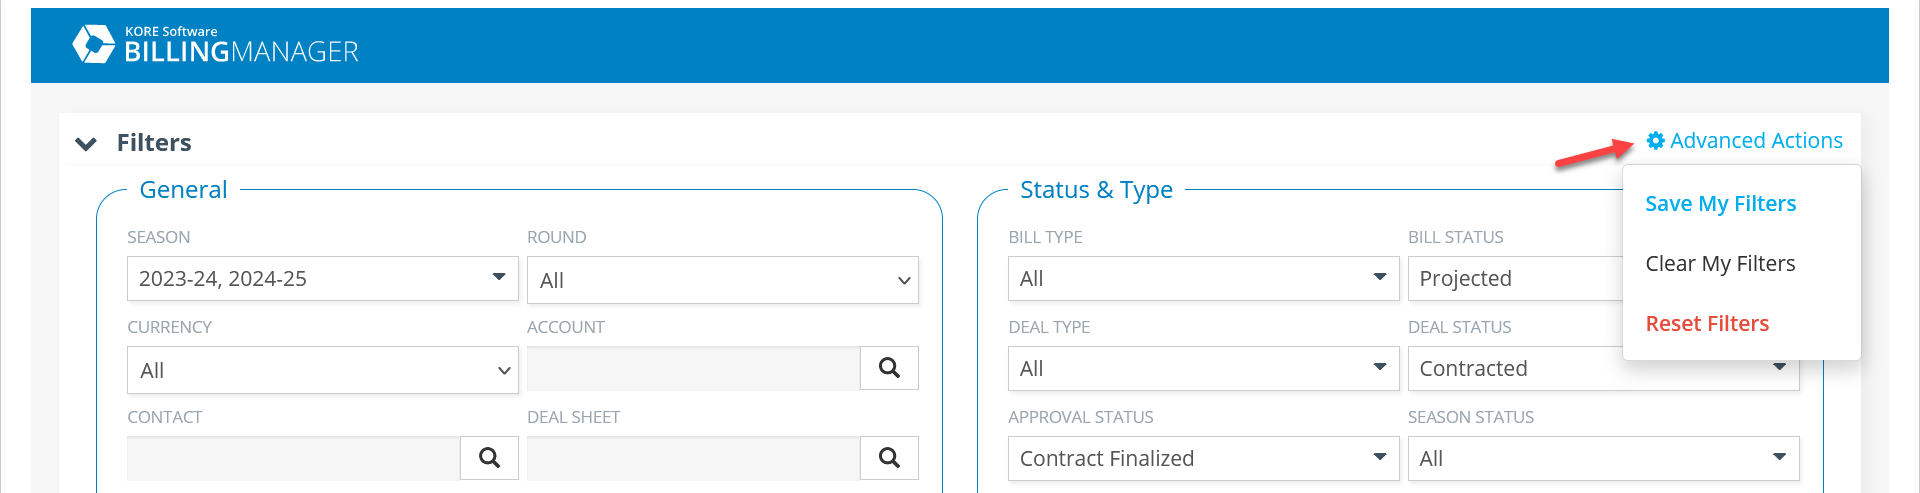
If you have previously saved your filters, you may change them and click Save My Filters to overwrite your previous set, or you can select Clear My Filters to delete them and go back to the system default.
Use the Reset Filters action if you have set various filters but want to quickly reset them to your personal default (or the system default if you have no saved filters).
Edit an individual bill
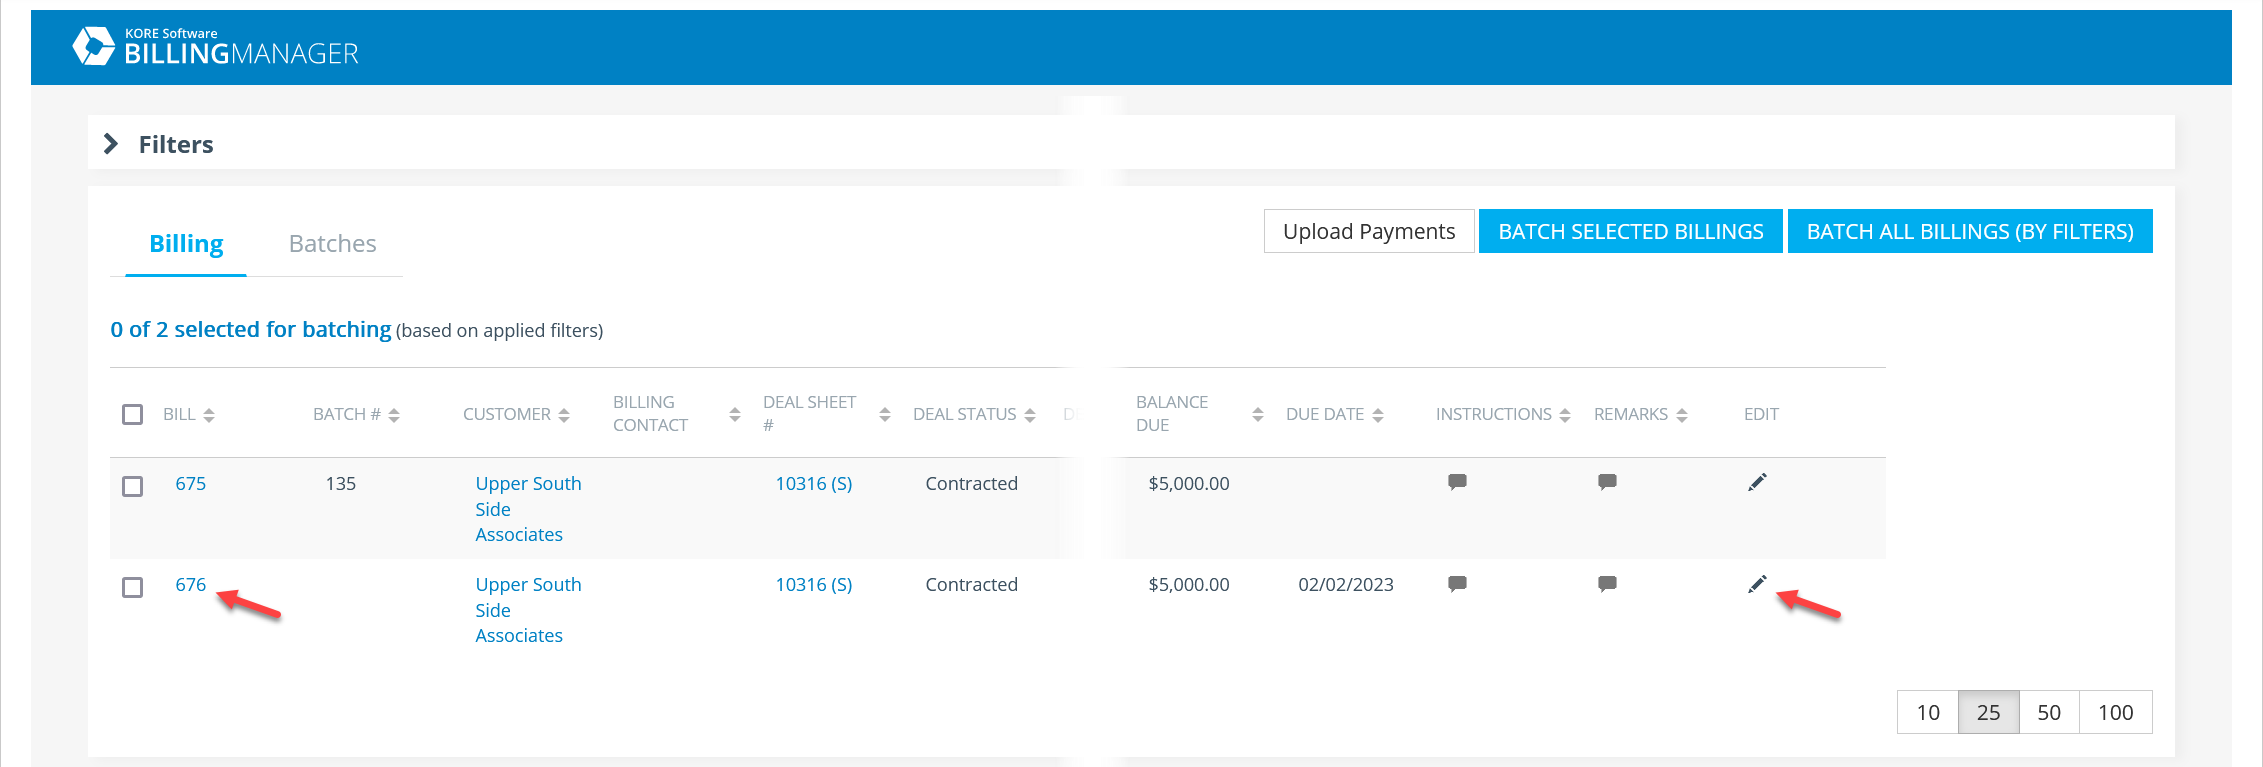
Once you have a set of results, there are two ways to edit a bill.
- If you generate invoices from within KORE Sponsorship, click the bill number to open its CRM record.
- If you generate invoices elsewhere, click the Edit icon at the end of a row to open a window within the Billing Manager.
CRM record
Here, you can manually generate an invoice or download the latest one (if one has been generated previously). You can also record a payment.
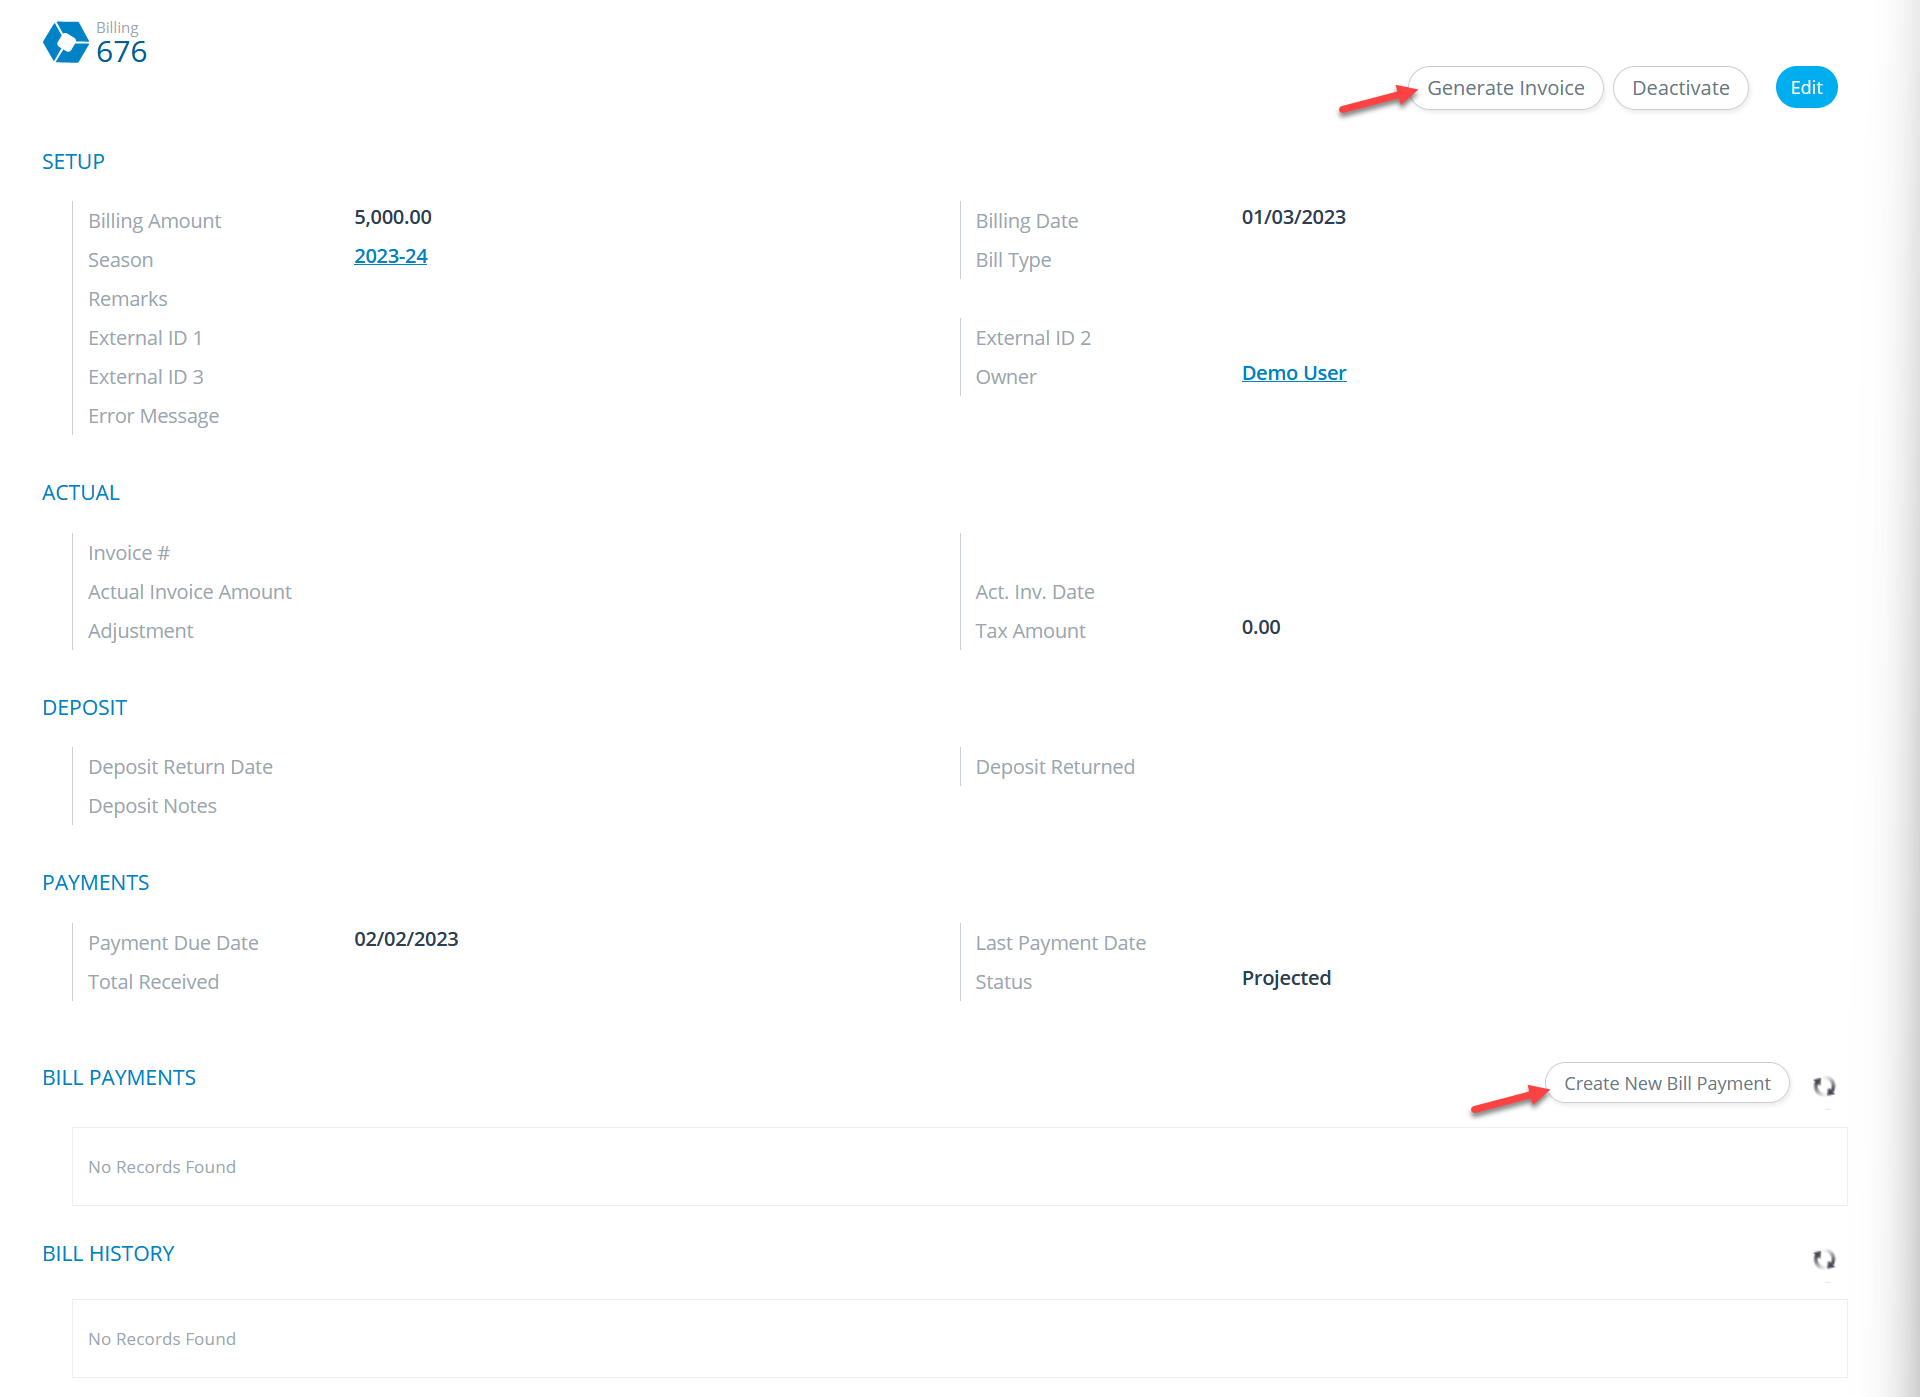
The Generate Invoice button will open a new browser window. Select the invoice template to use and the bill’s new status. Click Submit to generate the invoice, which you will then be able to download as either a Microsoft Word or PDF file.
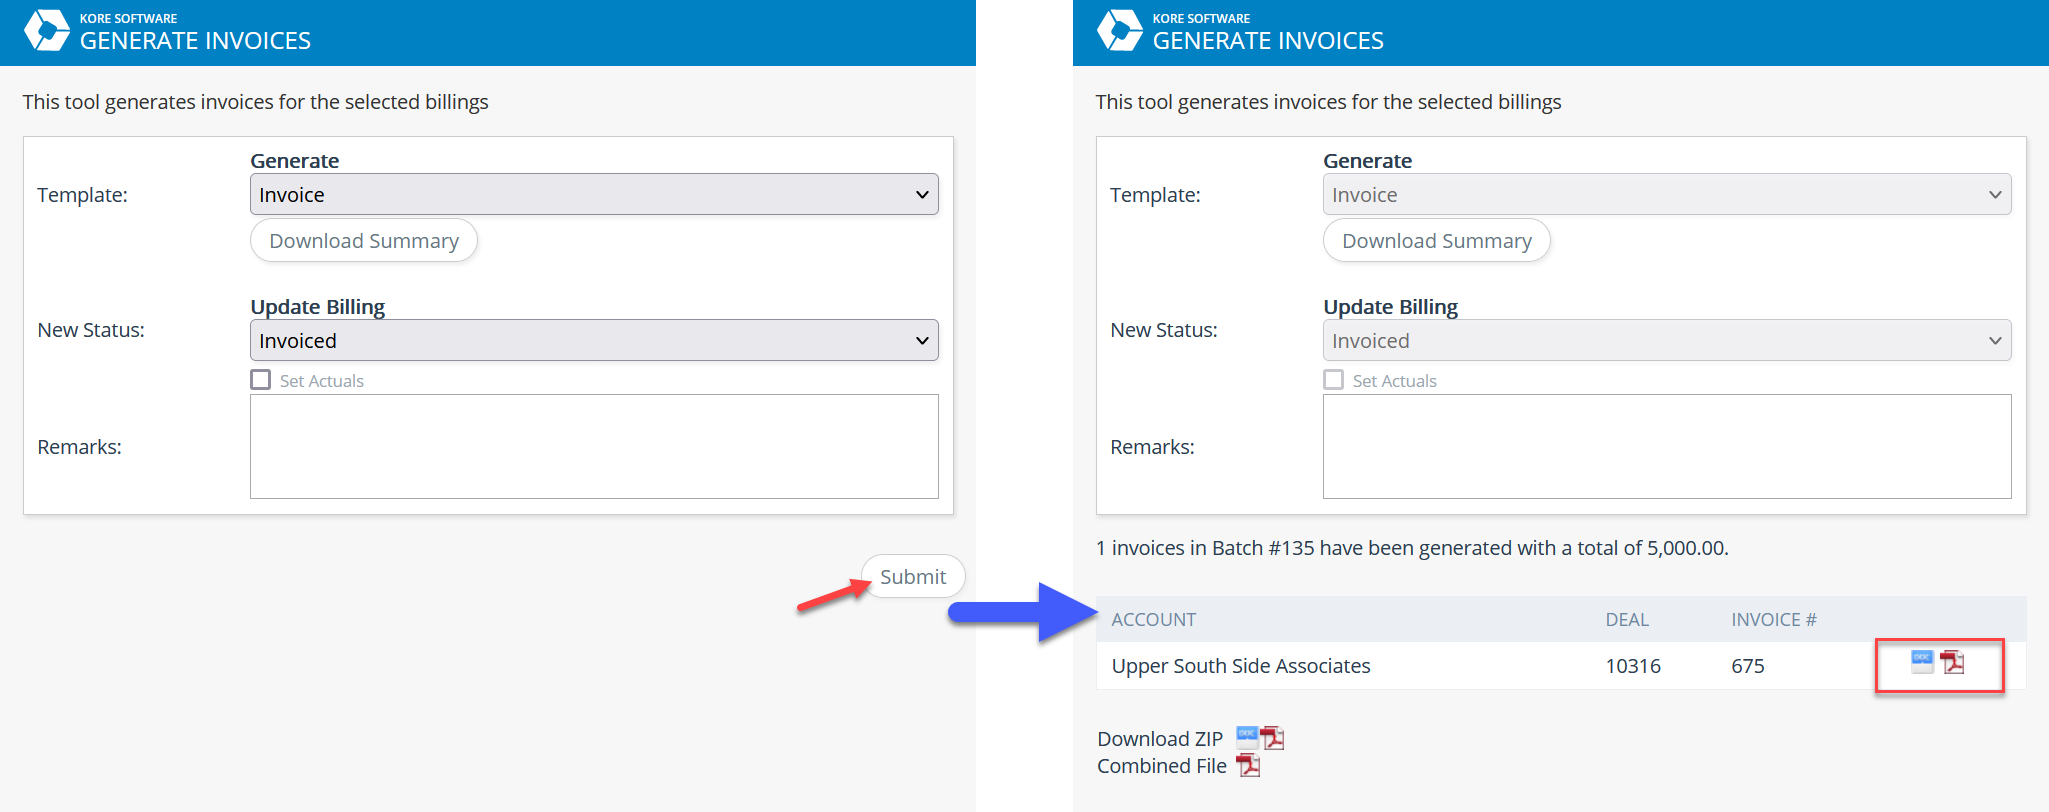
(Note in the screenshot that the system has created a batch with one invoice in it. Batch functionality is described below.)
The Create New Bill Payment button provides a form where you can enter the details of a payment received. The bill number will be pre-populated. Click the Save button after completing the form.
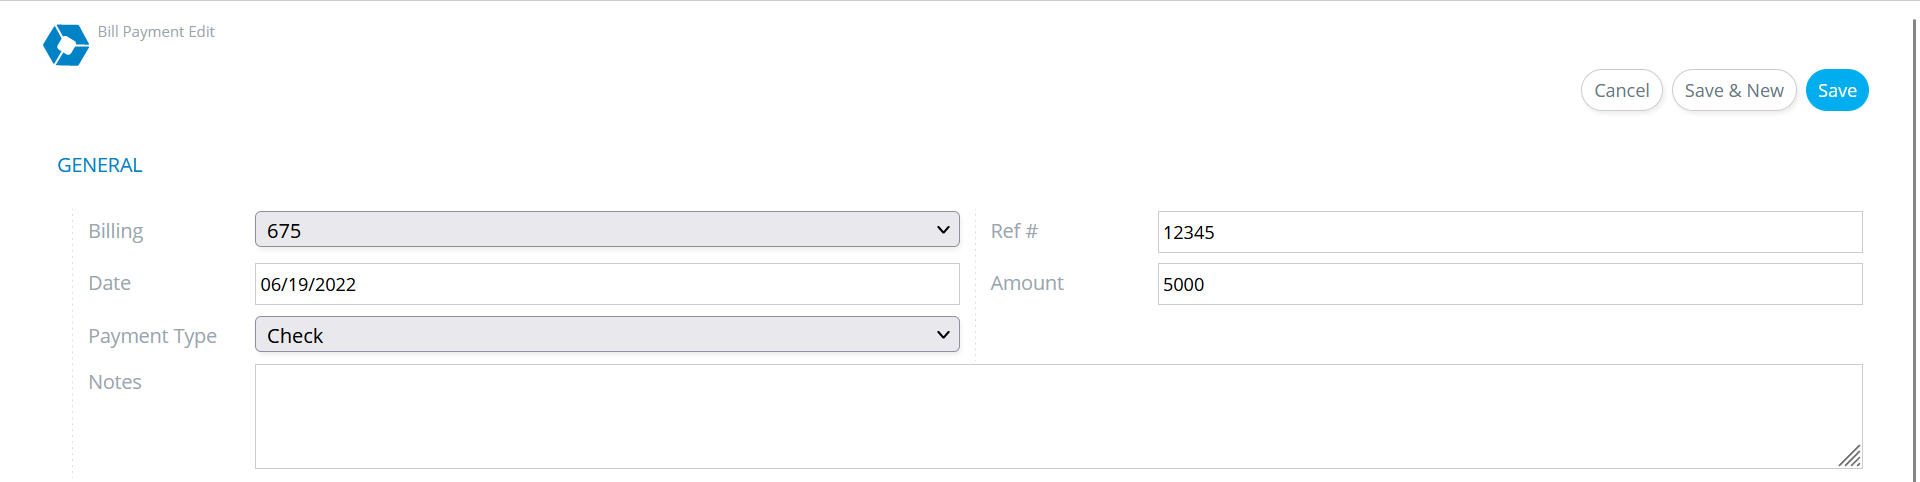
The system will automatically apply the appropriate status (such as “paid” or “partially paid”) to the bill.
Edit window
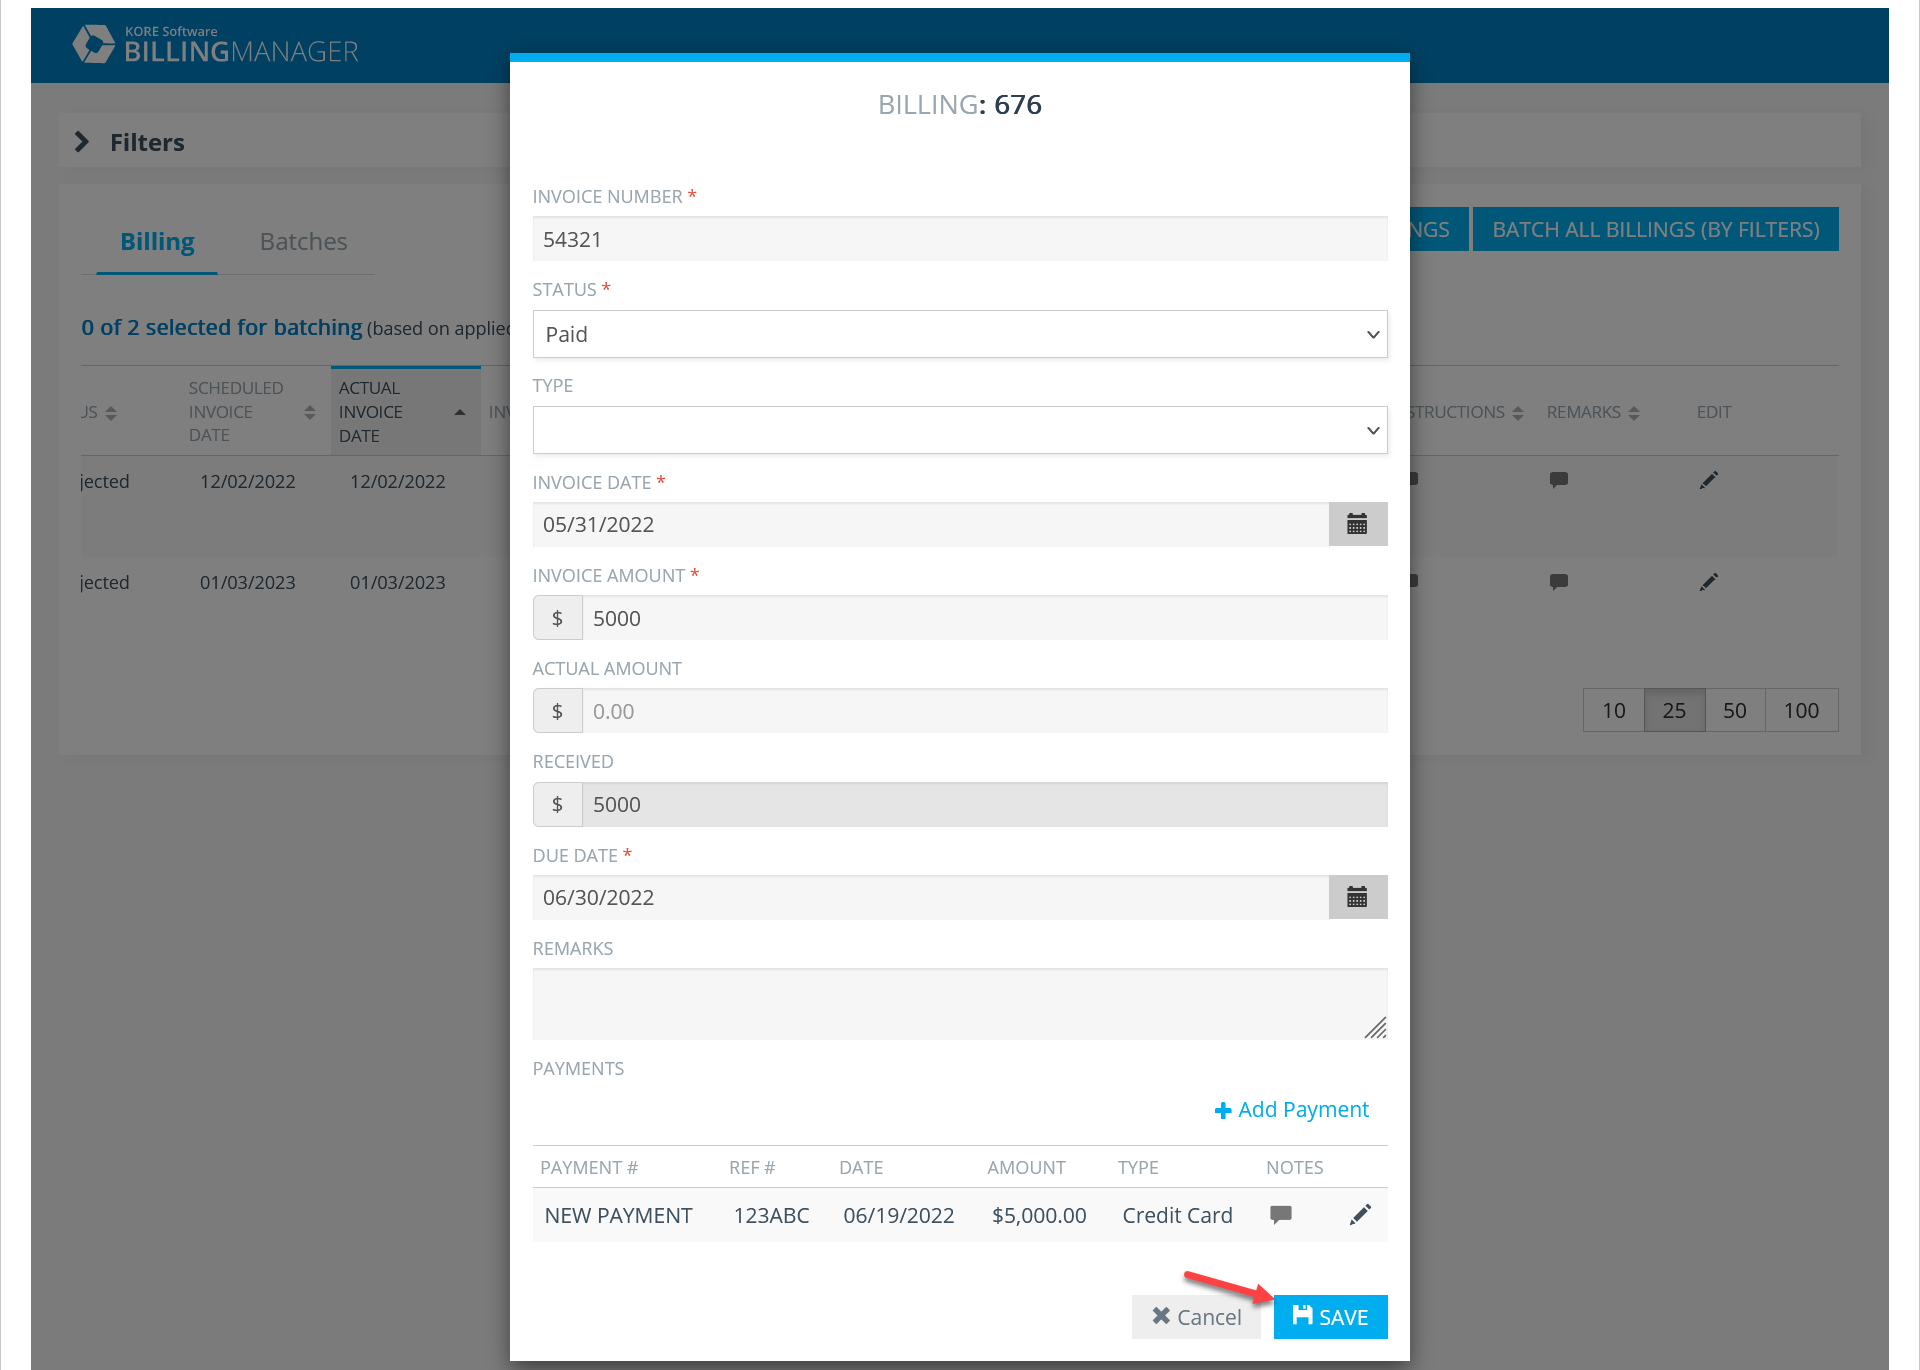
Here, you can quickly enter key details from an existing invoice and record payments. You cannot generate an invoice from this window—you must provide an invoice number.

The Actual Amount field may optionally be used if there is a difference between the expected invoice amount (based on the bill) and the amount actually invoiced. This may happen if your organization uses external financial software and a user changed the amount for some reason. If this is left empty ($0.00), the two amounts are assumed to be the same.
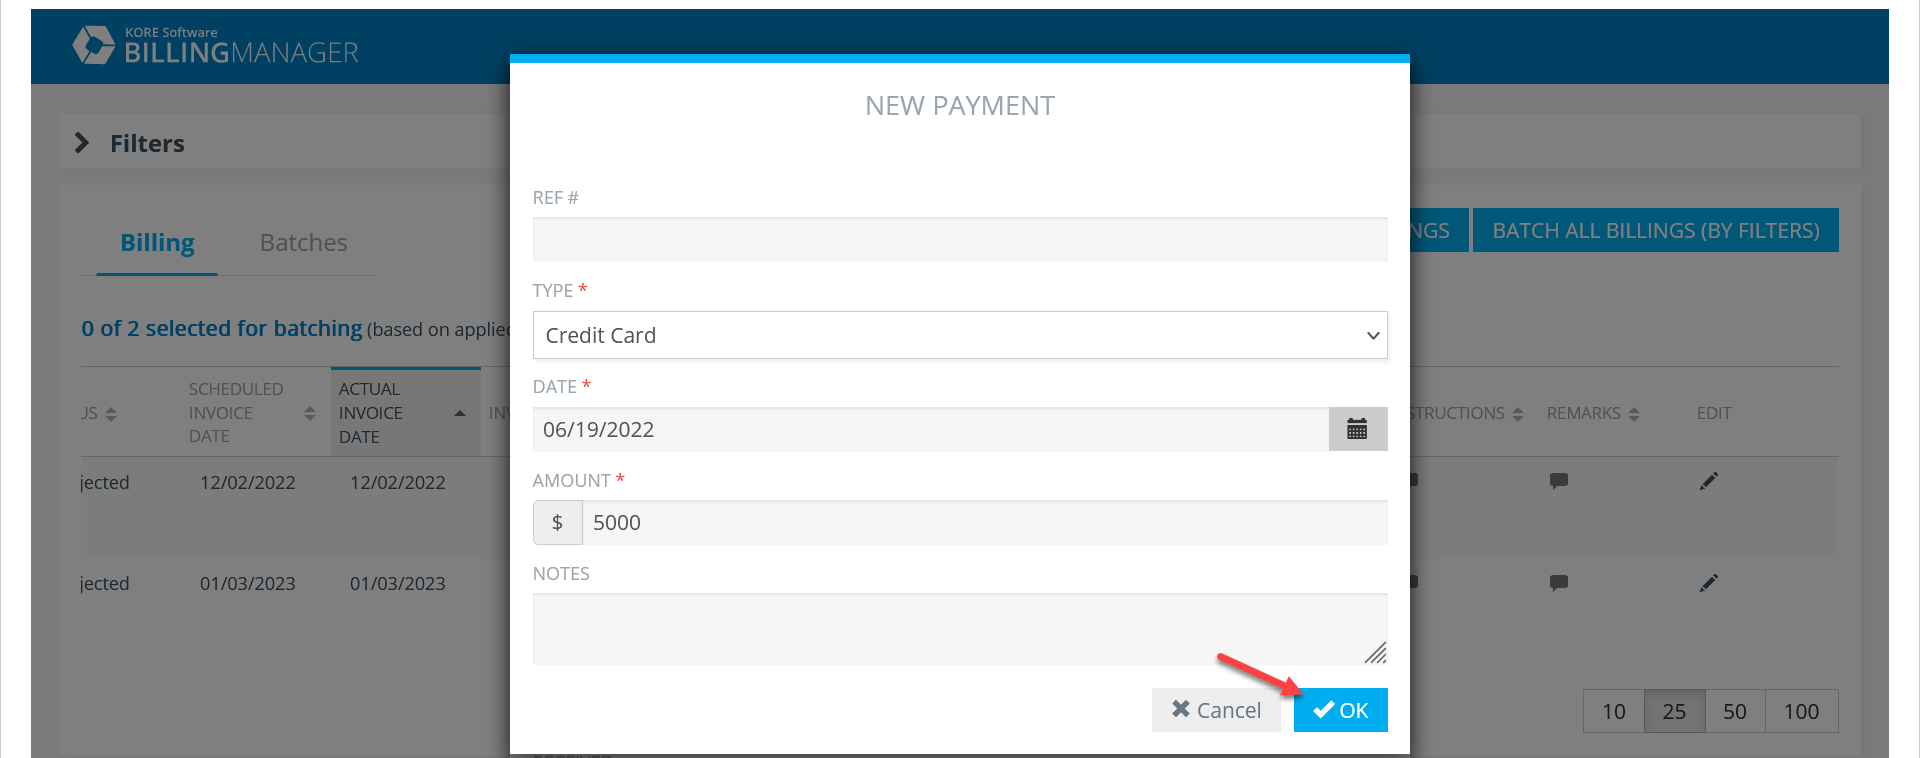
Click the Add Payment button to make a record of a received payment. You can add more than one payment per invoice if needed. Click OK to return to the form.
The payment, if added, will be displayed in a table below the invoice details. When finished, click the Save button.
Batch bills together for bulk processing
If you use a finance integration, batching also allows you to indicate that a set of bills are ready to generate invoices for and send.
Create a new batch
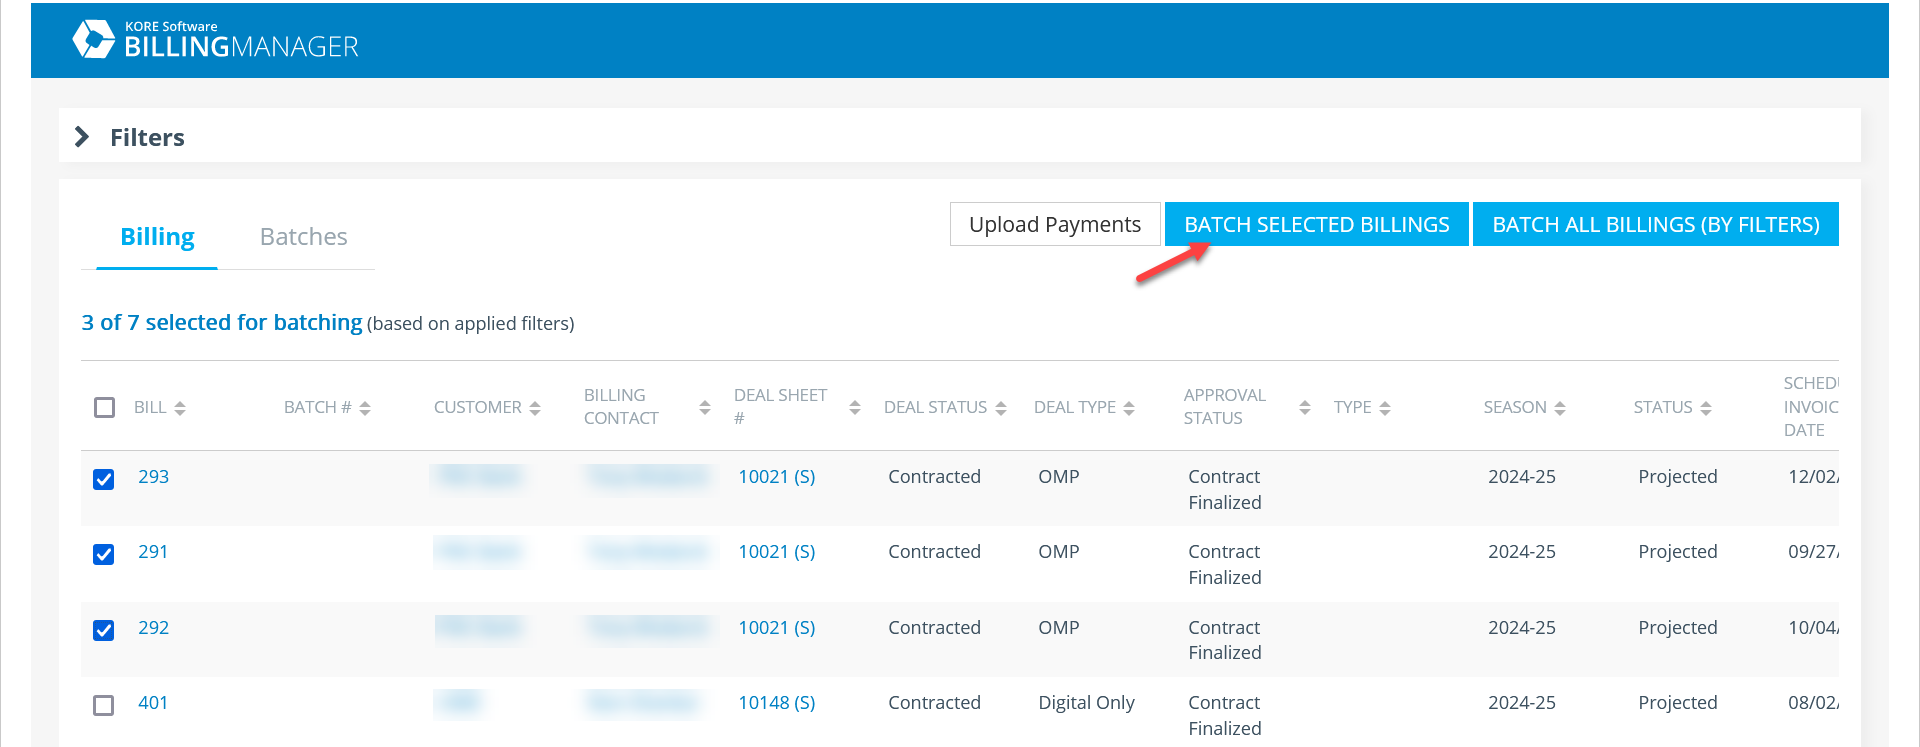
After setting filters and searching, you can click Batch all billings (by filters) or you can check the boxes next to the desired bills and then click Batch selected billings.
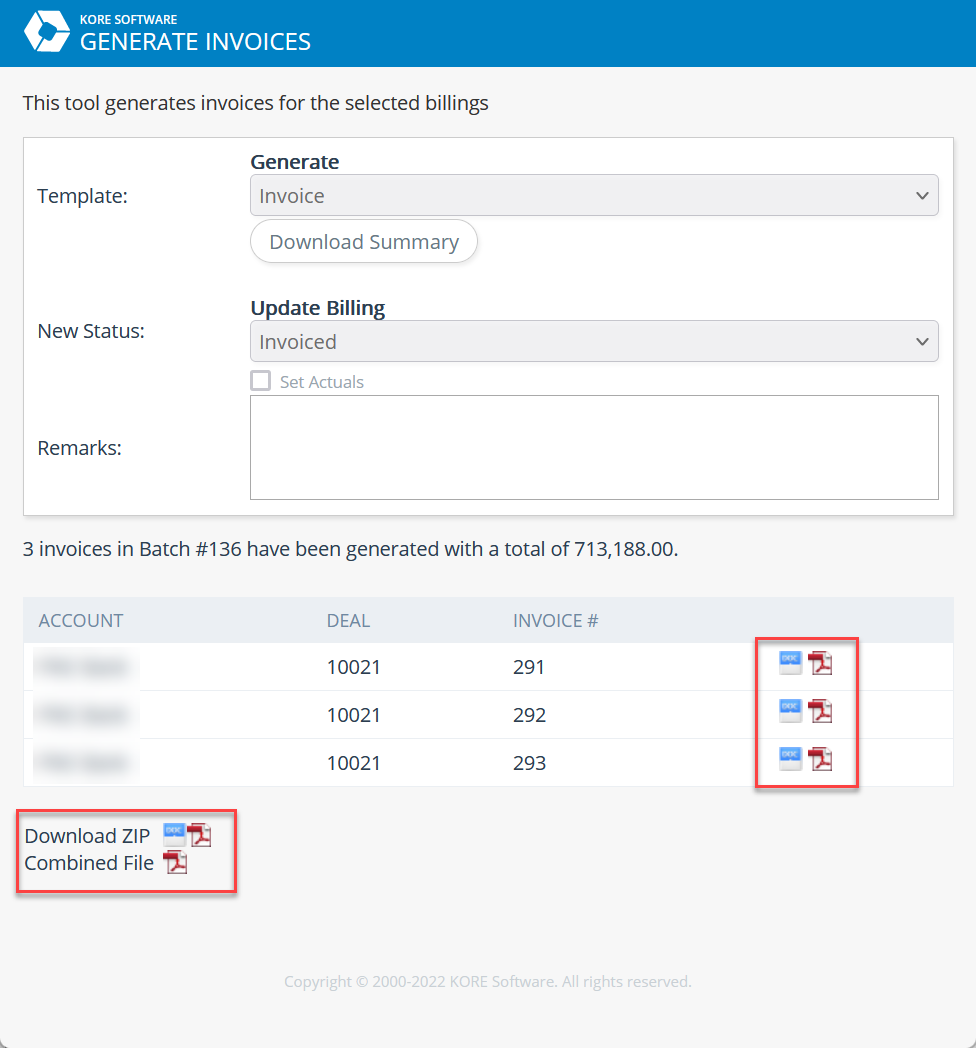
This will open the same window for generating invoices as seen before. This time, though, the batch will contain more than one invoice after selecting a template, selecting a new status, and clicking the Submit button.
View an existing batch
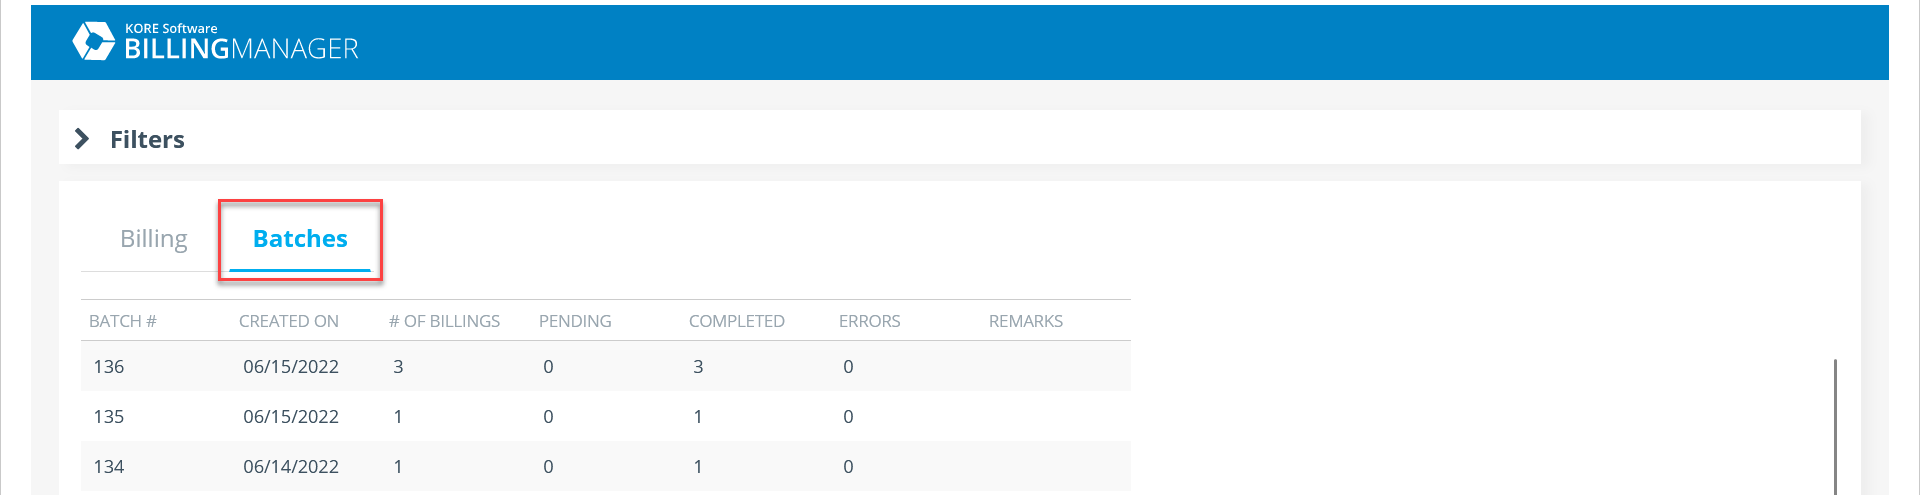
To view previously created batches, click the Batches tab after searching using filters.
Double-click a line to open the batch and view the list of billings it contains. You can also download a PDF file containing all invoices for the batch.
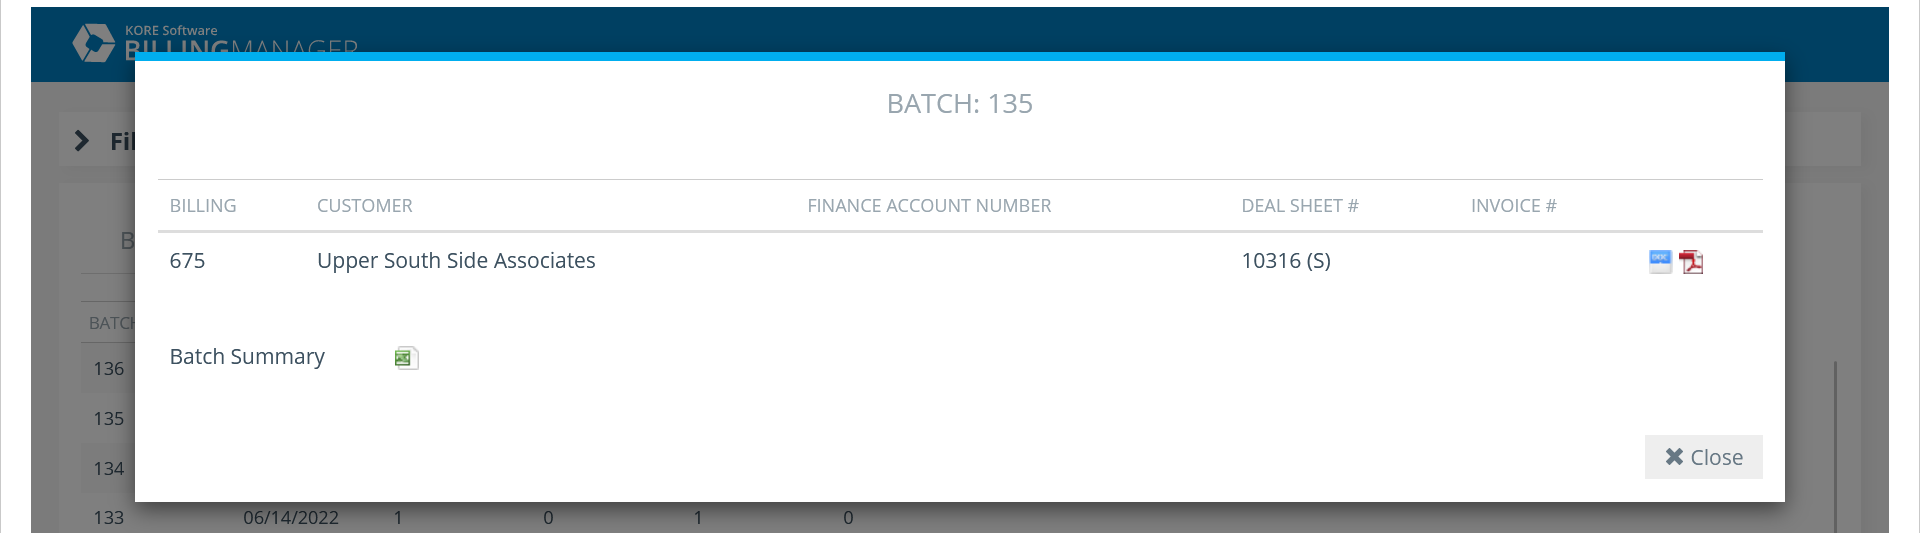
Note: In the Billing tab, only one batch# is displayed per bill. Although not recommended, a bill can belong to multiple batches. This is only revealed on the Batches tab when viewing the billings in a particular batch.
Once a bill’s status is invoiced or beyond, it can no longer be edited in the Billing Manager nor added to a batch. The bill’s CRM record can still be edited, though, and the bill’s status may be changed there if needed.
Customize the summary download (CSV spreadsheet)
When generating invoices, you also have a Download Summary button available. Many organizations use the summary to assist in internal audits or other processes. Your KORE Success Manager can customize the fields for you upon request. The available fields are:
- Account
- Finance Account Number
- Deal #
- Deal Type
- Deal Status
- Invoice #
- Bill Status
- Bill Type
- Season
- Estimated Amount
- Estimated Date
- Actual Amount
- Actual Date
- Due Date
- Remarks
- Deposit Notes
- Deposit Return Date
- External ID 1
- External ID 2
- External ID 3
- Special Instructions
- Customer PO
- Billing Contact
- Primary Contact
- Coordinator
- Salesperson
- Billing Contact Street Address
- Billing Contact City
- Billing Contact State
- Billing Contact Zip
- Billing Contact Country
- Billing Contact Primary Email
- Billing Contact Business Phone
- Agency Name