Overview
The activity screen consolidates the information and data entry fields that a sales rep needs. You can easily add new activity types to suit your organization’s needs. Dynamics CRM users can also add buttons to open email templates.
Ticket Sales Opportunities (TSOs) are primarily used on the activity screen. As sales reps get closer to closing a deal, you can collect additional information about your customers and what influences their decisions. You can customize which data to collect and in which stage of the sales process.
In addition to these customizations, your KORE Success Consultant can add your logo and brand colors to the activity screen.
Customize the TSO status slider
Warning: KORE advises you not to rename any existing status names. The rename would only apply to future TSOs—existing TSOs would not be updated retroactively.
The TSO status slider can be customized by adding, removing, or reordering status names. To do so, you’ll need to edit the object within your CRM, then refresh the list in Configuration Records.
Dynamics
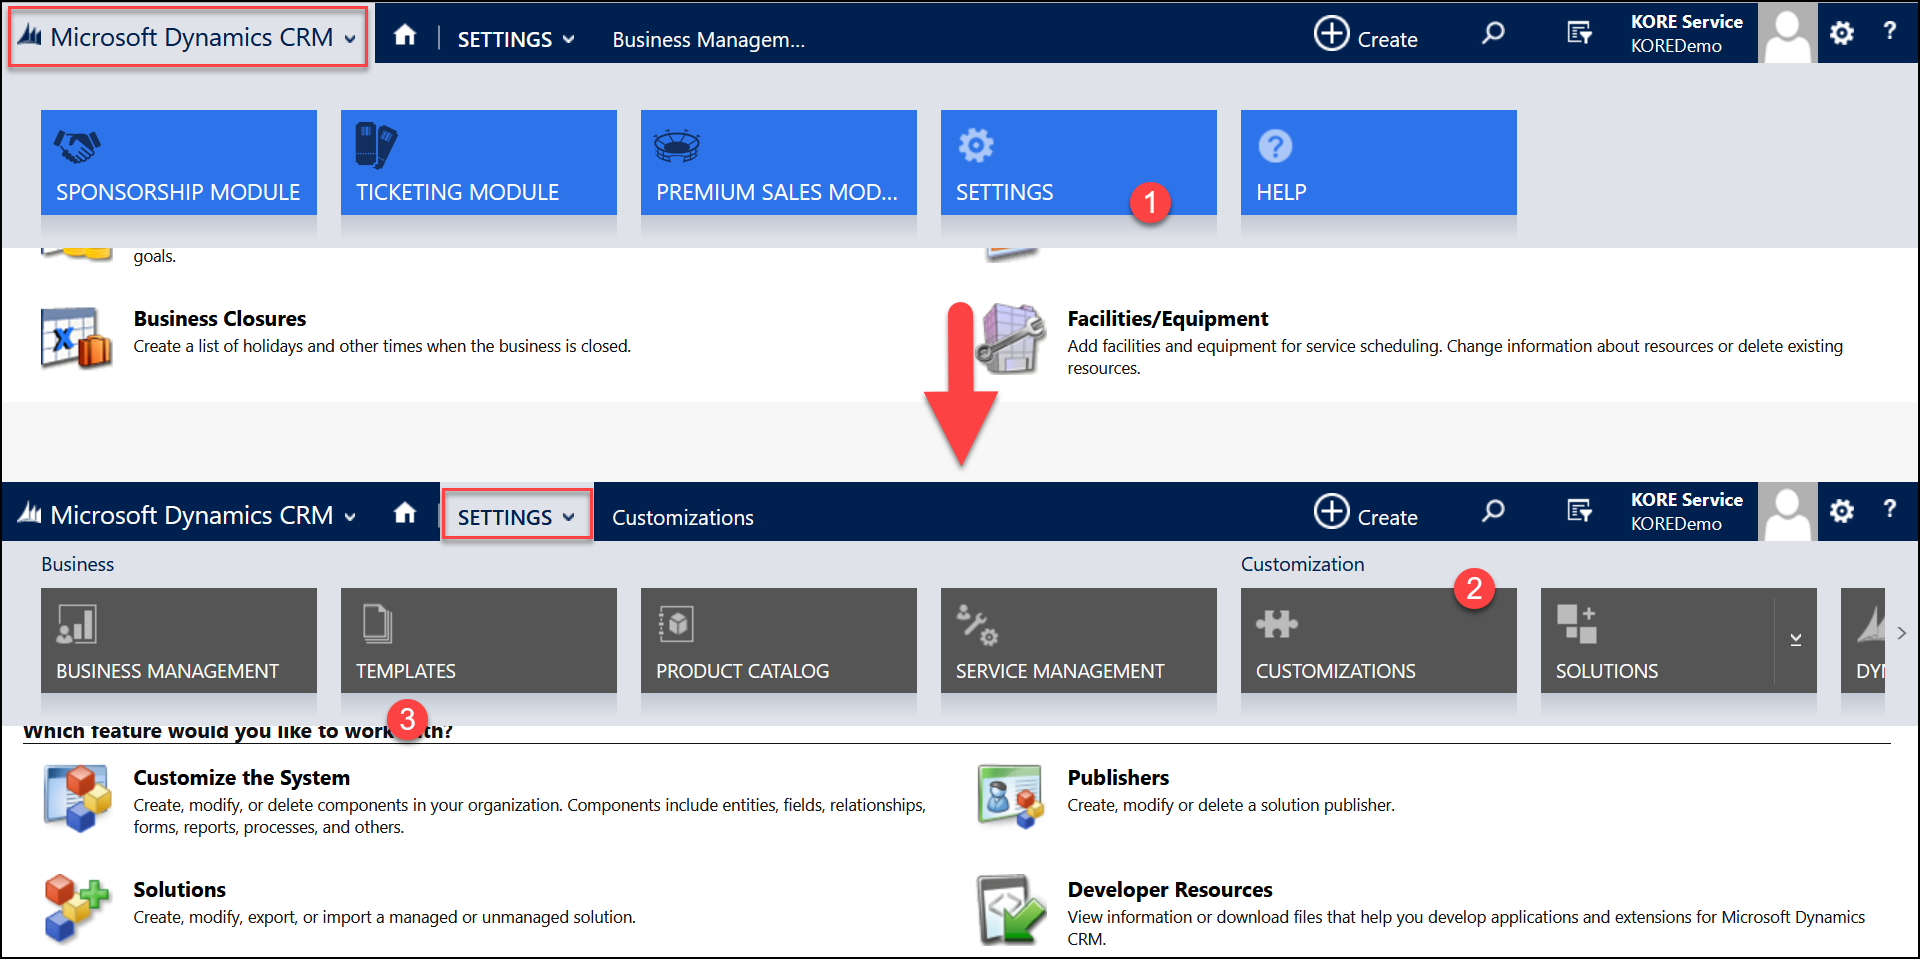
Open Dynamics settings and select Customization. Click Customize the System to open the editor in a new window.
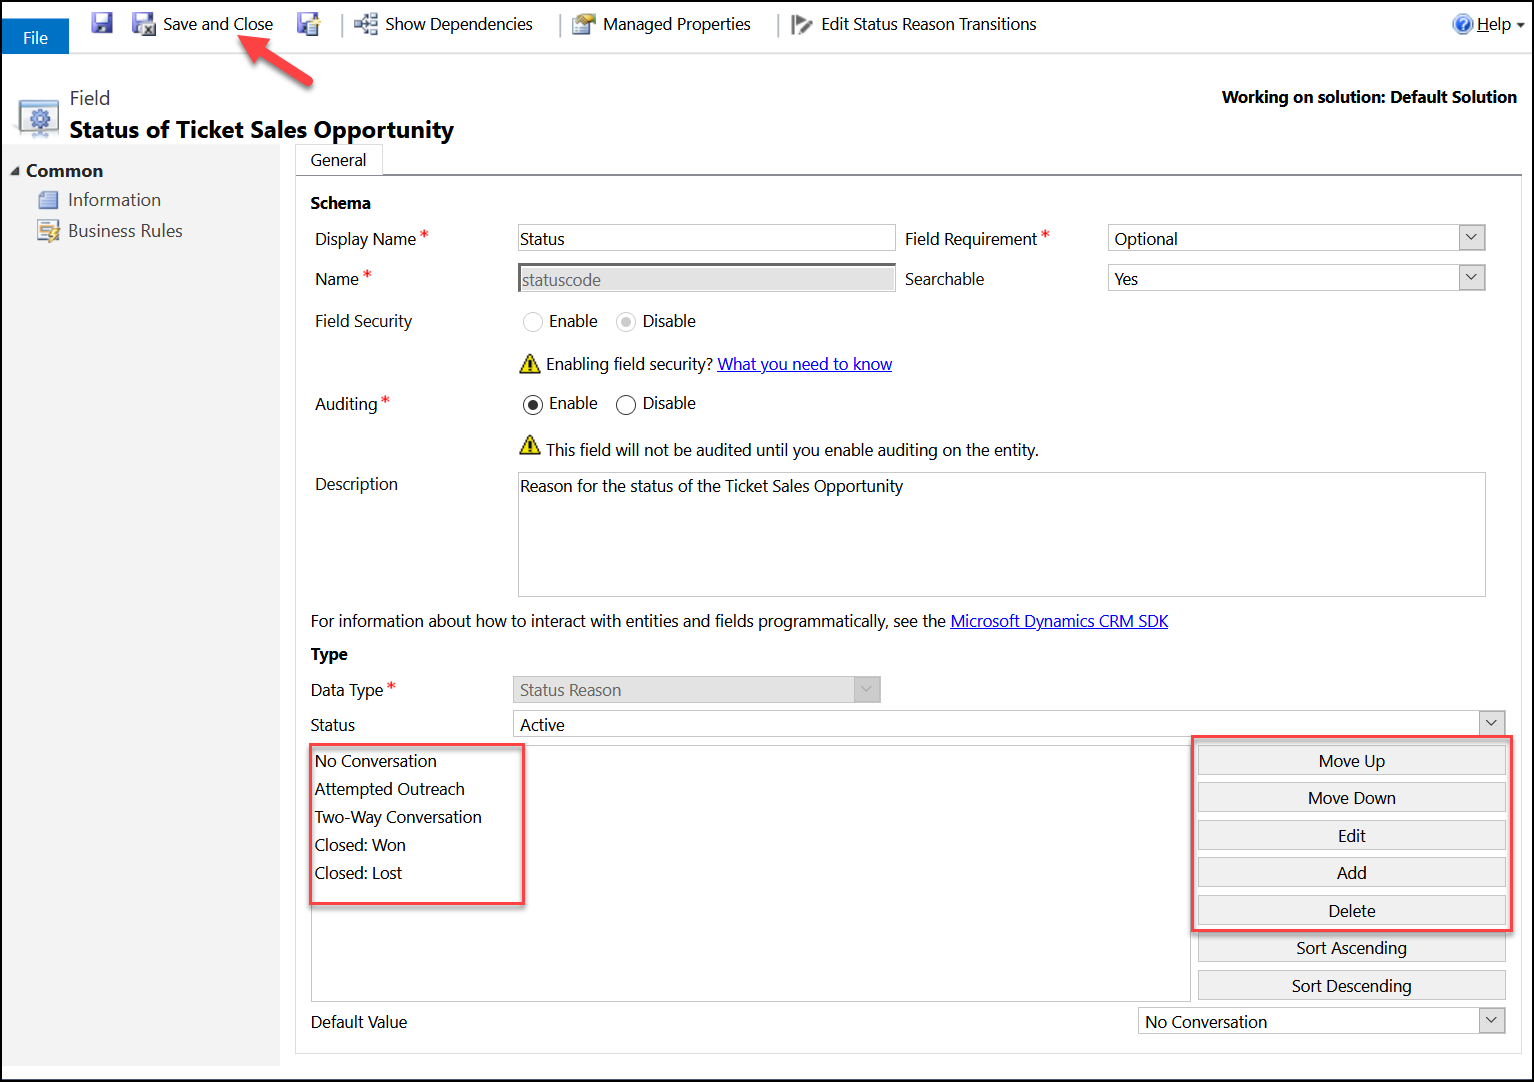
In the tree, navigate to Components > Entities > Ticket Sales Opportunities > Fields. Doubleclick the statuscode field (Type: Status Reason) to edit it in another new window.

Use the buttons to make your desired changes, then click Save and Close.
Finally, click Publish All Customizations in the previous window.

Continue to the next step below.
Salesforce
Open the Salesforce setup page, then select Platform Tools > Objects and Fields > Object Manager in the left navigation menu.
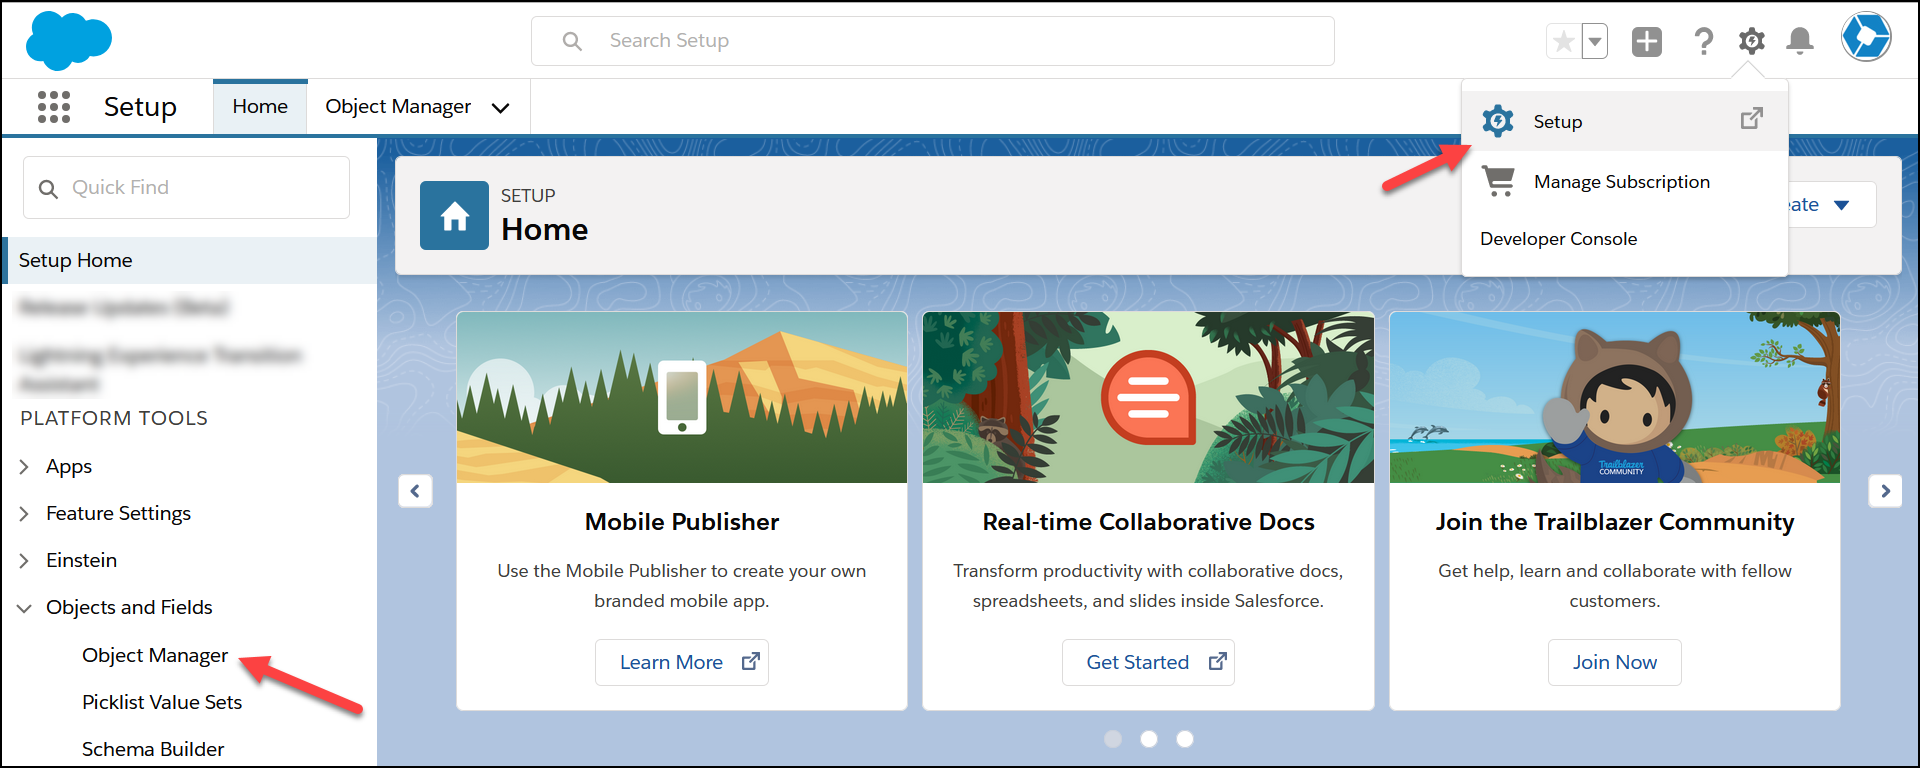
In the Object Manager, search for “ticket” and then click on Ticket Sales Opportunity.

Select Fields & Relationships, then find and click on Status.
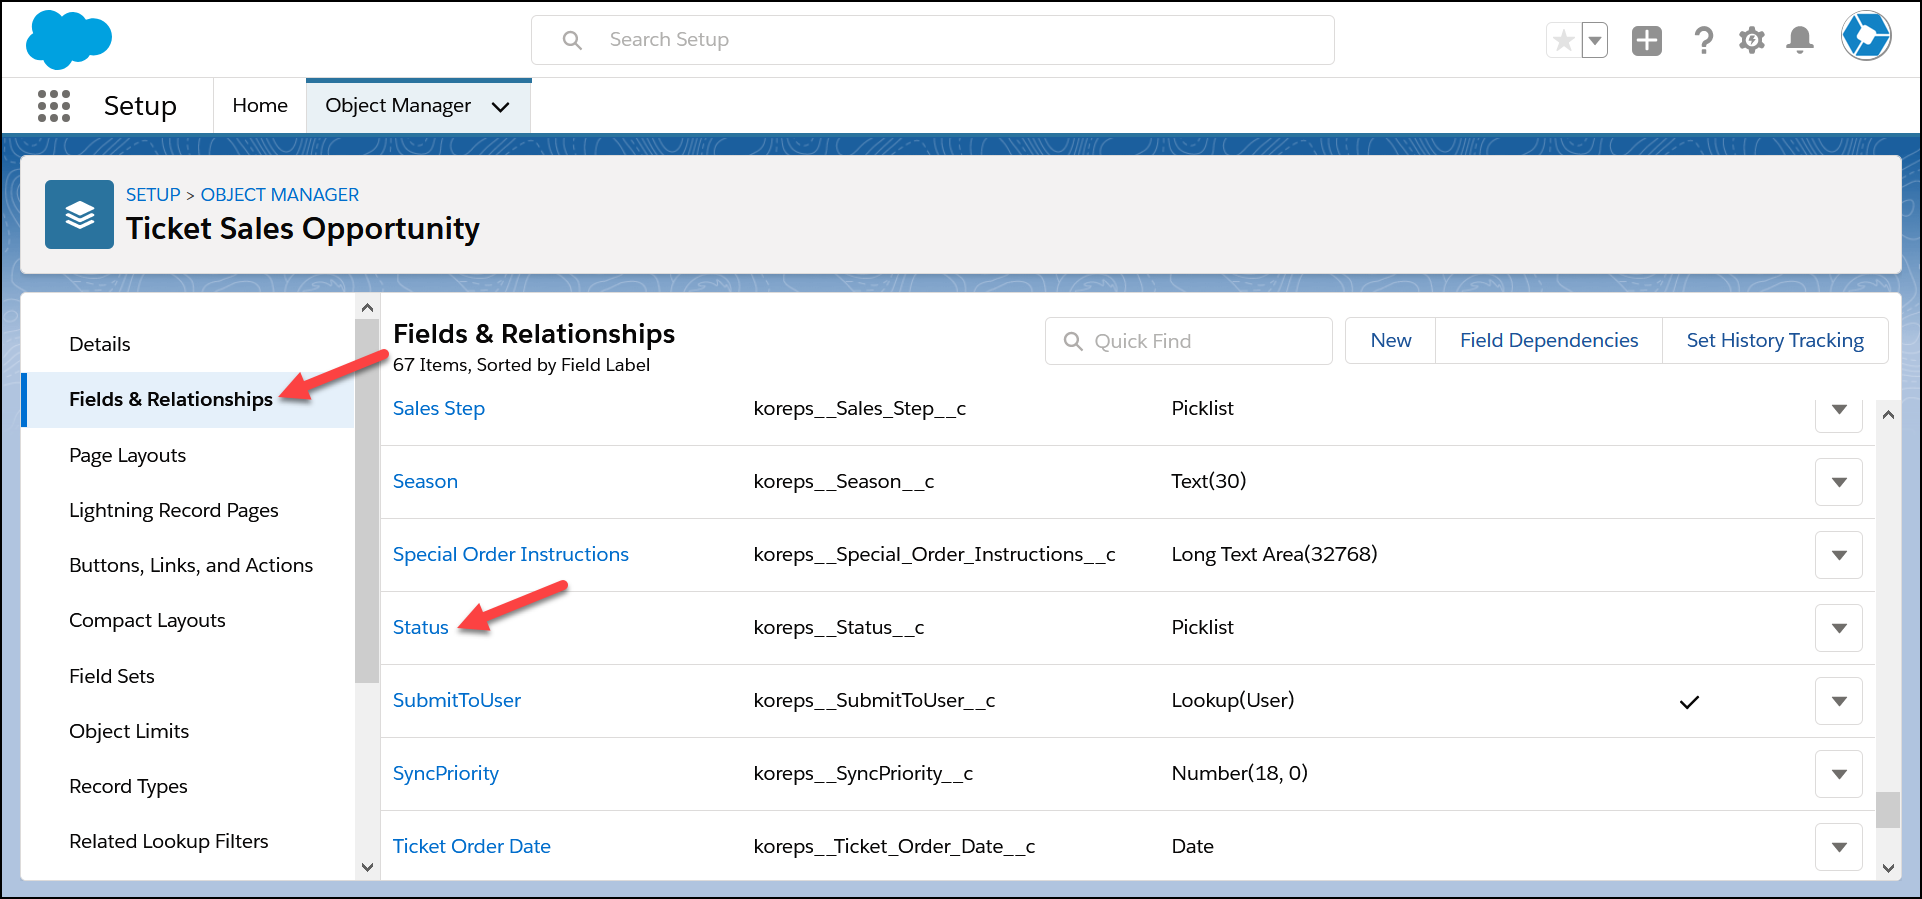
Finally, scroll down to the Values section and use the buttons to make changes.
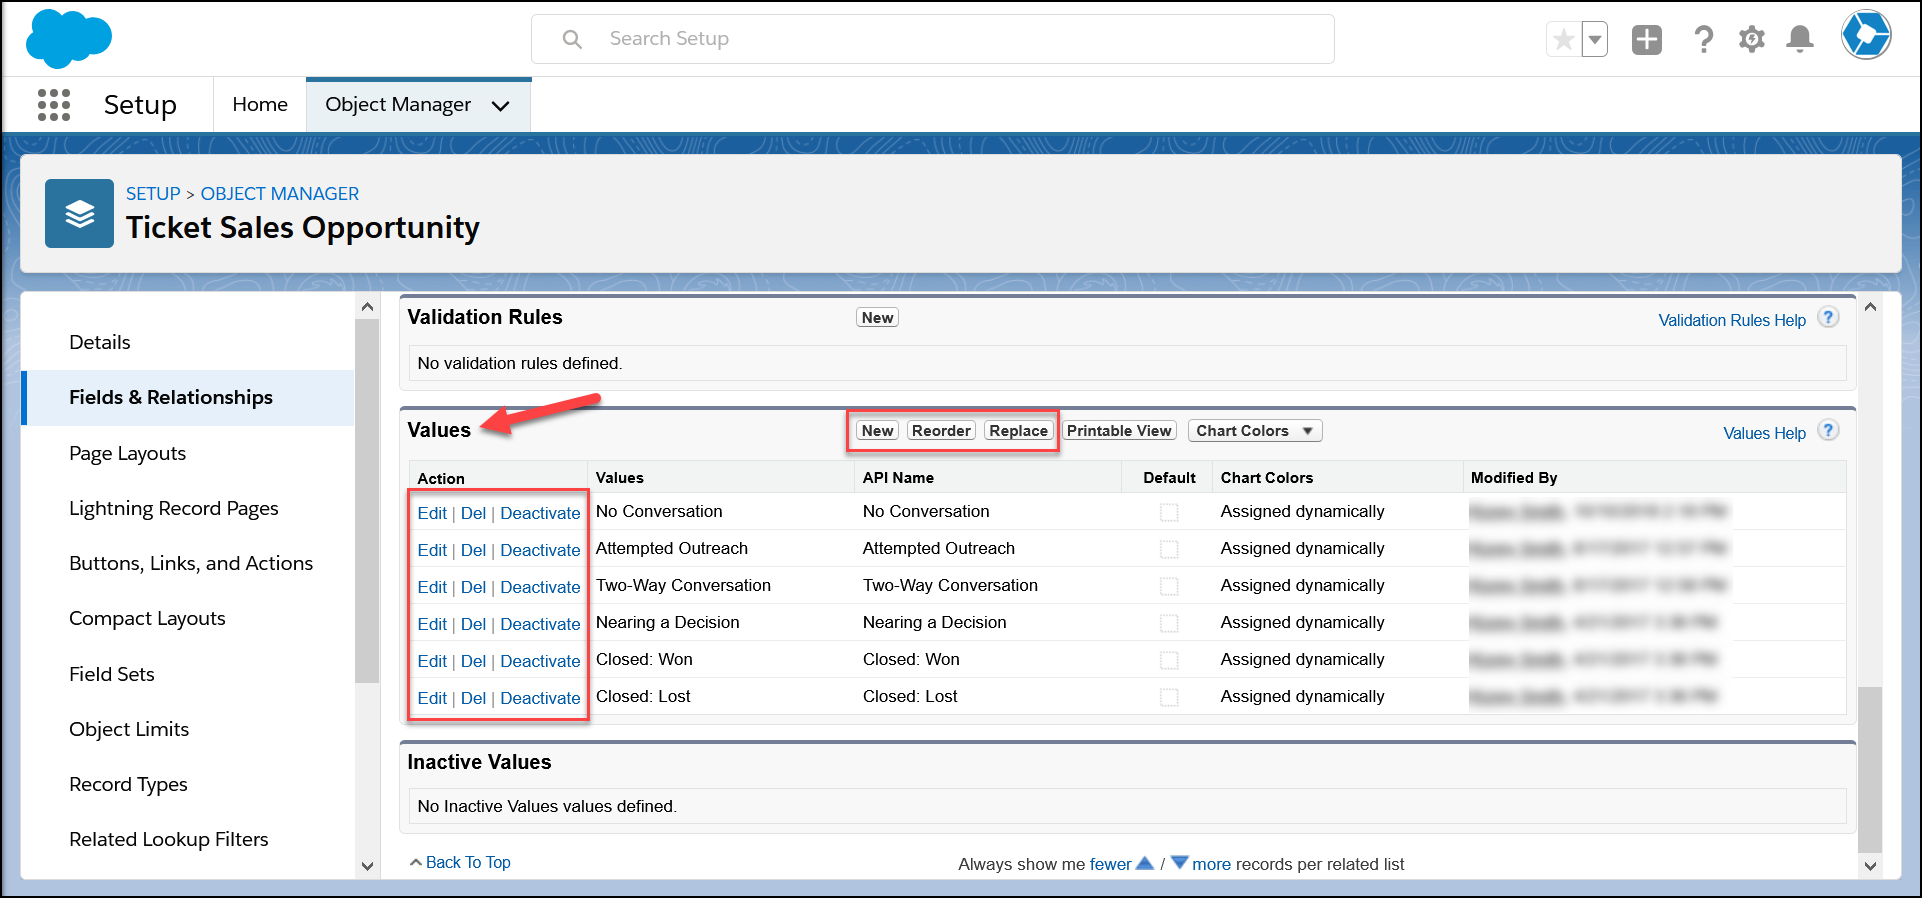
Continue to the next step below.
Refresh configuration records
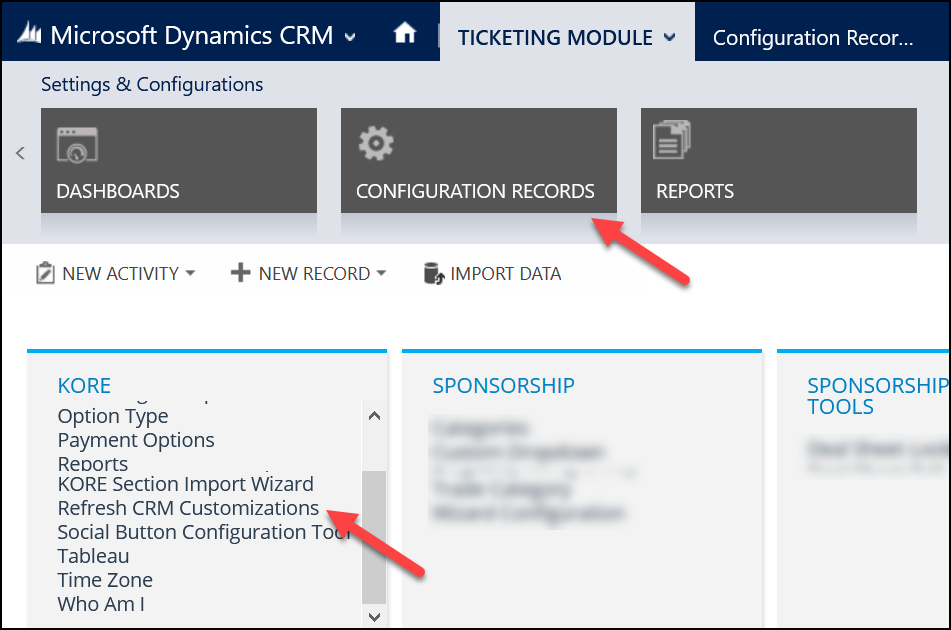
To finalize your changes, open the Configuration Records page and select Refresh CRM Customizations in the KORE section.
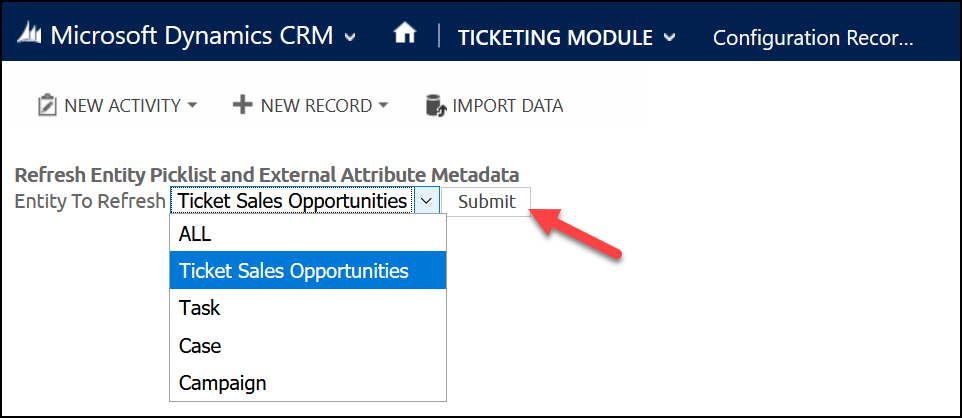
Select Ticket Sales Opportunities (or ALL) as the entity to refresh, then click Submit. After a few moments, a success message should appear.

Select TSO fields to use
First, find the KORE section in your Configuration Records and select Call Screen Field Configuration. Select the Ticketing module and choose to configure fields for Opportunity. Use the Set Field Visibility / Requirement Level option and select which TSO status you’d like to change.
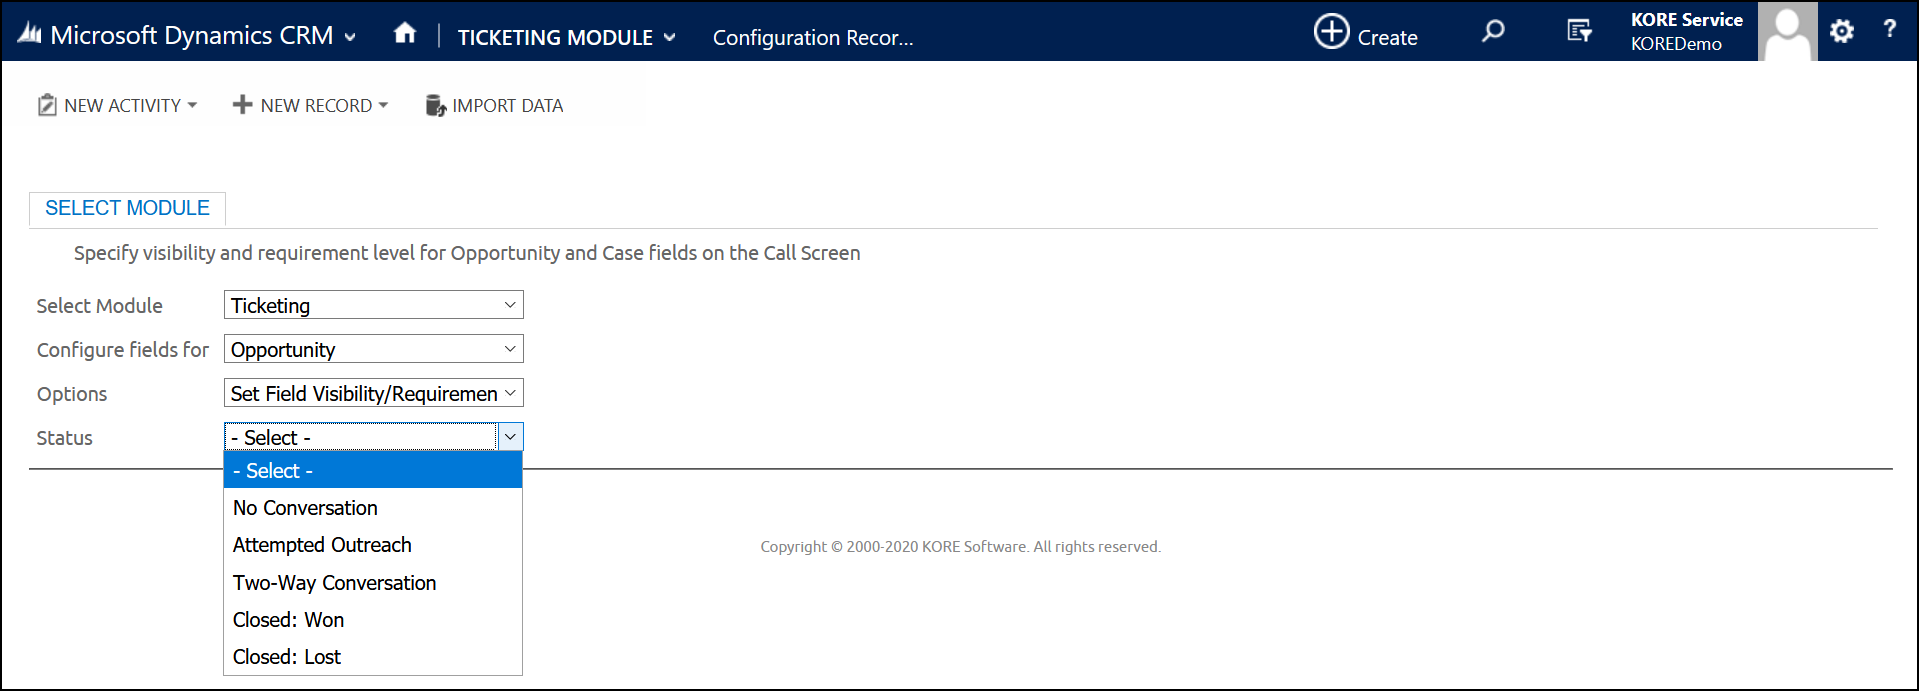
Each available field has a drop-down list where you can select to hide, show, or require it. When finished, use the Save button.
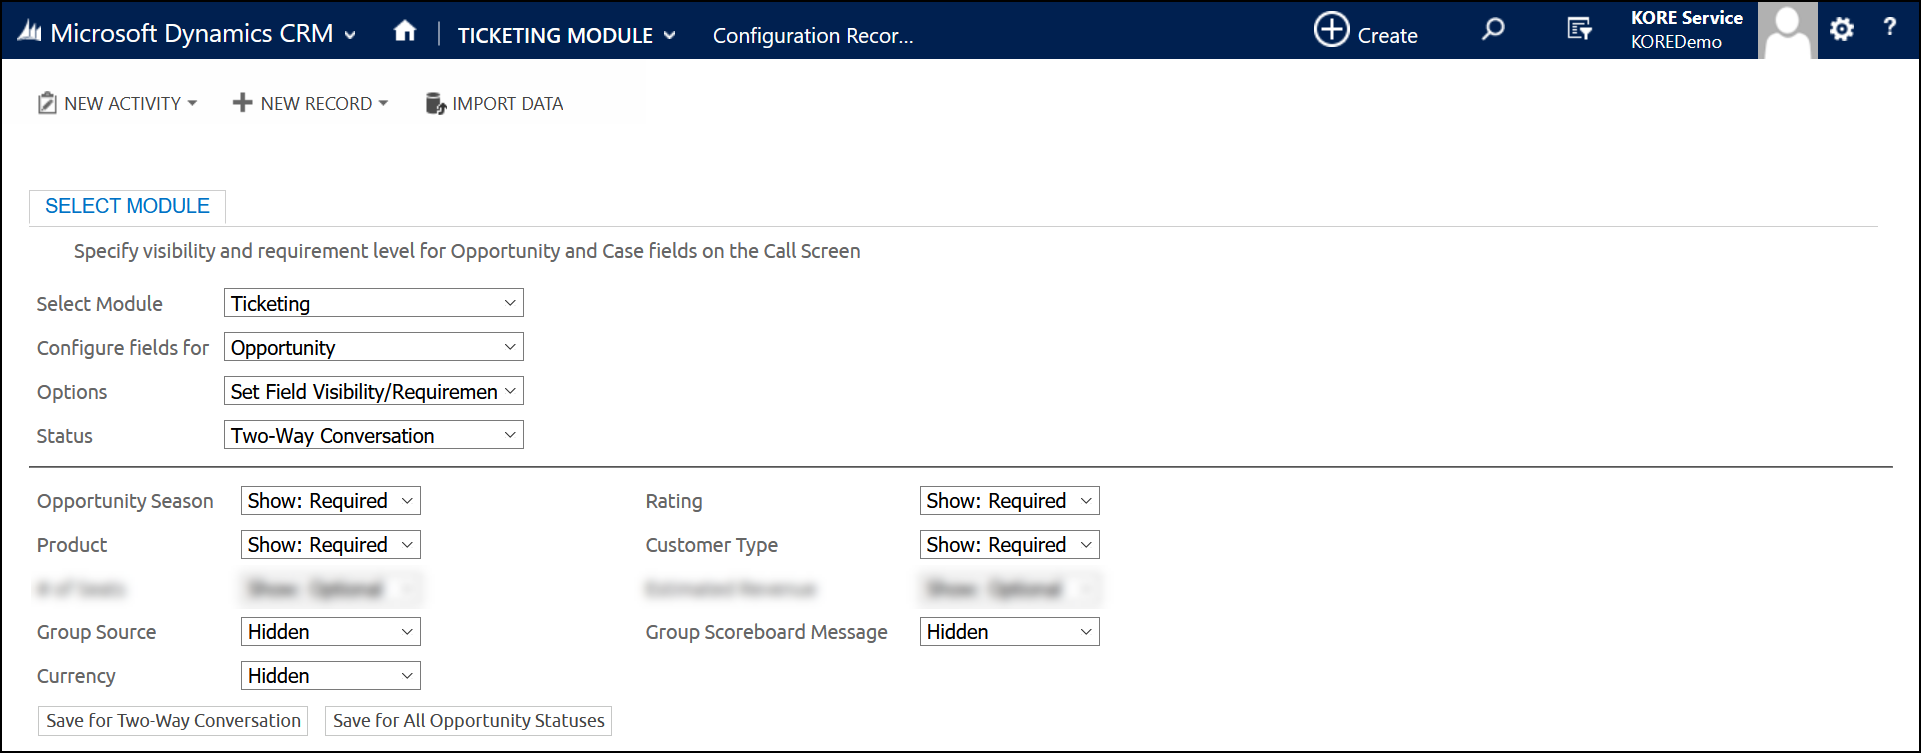
Configure TSO field drop-down lists
For each field that you show in a TSO, you can change the drop-down list of options. However, you cannot change the name of those fields.
Dynamics
As shown previously, open Dynamics settings and select Customization. Click Customize the System to open the editor in a new window. In the tree, navigate to Components > Entities > Ticket Sales Opportunities > Fields.
Next, find the field that you want to edit the options for. (To make this easier, click Display Name in the table header so they are displayed in alphabetical order.) Doubleclick the field to edit it in another new window.
In the Options section, use the buttons to add, delete, or reorder the fields. When finished, click one of the Save buttons.
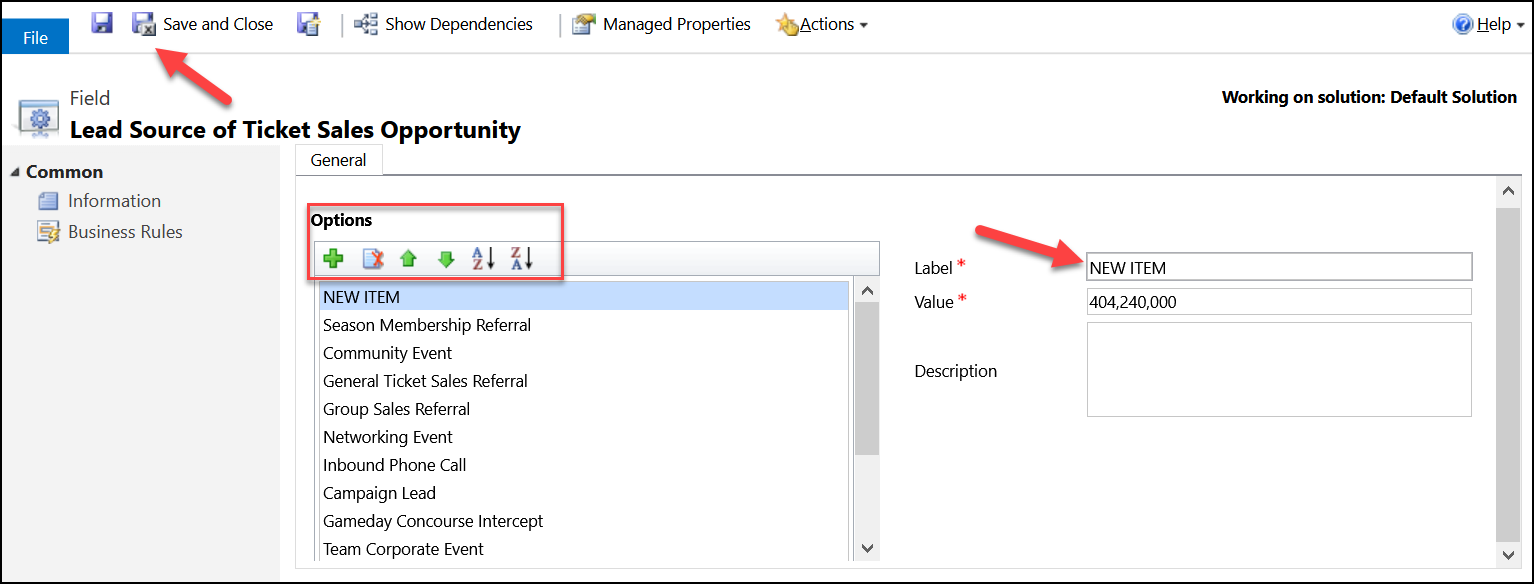
After completing your changes, click Publish All Customizations in the previous window as shown previously. Then open the Configuration Records page and select Refresh CRM Customizations in the KORE section. Choose "Ticket Sales Opportunities" from the Entity To Refresh drop-down list and click Submit.
Salesforce
As shown previously, open the Salesforce setup page, then select Platform Tools > Objects and Fields > Object Manager in the left navigation menu. In the Object Manager, search for “ticket” and then click on Ticket Sales Opportunity.
Next, select Fields & Relationships. Find the field that you want to edit the options for and click its name to open the editor.
In the Values section, use the buttons to add, delete, or reorder the fields.
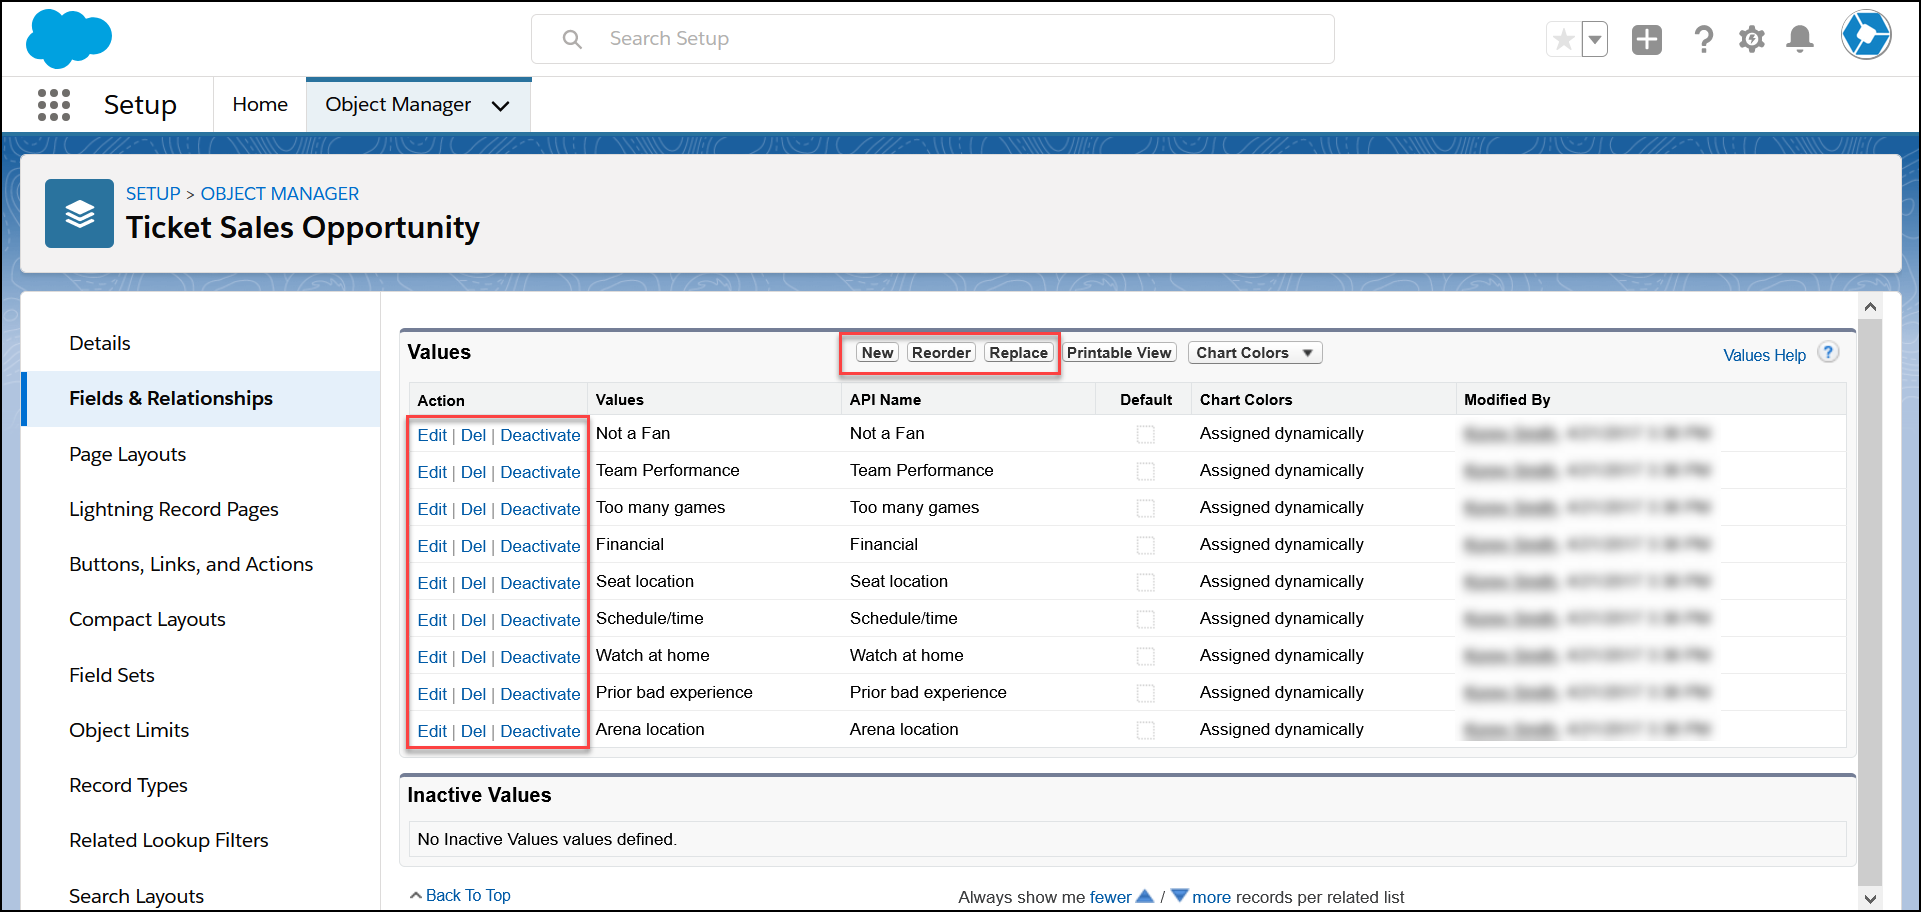
To finalize your changes, open the Configuration Records page and select Refresh CRM Customizations in the KORE section. Choose "Ticket Sales Opportunities" from the Entity To Refresh drop-down list and click Submit.
Add email template buttons
The Recipient section of the Activity page can provide customized buttons for quickly opening email templates.
Dynamics
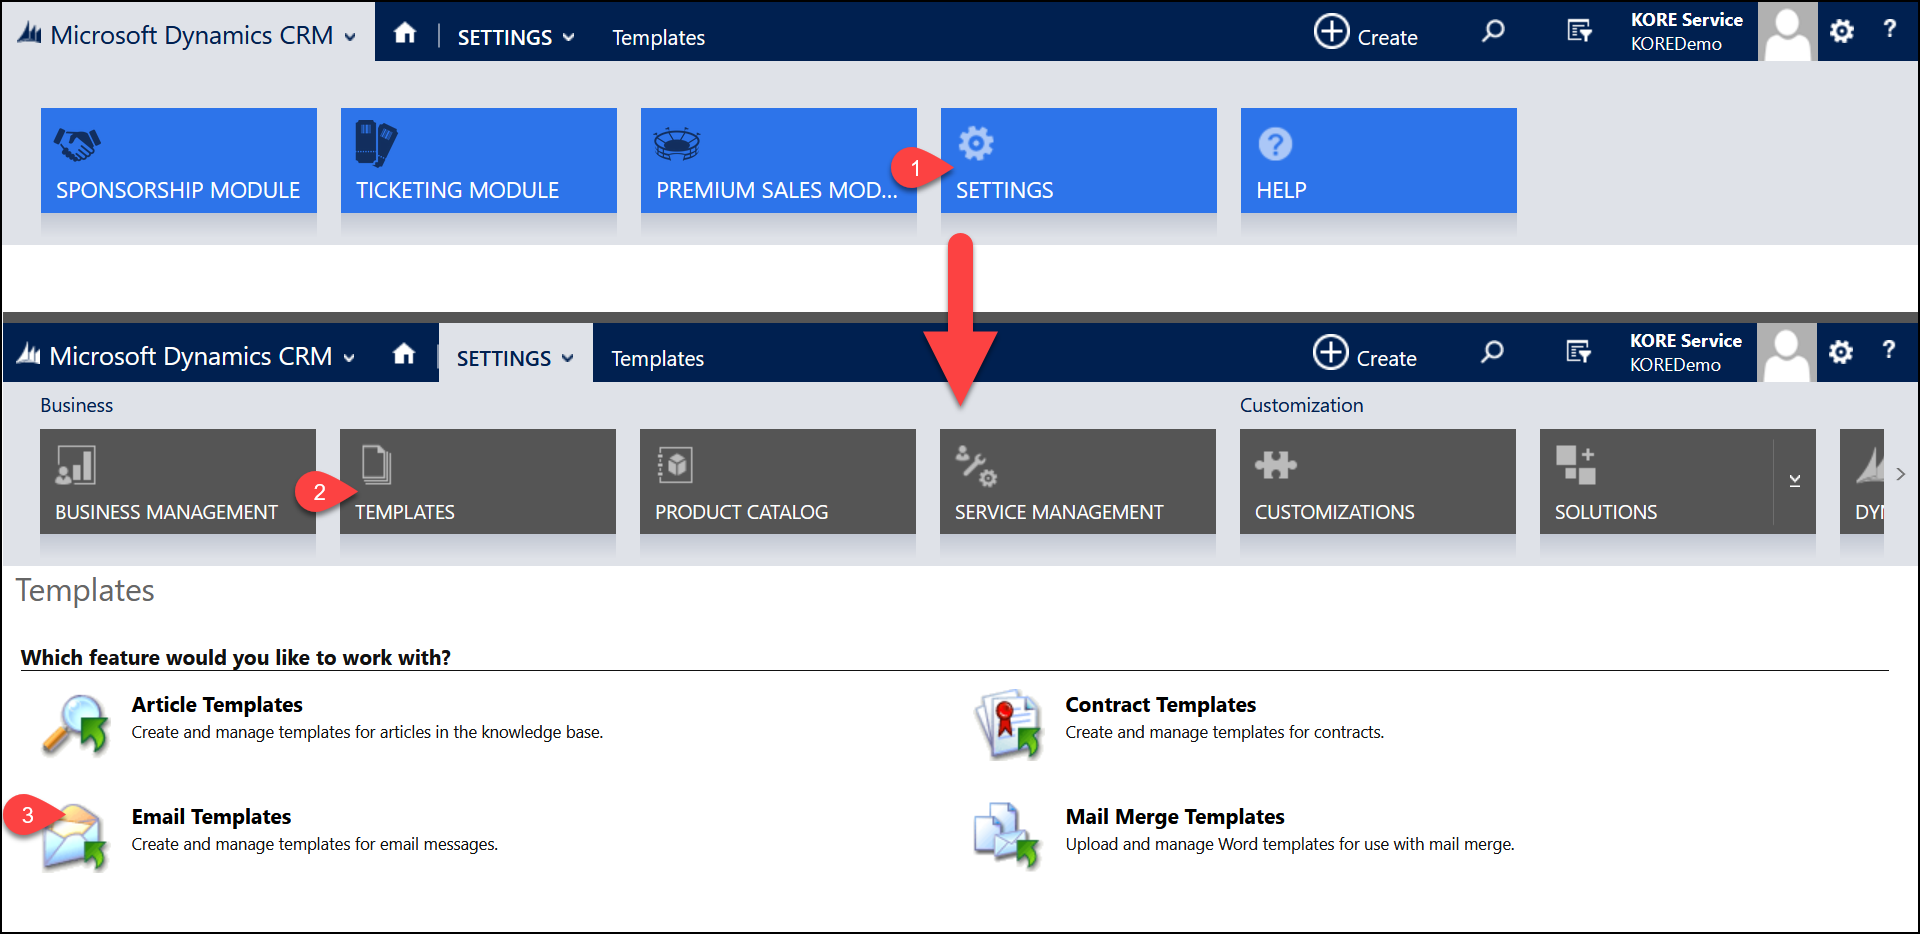
First, create email templates for your organization. Open Dynamics settings and select Templates. Next, select Email Templates and create a new template.
When you’re ready, send the exact name of the template to your KORE Success Consultant. They will enable the button for you.
Salesforce
First, create email templates for your organization. Select "Email Templates" in the ribbon menu, then click the New Email Template button and fill in the form. Be sure to save the template in the Public Email Templates folder.

When you’re ready, send the exact name of the template to your KORE Success Consultant. They will enable the button for you.
Add an activity type
You may wish to track additional activities, such as LinkedIn messages or lunch meetings. To add them to the activity screen, open Configuration Records and find Task Types in the KORE section. Click the Create New Task Type button, enter a name for the activity type, and click Save.
You can also deactivate any activity types you no longer wish to use. Existing activities of that type will not be deleted.

Edit category and sub-category lists
The Category and Sub-Category drop-down lists on the activity screen can be customized to your needs.
Dynamics
As shown previously, open Dynamics settings and select Customization. Click Customize the System to open the editor in a new window. In the tree, navigate to Components > Entities > Task > Fields. Next, doubleclick the Category (kore_category) or Subcategory (kore_subcategory) line to open the editor.
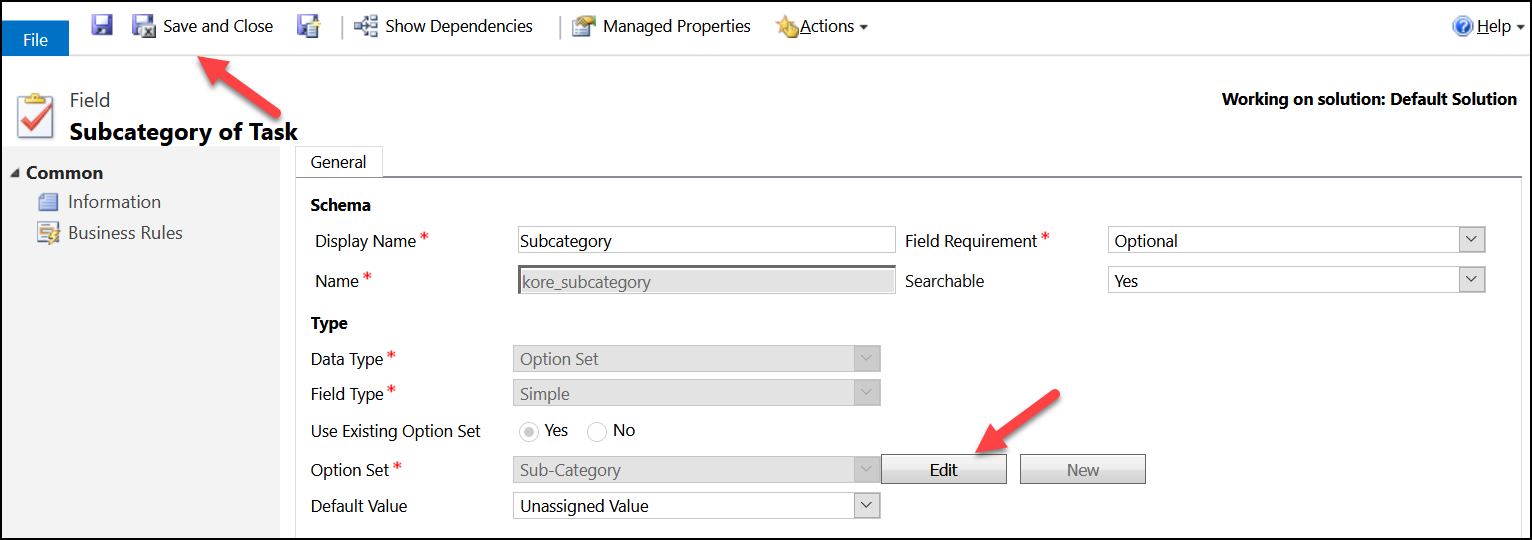
Click the Edit button next to “Option Set” to open the pick-list editor. Use the buttons in the Options section to create or edit entries, then click Save.
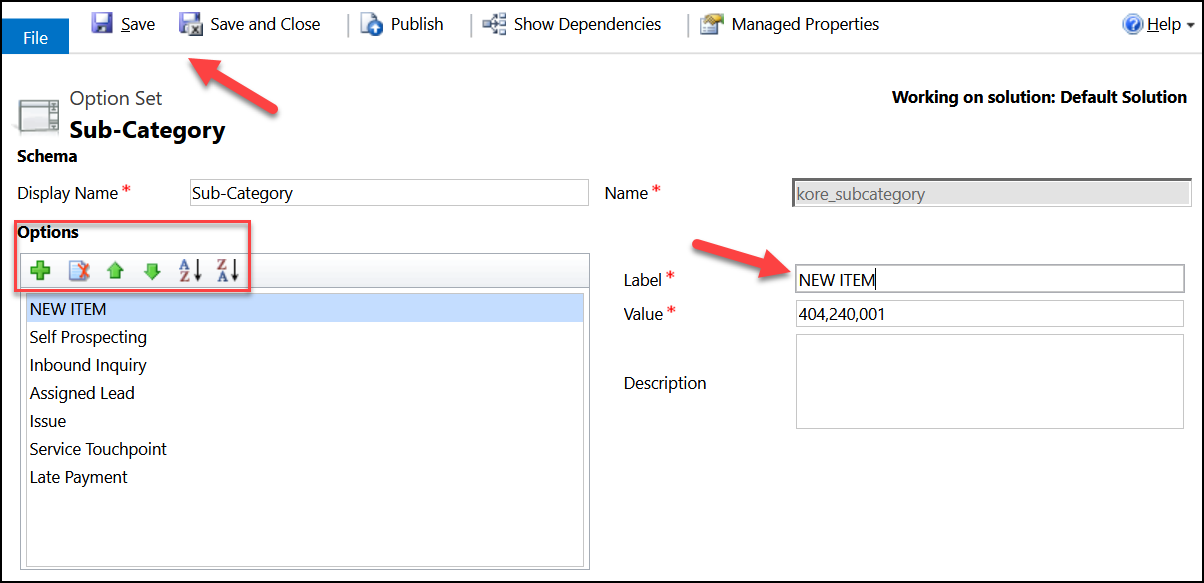
After completing your changes, click Publish All Customizations in the previous window. Continue to the next step below.
Salesforce
As shown previously, open the Salesforce setup page, then select Platform Tools > Objects and Fields > Object Manager in the left navigation menu. In the Object Manager, click on Activity.

Next, select Fields & Relationships. Click either Activity Category or Activity Sub-Category to open the editor. In the Values section, use the buttons to create or edit the pick-list items.
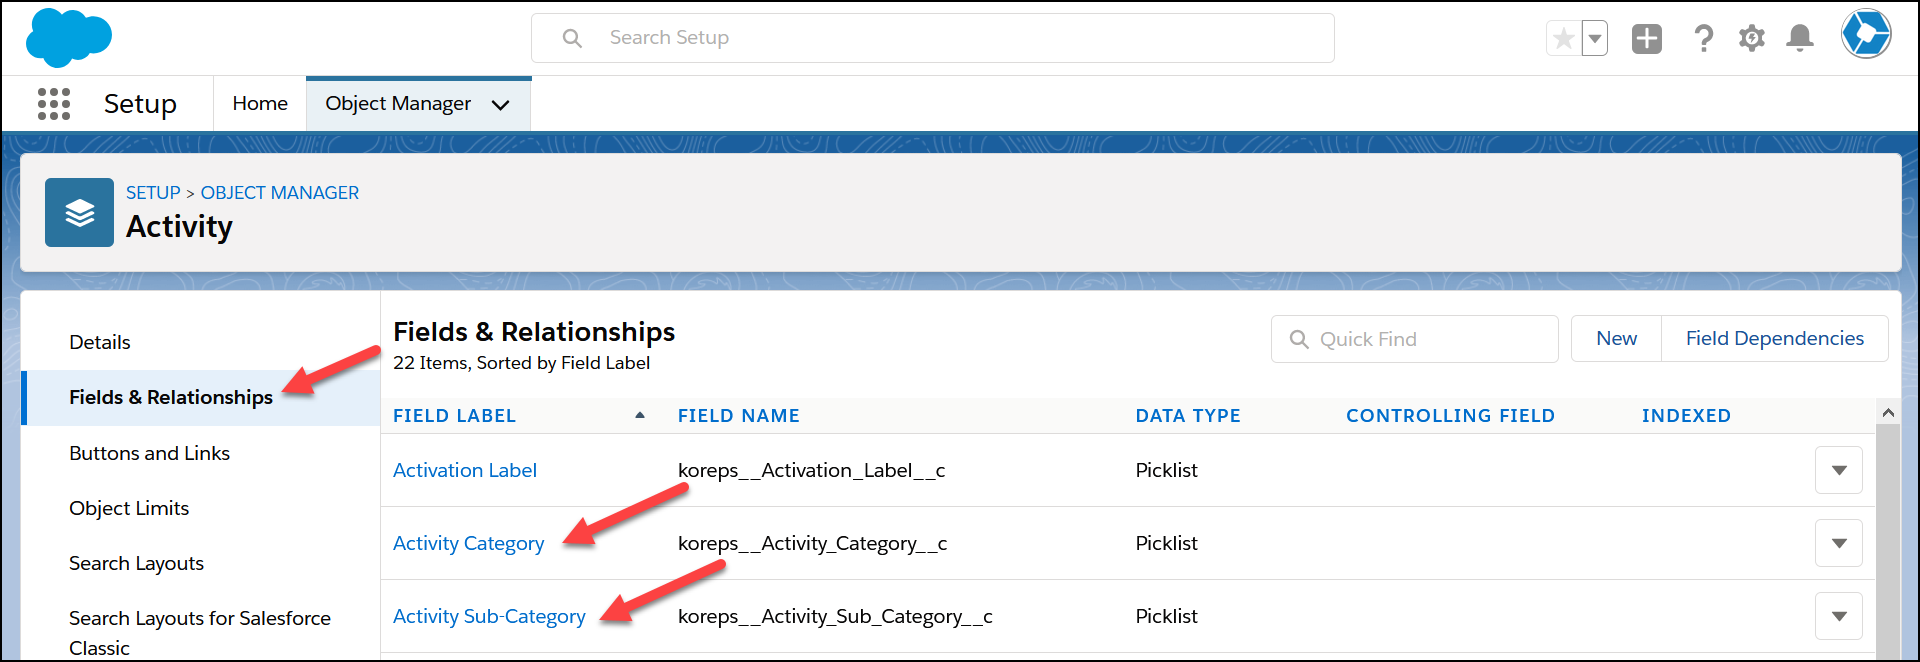
After completing your changes, proceed to the next step below.
Finalize the update
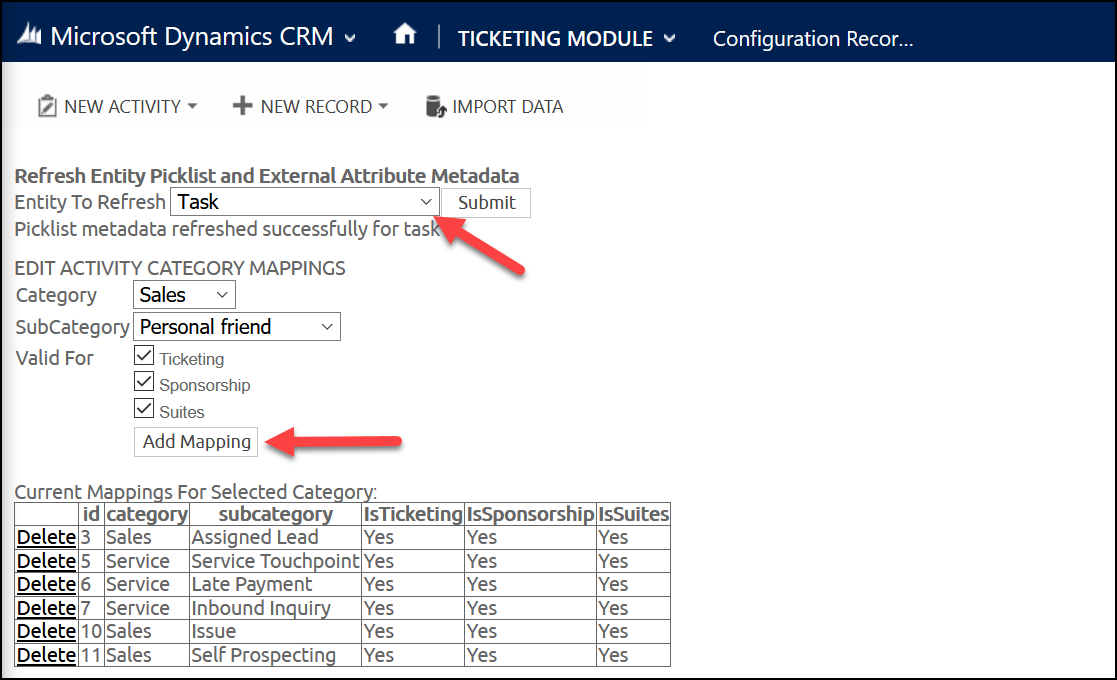
In Dynamics or Salesforce, open the Configuration Records page and select Refresh CRM Customizations in the KORE section. Choose “Task” from the Entity To Refresh drop-down list, select which KORE modules it should be available in (if your organization subscribes to more than one), and click Add Mapping.
