
Overview
Touchpoints help your organization deliver great experiences to your ticketholders. A touchpoint is an interaction that keeps you in touch with a ticketholder: these could be seat upgrades, special pre-game events, autographed memorabilia, or anything else! Each different type of touchpoint is worth some number of points. Often, organizations set touchpoint goals for certain types of ticketholders—for example, you might want to ensure all your season ticketholders receive 50 “points” worth of attention and extras. You can also set a touchpoint goal for an individual contact.
Sometimes, a ticketholder might have a poor experience that you’d like to make up to them. You can use touchpoints with negative point values to account for this. For example, suppose venue security unfairly hassled a fan who did nothing wrong. This could be assigned -10 points, which you could try to make up to them with an in-seat visit from your rep at the next game, an autographed ball, or anything else. Of course, some people just love to complain—if a contact’s list of touchpoint activities contains several negative experiences, you can investigate whether they’re just taking advantage or if there’s a serious problem.
As a CRM manager or administrator, you can customize touchpoints to your organization's needs.
Create touchpoints
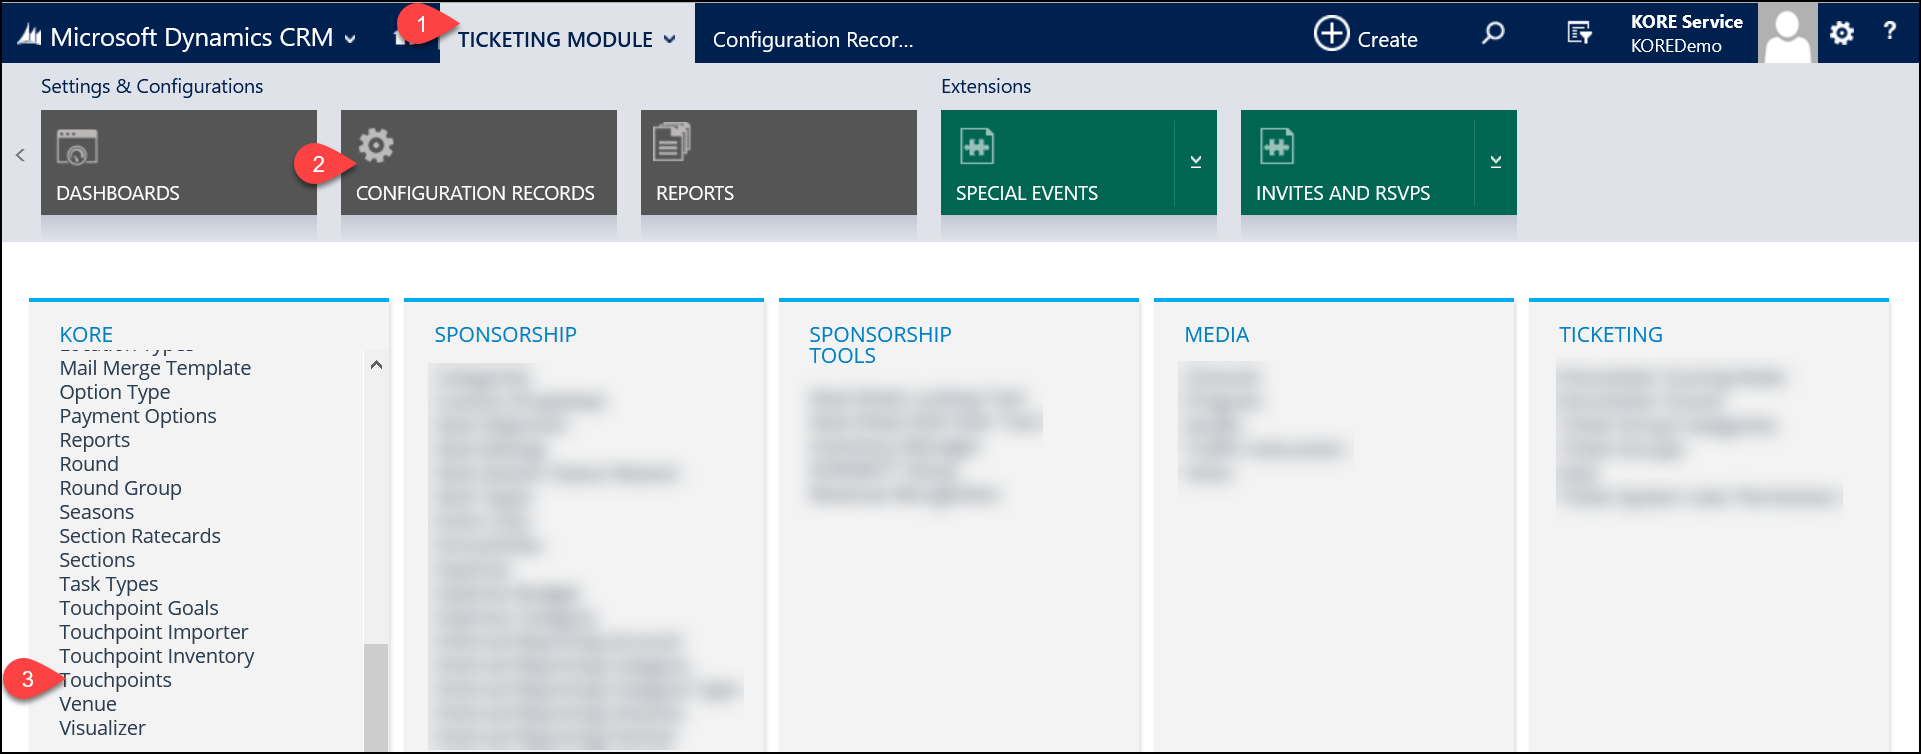
Begin by opening the Configuration Records screen. Next, find “Touchpoints” in the KORE section.
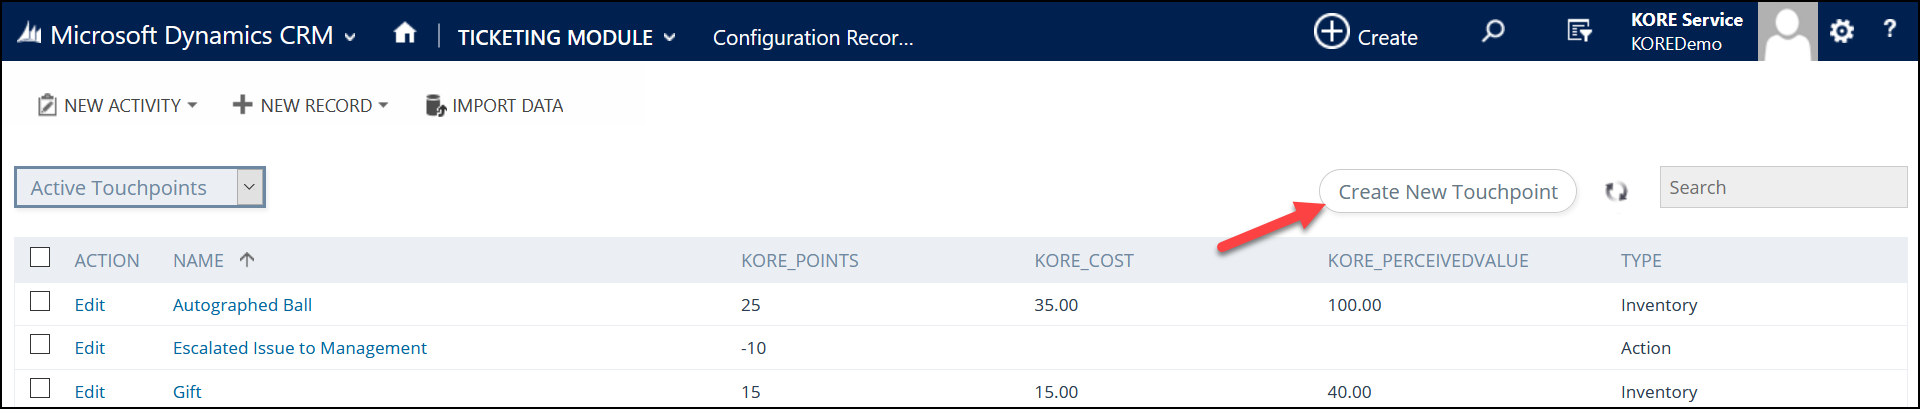
On the following screen, you can see any existing touchpoints you have. Click the “Create New Touchpoint” button to add a new one.
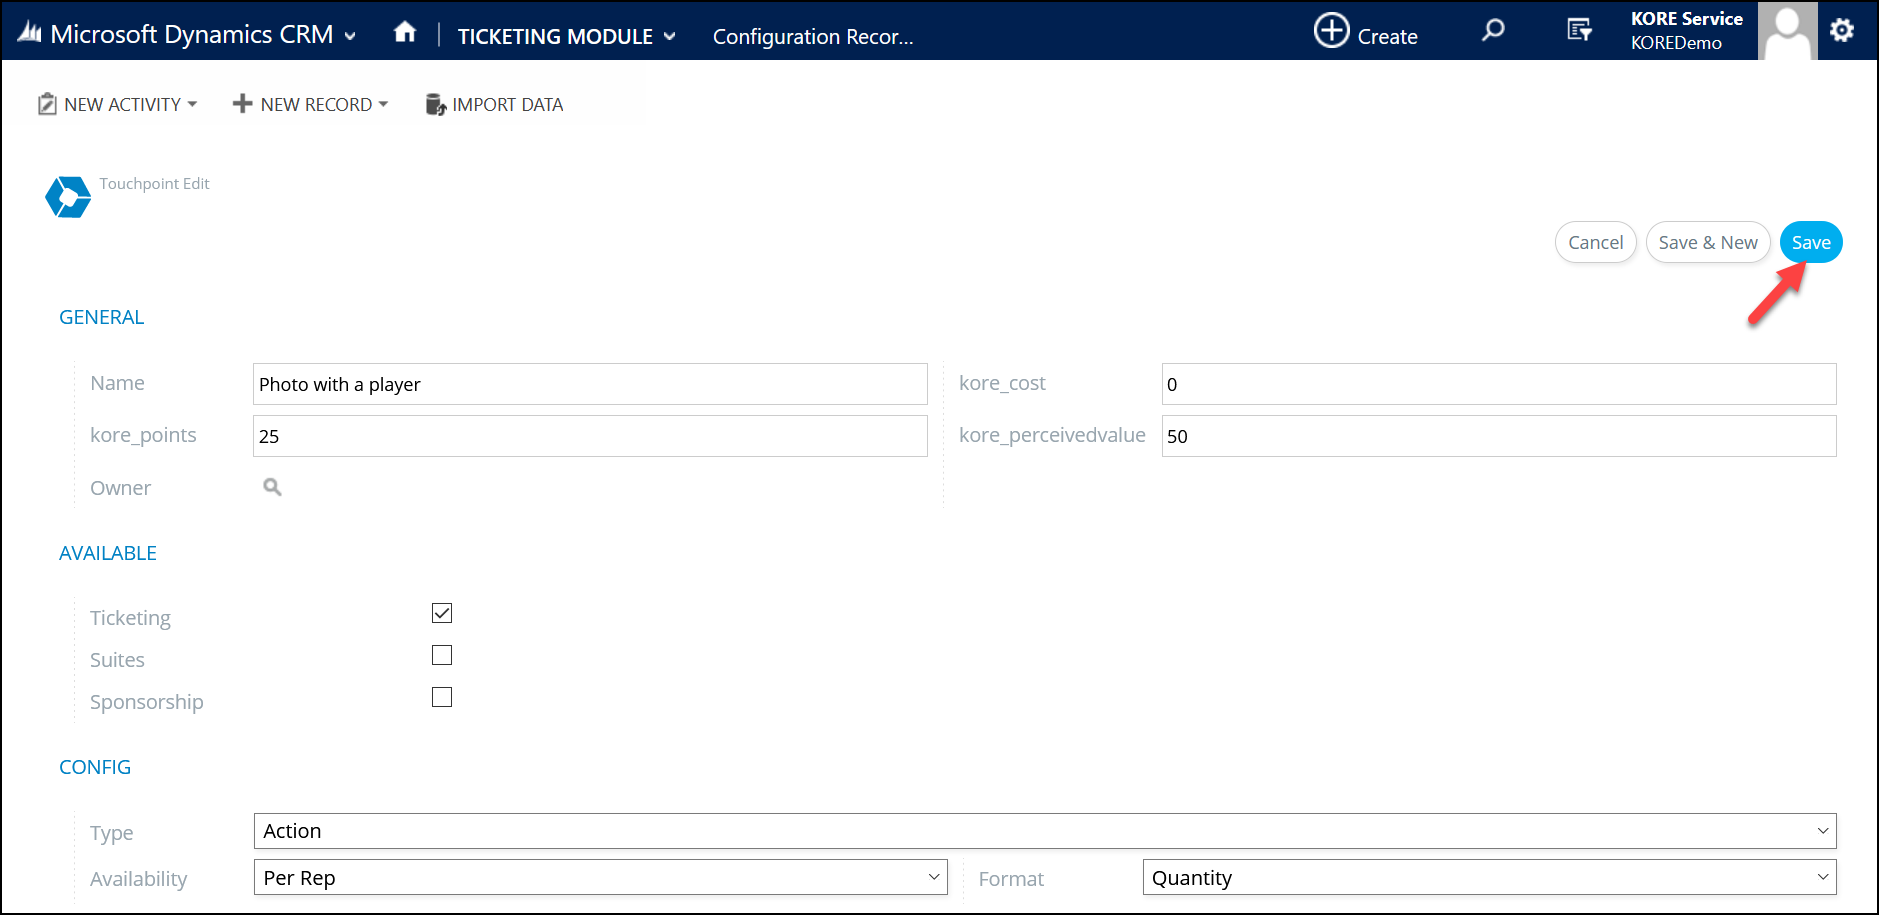
This opens a form. Fill in the fields, then click “Save”.
- Name: The name of the touchpoint, such as “Photo with a player”.
- Points: The value of this touchpoint relative to others.
- Cost: The actual cost to your organization, if any, of offering this touchpoint.
- Perceived Value: The amount a fan might expect the touchpoint to be worth, such as $50 for a free seat upgrade.
- Type: Use “Action” for things your staff does (such as a photo with a player) and “Inventory” for physical goods (such as an autographed jersey).
- Availability: If there is a maximum quantity for the touchpoint, use “overall” or “per rep” to specify which the limit applies to.
- Format: If there is an availability limit, it can apply to the quantity provided (such as fans invited to the field during pre-game ceremonies) or the monetary cost to your organization (such as offering free food and beverage). See “Configure inventory” below to set the limit.
Touchpoints can also be used in other KORE modules, if your organization subscribes to them. Use the check boxes to set which modules this touchpoint can be used with.
Configure inventory
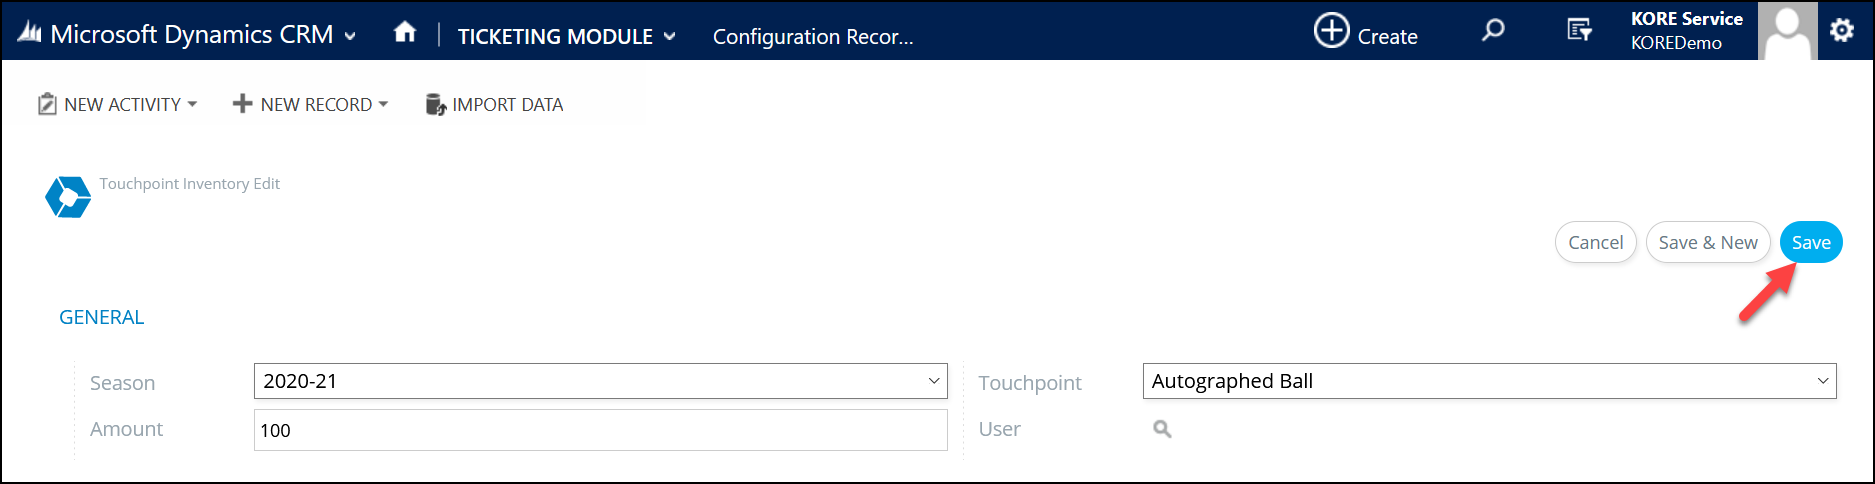
If you choose to restrict a touchpoint by quantity or price, open “Touchpoint Inventory” from the “Configuration Records” screen. On this page, you can click the Create New Touchpoint Inventory button or edit an existing inventory limit.
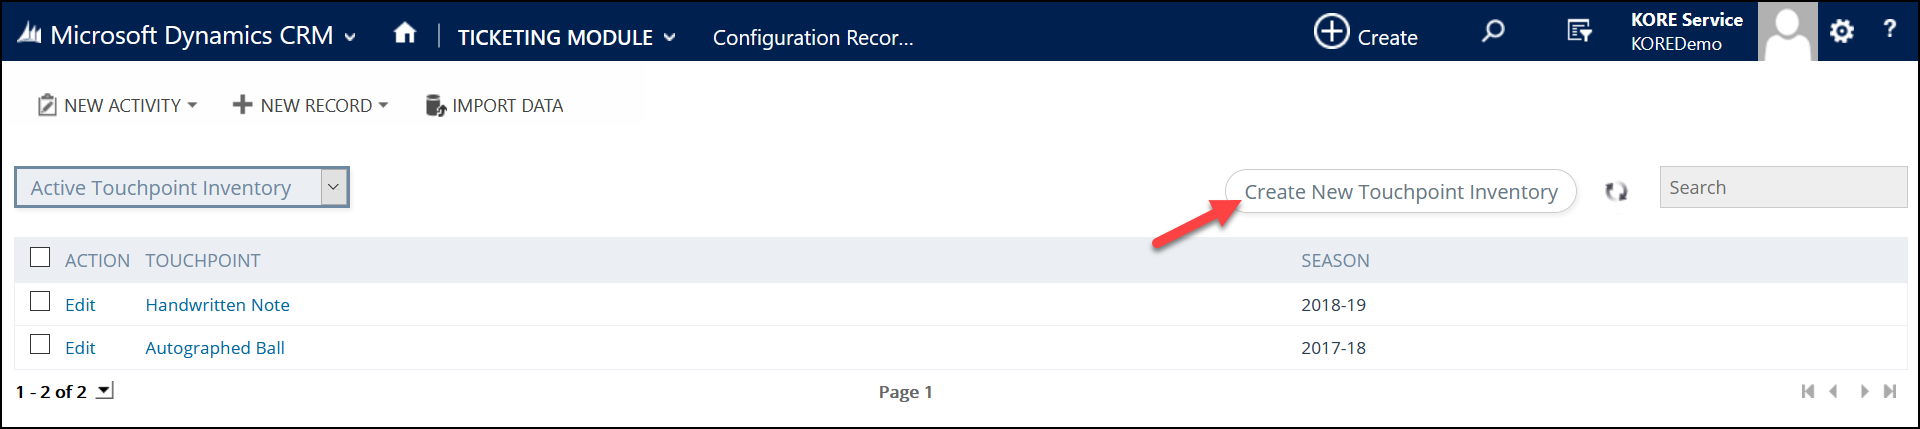
Use the drop-down menus to select which season and touchpoint the limit will apply to. Then, enter the numeric quantity or price limit (as configured in the previous step) in the Amount field. Leave the User field empty unless KORE Success or Support advises you to use it. When finished, click the Save button.
Create touchpoint goals
A touchpoint goal is how many points worth of value you want to deliver to a contact. Goals apply to only one contact each but can be created in bulk.
Begin by opening the Configuration Records screen. Next, find “Touchpoint Goals” in the KORE section. The following page lists any existing touchpoint goals.
One at a time
Use the “Create New Touchpoint Goal” button to add one.

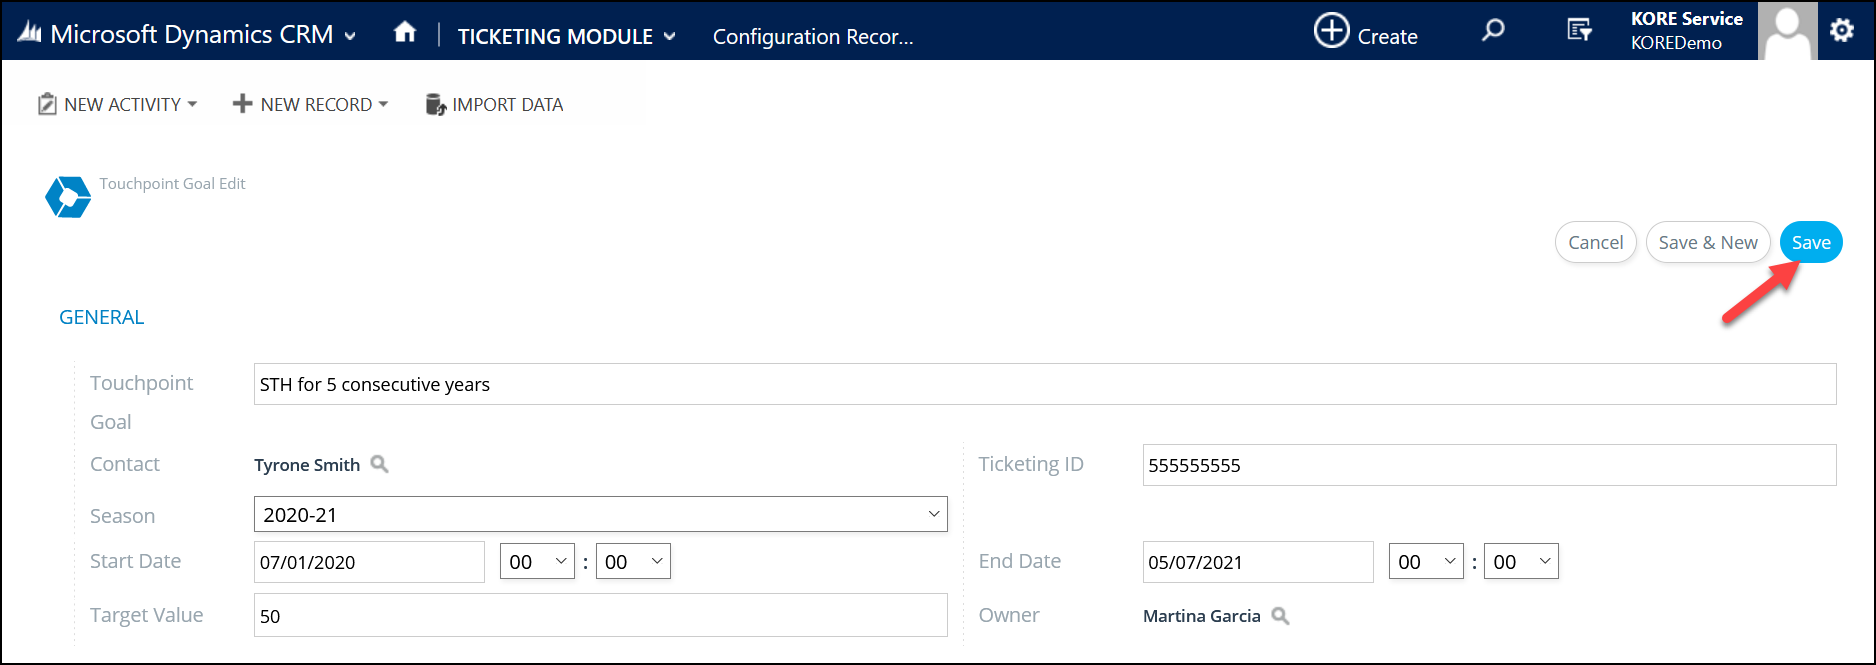
This opens a form. Fill in the fields, then click “Save”.
- Touchpoint Goal: A name for the goal that will be displayed in your CRM
- Contact: The person this goal applies to
- Ticketing ID: The ticketing account number for this contact
- Season: The season the goal is related to
- Start and End Dates: The date range (with optional times of day) where touchpoints counted toward this goal
- Target Value: The number of points this contact should reach
- Owner: The representative responsible for meeting this goal
In bulk
To create several touchpoint goals at once, you’ll need to create an Excel sheet containing the details. To begin, select the “Excel Import/Export” button. This will open the Import/Export tool in a new browser tab or window.

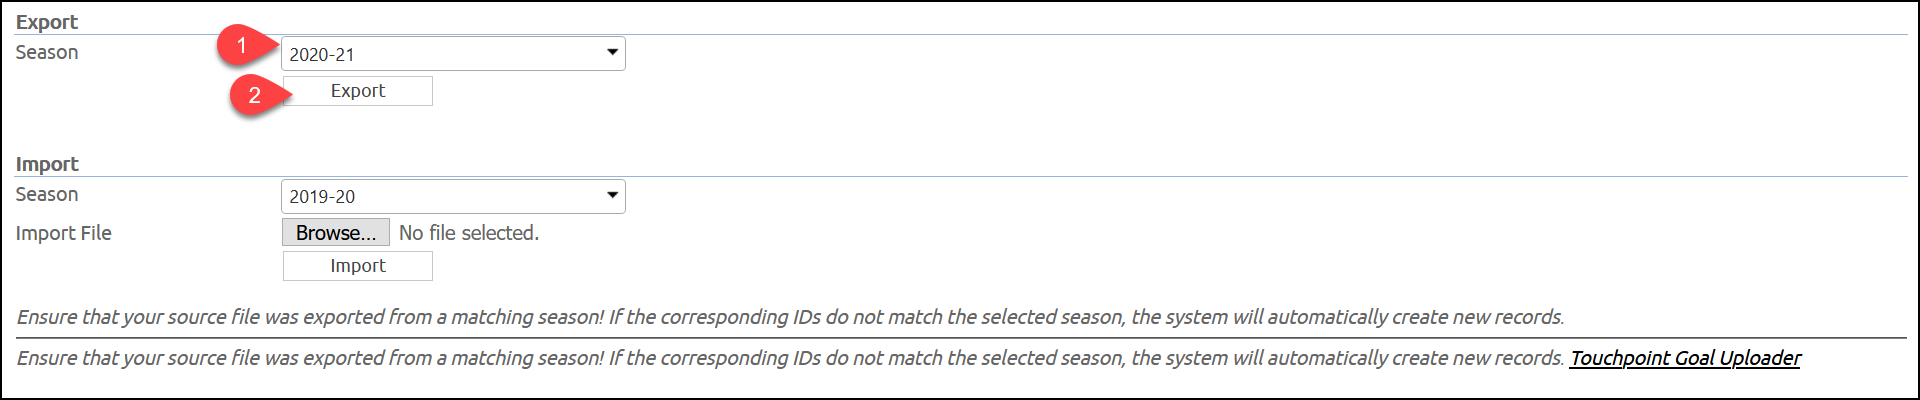
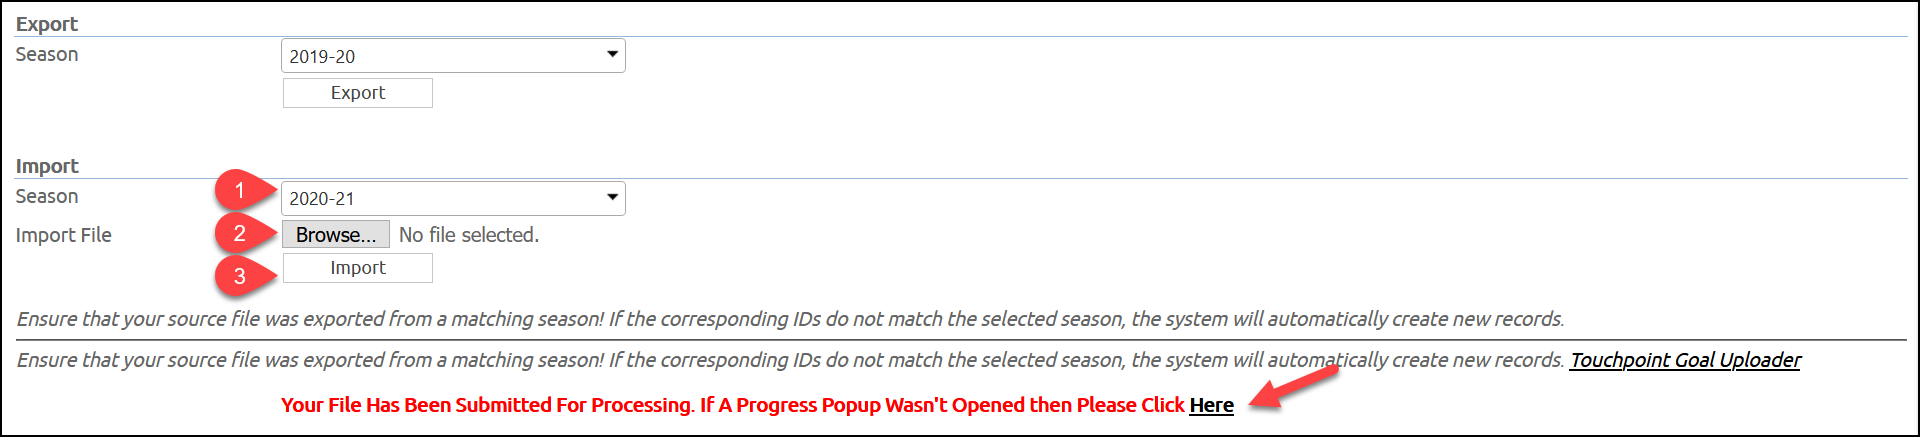
Next, look for the “Export” section and select the season you want to set goals for. Then click the “Export” button and save the spreadsheet.
Open the file in Excel. If it is opened in Protected View, click the “Enable Editing” button at the top.
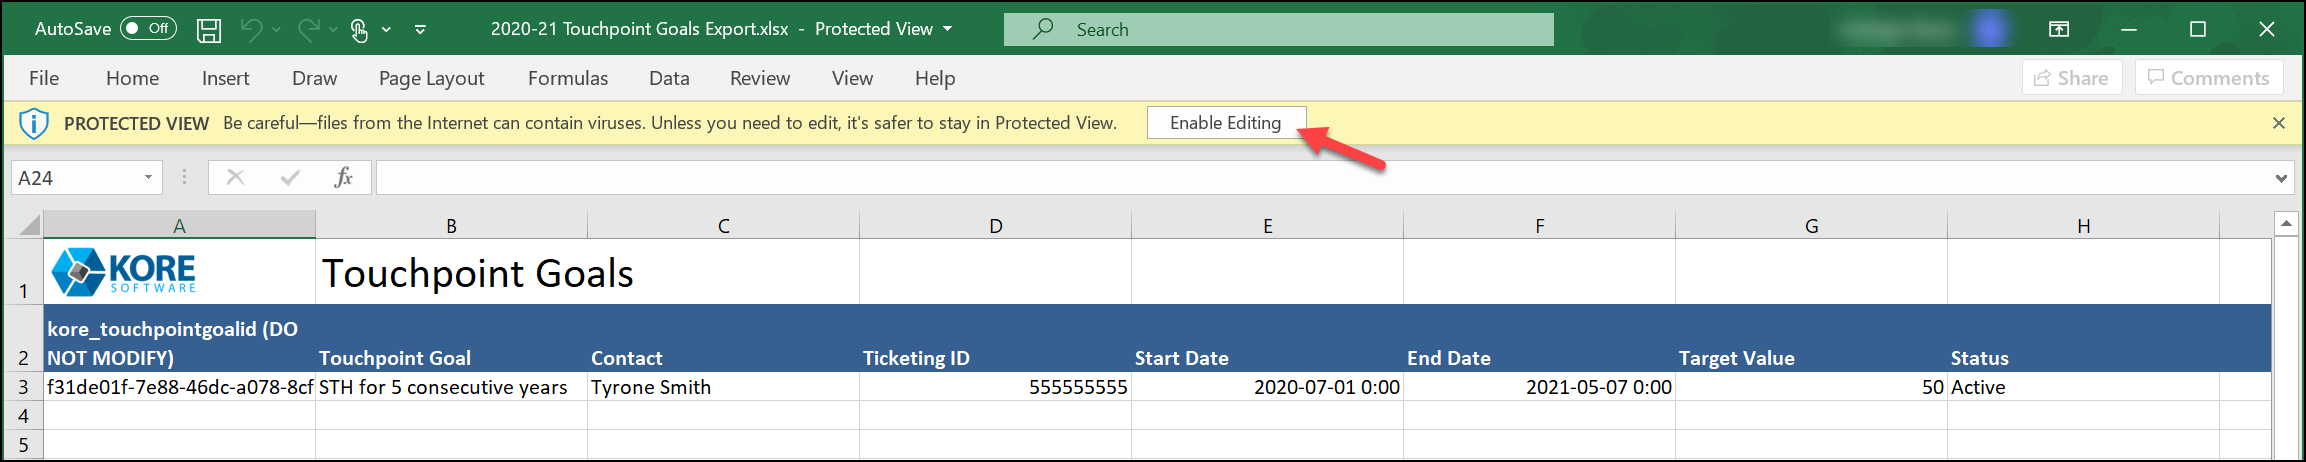
In the spreadsheet, enter each new touchpoint goal on a new line. Leave the ‘kore_touchpointgoalid’ field blank; one will be assigned after you upload the spreadsheet. You can also make changes to any existing goals in the sheet as long as you don’t modify the ‘kore_touchpointgoalid’ field.
Note: Removing an existing line from the spreadsheet will not delete or deactivate the goal when you upload it in the next step. You can leave the lines in place or remove them, whichever suits your workflow best.
When finished, save your file and return to the Import/Export tool. Select the correct season in the Import section, then click “Browse” and locate your updated file. Finally, click “Import” to begin the process. The tool will acknowledge your upload and provide a progress page. (You may need to open it manually if your browser blocks the pop-up.)
Once processing is complete, you can click “View Results” to see any errors you may need to correct.
