Overview
CRMs provide tools for tracking your organization’s interactions with clients, but that information isn’t always handy or easily customizable. With KORE Ticketing, everything you need is in one place—no more frantically clicking around in the middle of a phone call.
Note: The activity screen is sometimes referred to as the call screen. They’re the same thing.
Activity grid
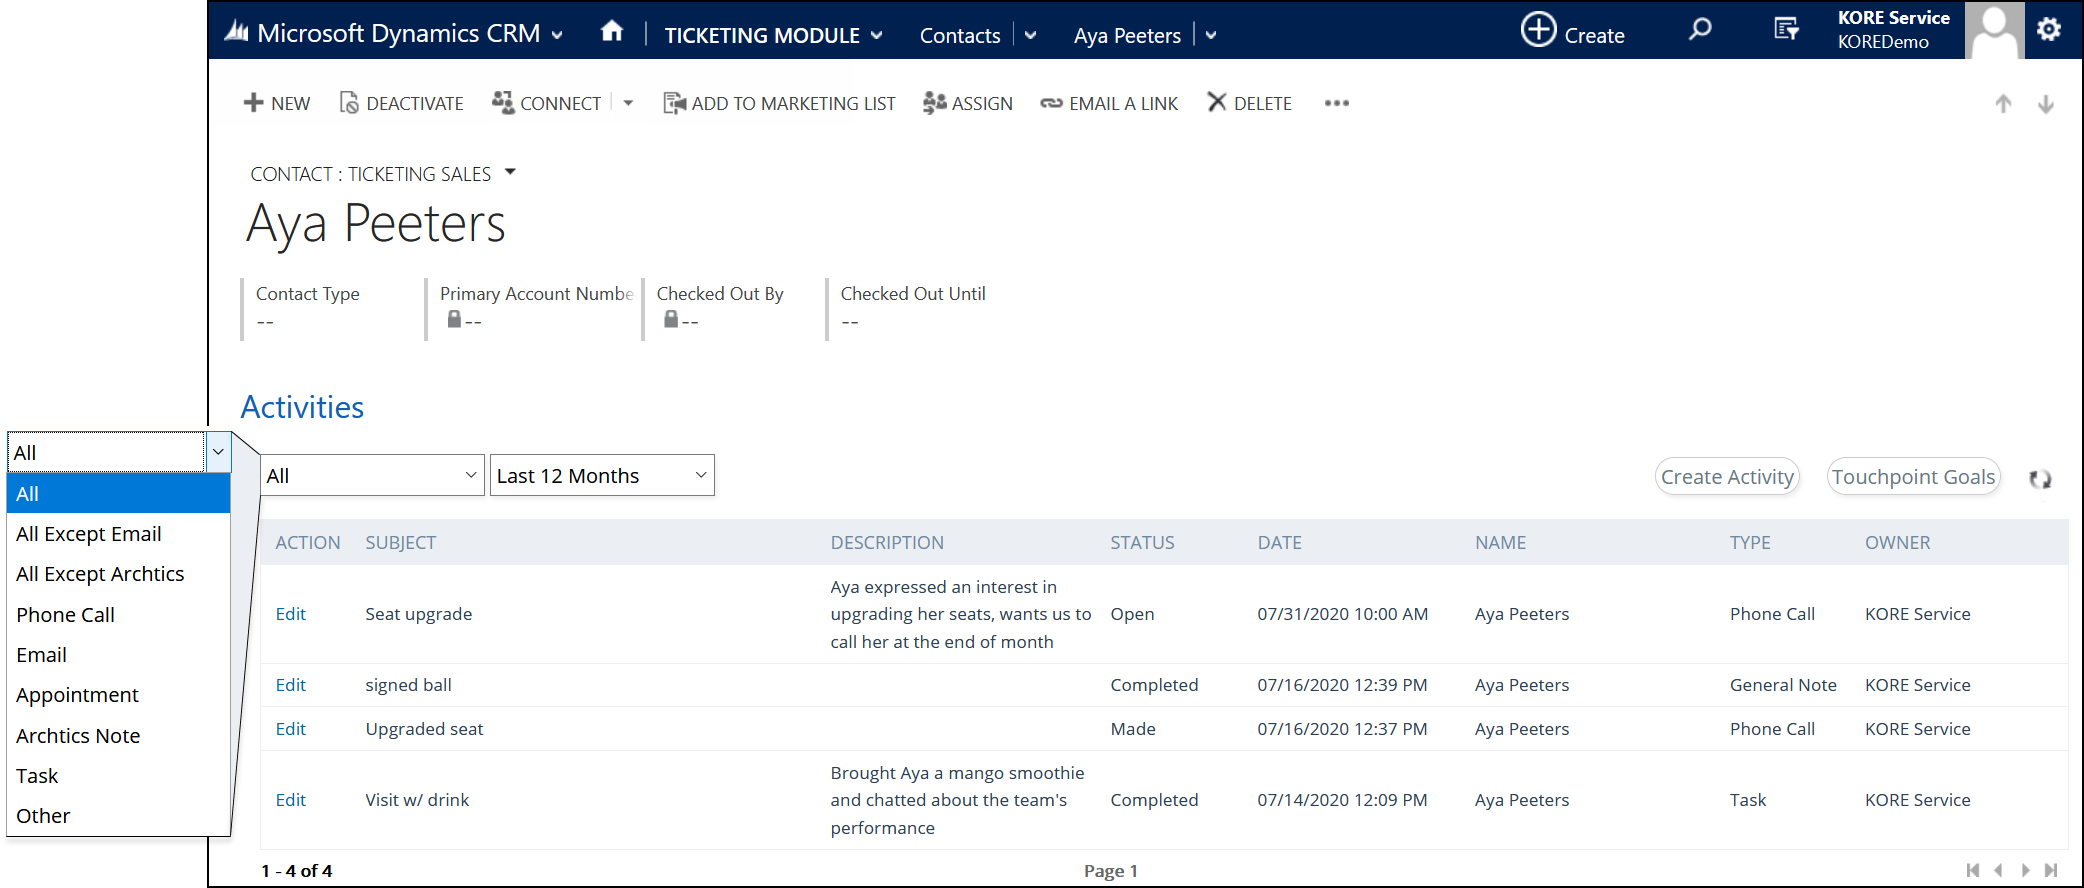
The activity grid is shown on contact and account pages. It lists activities by date, but you can click any column header to sort by other criteria. It includes both sales and service activities in any state (such as completed or scheduled). You can also use the drop-down menu to choose what type of activities to show.
Create an activity
From the contact or account page’s activity grid, click the Create Activity button to open the activity screen in a new window. This screen contains several sections. (If the window doesn’t open, check your browser’s pop-up blocker.)

Recipient info
This section provides different details depending on if the activity is for a contact or an account. For contacts, you can mark the contact as checked out if you haven’t already.
Dynamics users can also use the buttons (if your CRM manager configures them) to open an email template and customize your message before sending. Unfortunately, we are unable to provide these buttons in Salesforce.
For accounts, you can select the contact person you‘re interacting with. If they aren’t in the drop-down list, use the Create Contact button to add them.
You can click the contact’s (or account’s) name to reopen their contact (or account) page. If your phone system is integrated with your PC, just click a phone number to call it.
Warning: The icon next to the phone number is a button used to change its status. Click the red X to mark the number as “do not call” or the green check to mark a phone number as okay to call. The green check mark does NOT mean you can call that number!
Activity details
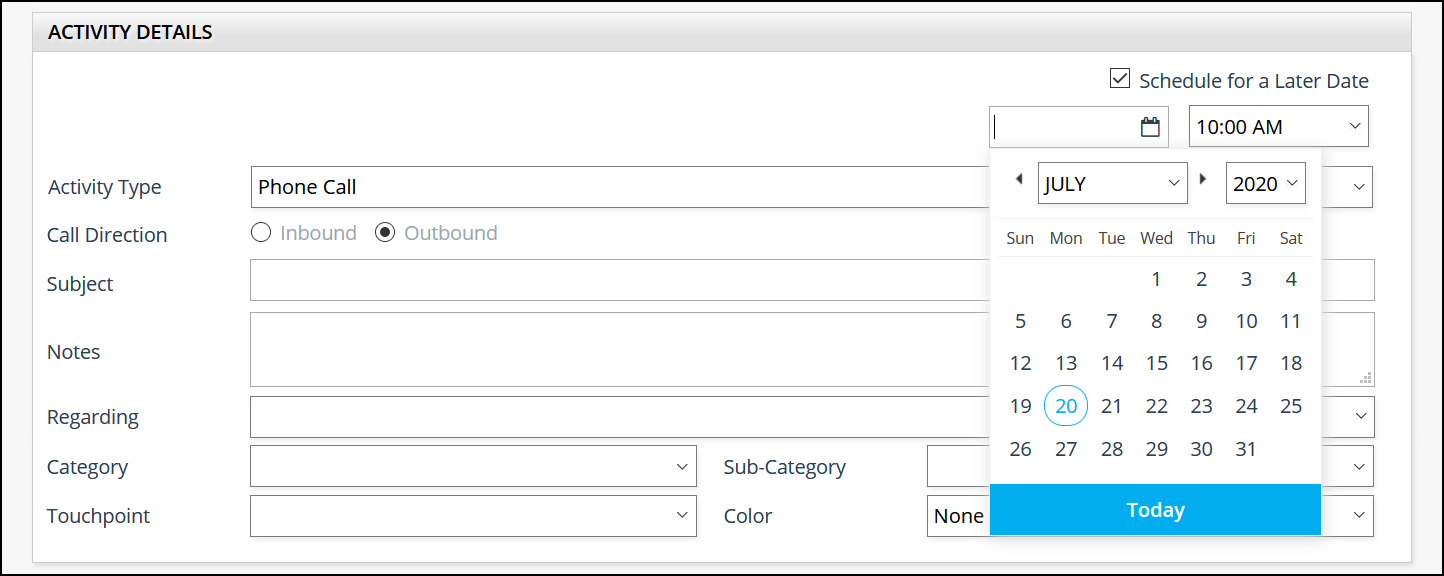
By default, we assume you’re entering the activity during or just after completing it. But if you’re instead scheduling a future activity, select the Schedule for a Later Date checkbox to choose a date and time. Once saved, the scheduled activity will be available on your to-do list. (The Save As Completed button at the bottom of the screen will change to Save.)
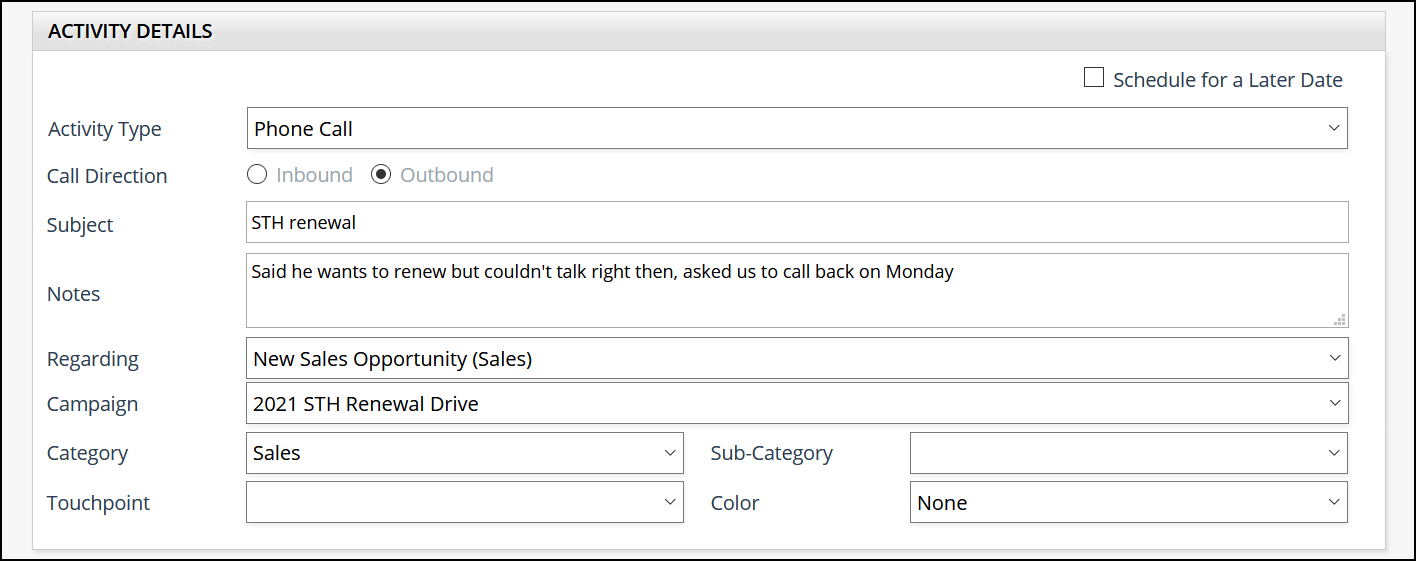
Select an Activity Type from the drop-down menu. CRM managers can customize this list with new types (such as a text message or LinkedIn message). Depending on the selected type, the fields in this section may change slightly.
Each activity requires a subject. The notes field is optional—use it to provide additional details.
Use the Regarding drop-down menu to choose an existing TSO, if applicable. If you don’t have one, choose “new sales opportunity” or “service case” which will add the respective section to the form. Additionally, the Campaign field will become visible and you can choose which campaign to connect it to. (There’s no need to specify a campaign for an existing TSO.)
The category, sub-category, and color fields are optional—follow your organization’s guidance. CRM managers can create categories and sub-categories using the CRM’s built-in object manager. The color field has no inherent meaning outside of what your organization uses it for.
If your organization uses touchpoints, use the drop-down menu to record any special interaction you had.
Activity history
This section provides you a quick view of your organization’s history with this contact or account. Click the icon in the heading to expand the list. This is the same information available in the activity grid described earlier.

Fan profile
This section is only available for contacts, not accounts.
Many organizations like to collect additional personal details about fans. In this section, you can add, update, and view such details. The contact record will be updated when you save this activity. Your CRM manager controls what fields are available here.

Follow-up
Often, you’ll need to plan a follow-up activity. In this section, you can easily schedule one without leaving the activity page. Use the checkmark in the heading to create a follow-up. (This is checked by default.) The subject will be filled in automatically based on the current activity, but you can change it. Once saved, the scheduled follow-up activity will be available on your to-do list.

Manage a scheduled activity
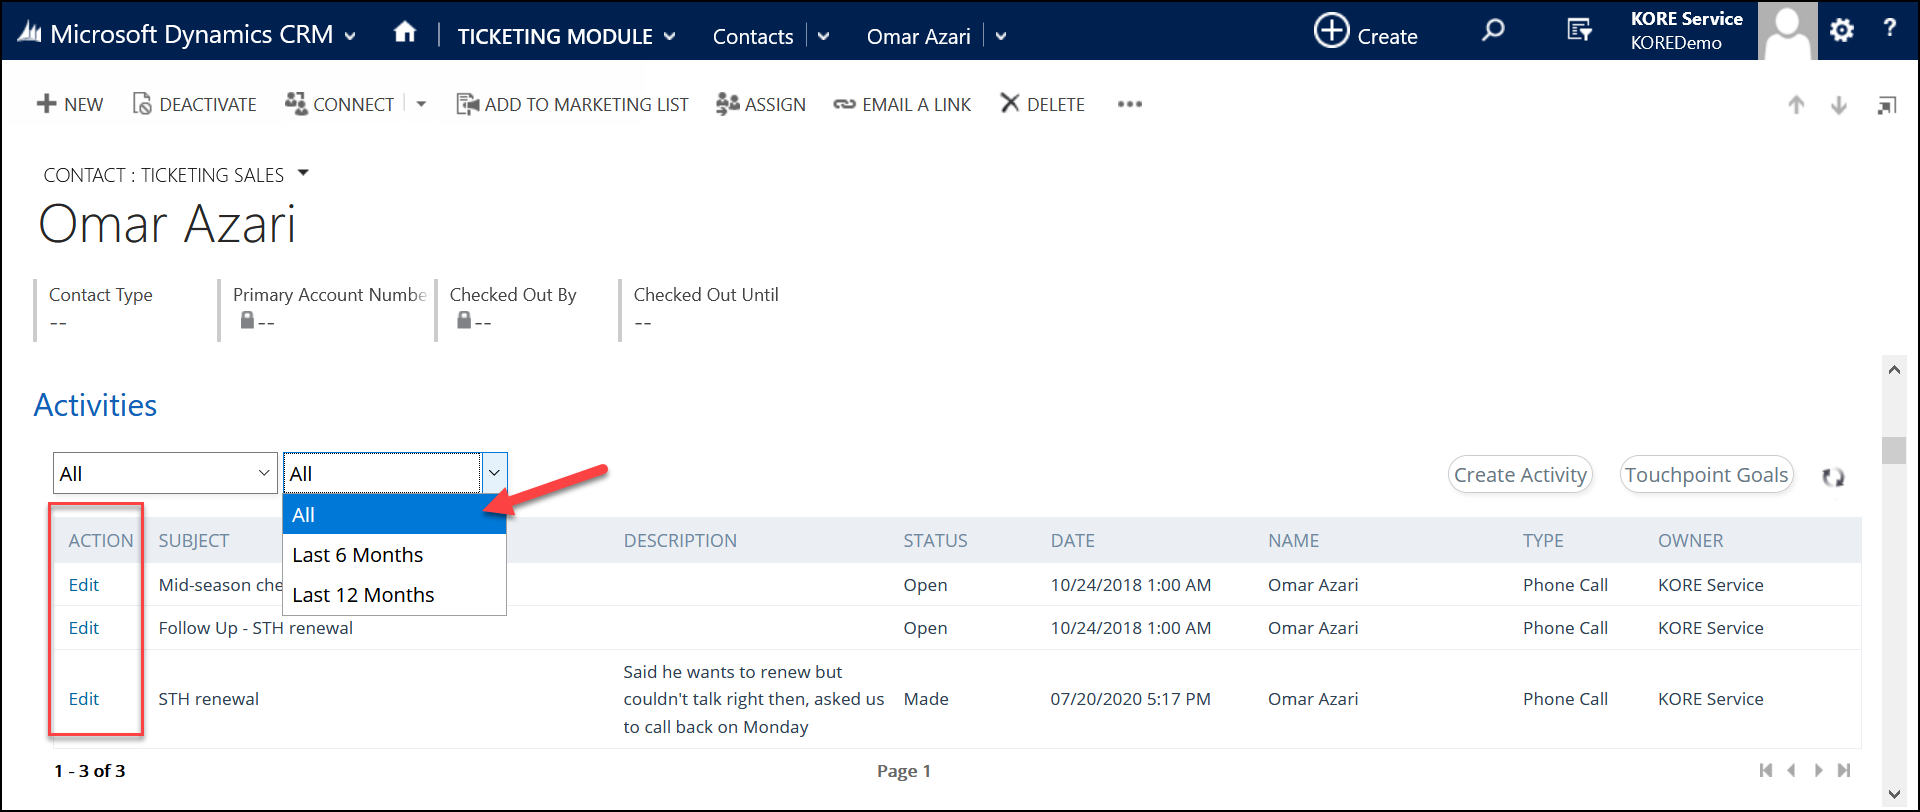
On a contact page, you can view scheduled activities in the activity grid. To do so, change the date selector to "All". The activity grid provides an Edit button for each activity.
Complete or reschedule
When you click Edit to open a scheduled activity, "Schedule for a Later Date" will no longer be checked. Instead, we assume that you're completing the activity now, regardless of what date it was scheduled for. Fill in the activity details and click the Save As Completed button. If you instead need to reschedule the activity, check the box again and enter the new date and time. The button will change to a Save button since you aren't completing the activity at this time.
Cancel
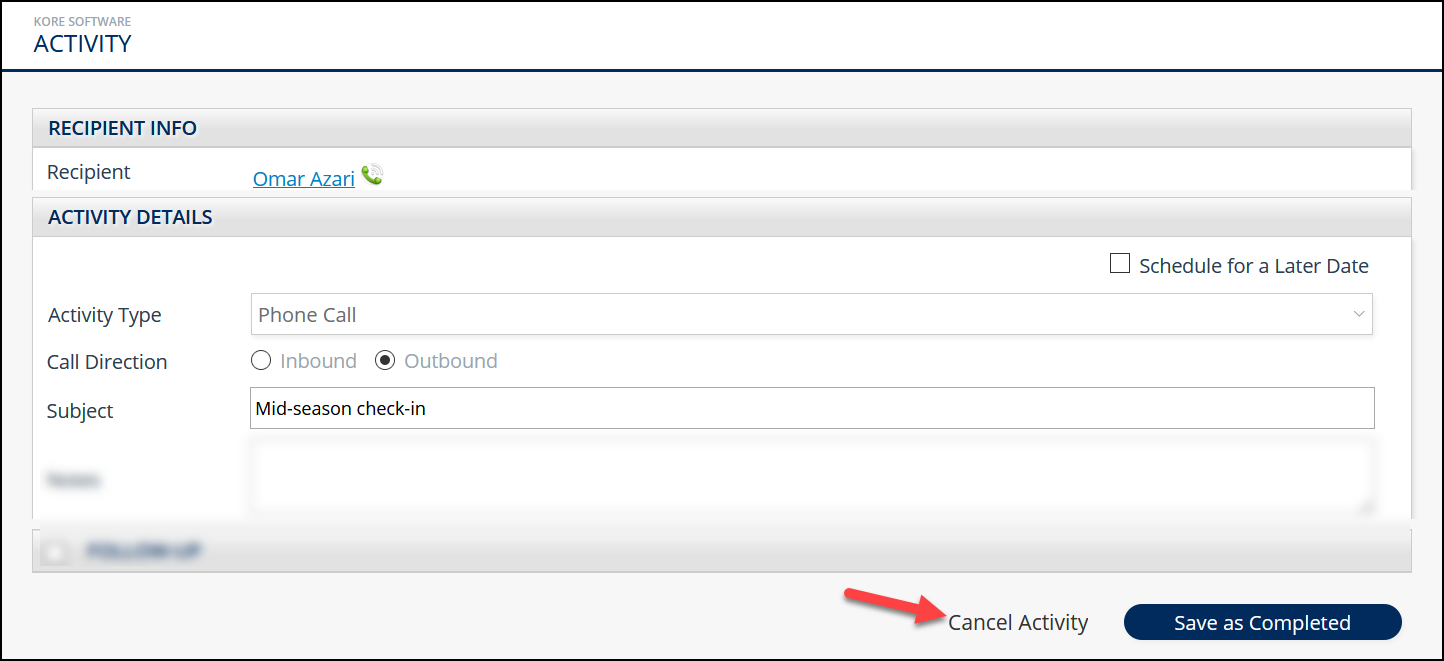
If for some reason you no longer want to complete a scheduled activity, click Edit to open the scheduled activity. At the bottom of the activity screen, click the Cancel Activity button. This action cannot be undone, so you will be prompted to confirm the cancellation.
Reassign
To reassign a scheduled activity to another user, use your CRM's built-in activity management.
Dynamics
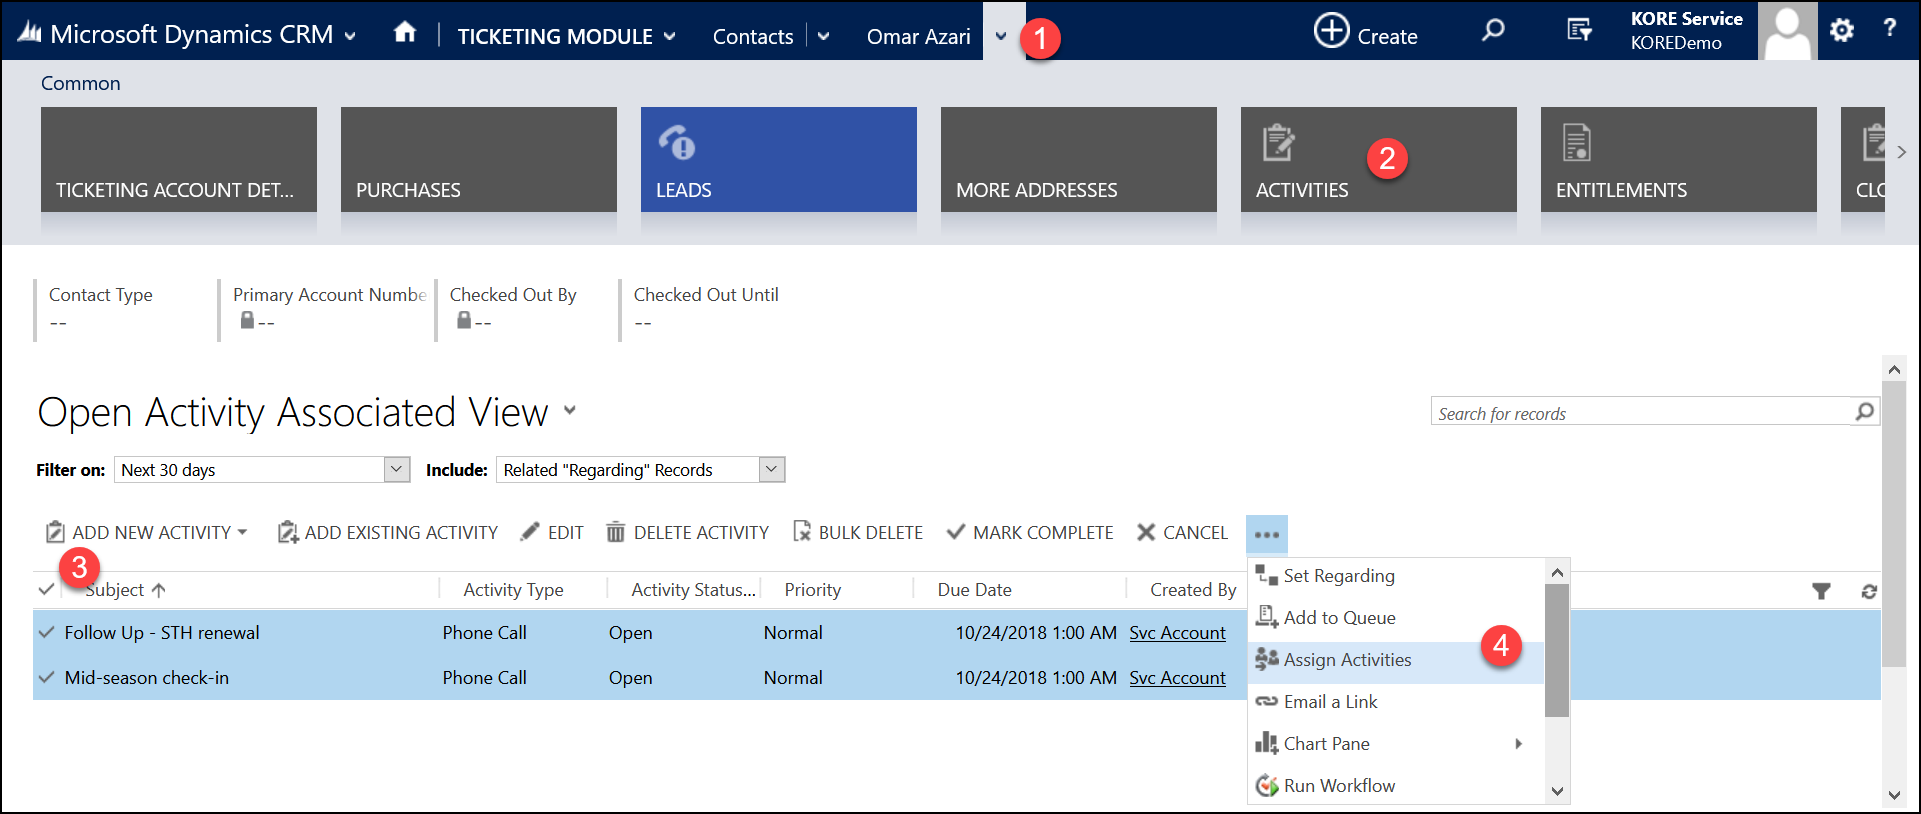
Open the contact's activities page, select the activities to reassign, and select Assign Activities.
Salesforce
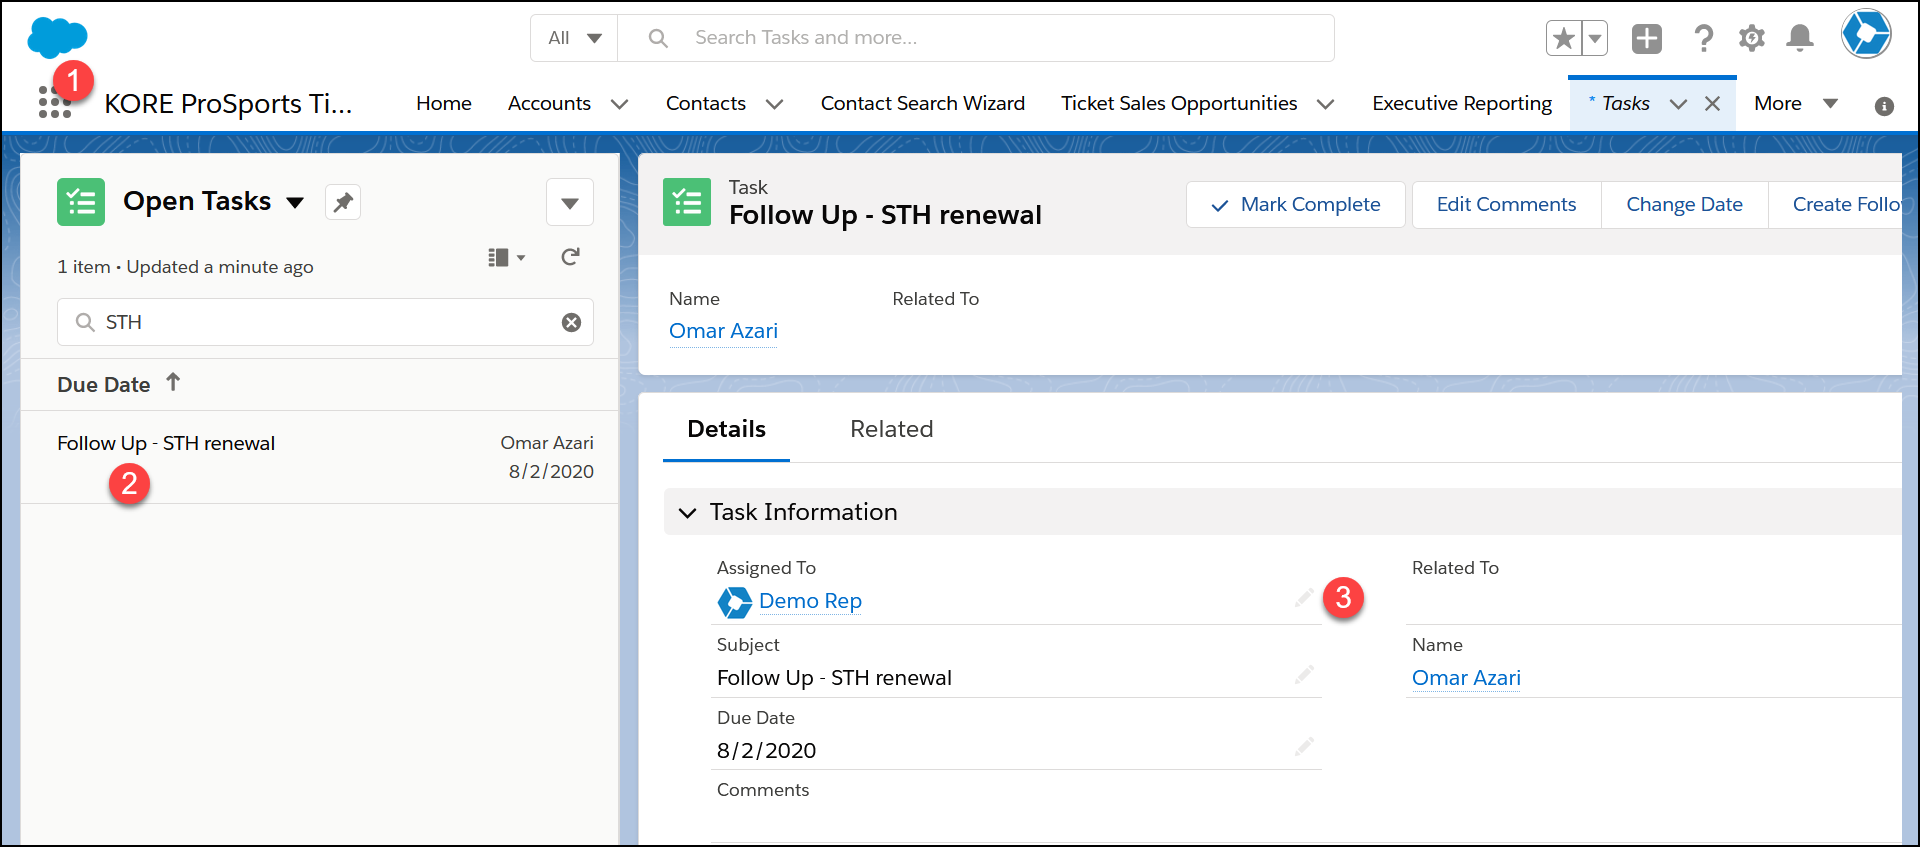
Open the App Launcher and select the Tasks app, locate the desired activity, and click the pencil icon next to the assignee.
