Overview
Customer attributes are traits that indicate a contact's likelihood to purchase tickets or behave in a certain way. These attributes are typically provided by a vendor, such as LiveAnalytics or Turnkey Sports & Entertainment. Teams can also create their own predictive scoring models and customize the customer attributes.
KORE Ticketing displays customer attributes (or scores) in the contact dashboard on the contact screen. This provides sales representatives with additional insights, such as a prospect’s past buying experiences with your organization.
If your organization uses Archtics, Ticketmaster provides customer attributes through LiveAnalytics. You can upload these attributes into KORE Ticketing.
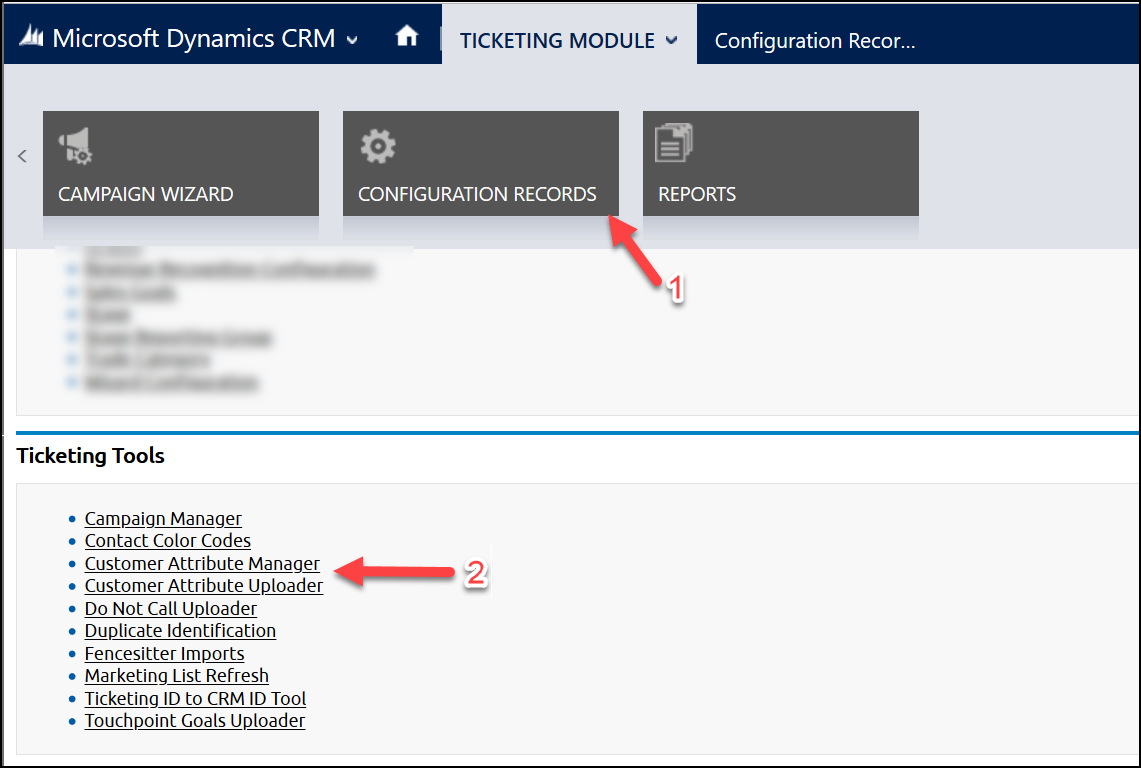
The Customer Attribute Uploader and Manager can be found on the Configuration Records page within KORE Ticketing.

Displaying attributes
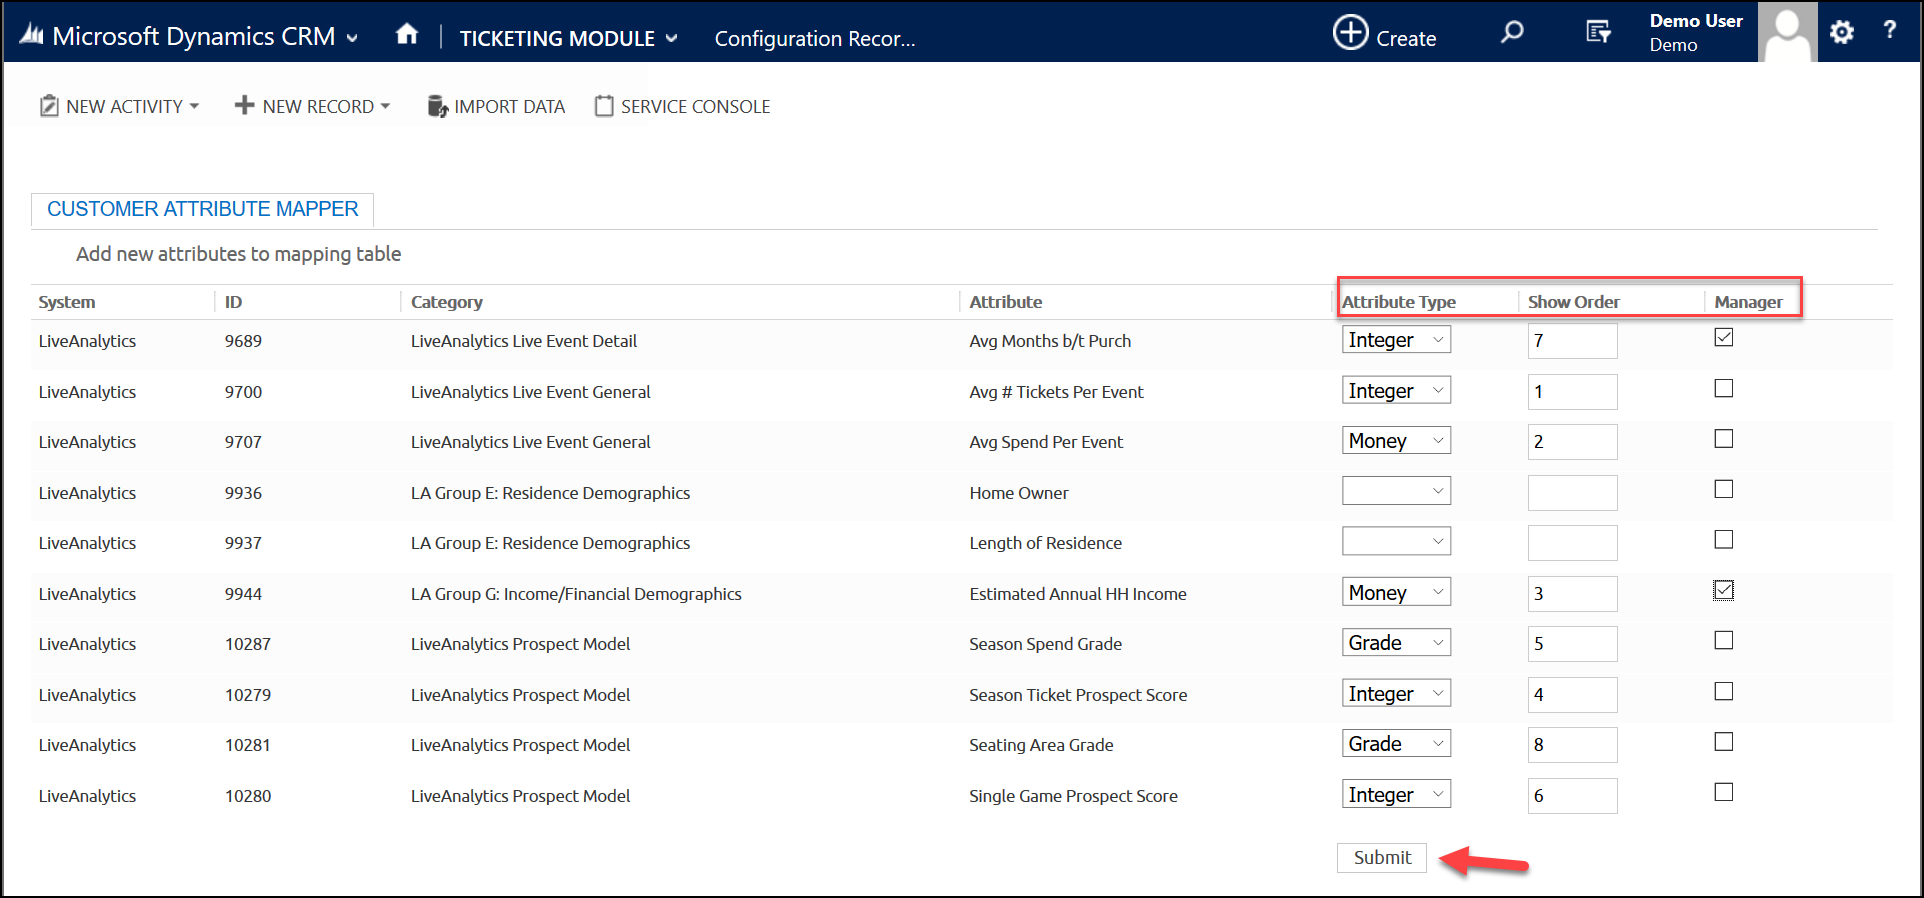
The Customer Attribute Manager displays all the customer attributes available to you. There are three settings you can adjust:
- Attribute Type: The kind of value the entry should have, such as an integer (whole number) or money amount.
- Show Order: A number that specifies what order this field will be displayed in, relative to other customer attributes. If this is blank, the attribute will not be displayed on the contact screen.
- Manager: If the box is checked, only users with the Ticketing Manager role will see the attribute on the contact screen.
When you finish making changes, click the Submit button at the bottom of the page.

Uploading attributes
The Customer Attribute Uploader lets you upload a batch of data about your contacts. You can upload any number of attributes for any number of contacts, but each unique combination must be listed separately.
An attribute’s name is a field that will be displayed. Each one can have a different value for each contact. For example, you might have an attribute named “Enthusiasm” which you score each contact on from 1 to 5.
First, navigate to the Customer Attribute Uploader and download the ticketing attribute template. Open the Excel file and enable editing.
- Ticketing Database: Open the picklist and select which ticketing database to update. (There should only be one choice unless your org uses MultiDB.)
- AccountId: Enter the contact's ticketing system account ID.
- CustnameId: Currently unused. Leave blank.
- AttribSeqNum: Enter the number 1. (This indicates that the attribute is not a sub-component of another attribute and is necessary for compatibility.)
- AttributeId: A number that uniquely identifies this attribute.
- For existing attributes, find the AttributeId number in the ID column of the Customer Attribute Manager page.
- To create a new attribute, choose a unique number to identify it with.
- Category: The name of a group of related attributes. This enables them to be listed together in the Customer Attribute Manager.
- AttributeName: The text displayed on the contact screen for this field.
- AttributeValue: The value (number or text) for this contact-attribute pair.
- AttributeComment: An optional comment for your use while completing the spreadsheet.
For example, you might enter something like this:
|
Ticketing Database |
Account Id |
Cust name Id |
Attrib Seq Num |
Attribute Id |
Category |
Attribute Name |
Attribute Value |
Attribute Comment |
|
Team 1 |
55492 |
|
1 |
5813 |
Attitude |
Enthusiasm |
5 |
|
|
Team 1 |
55697 |
|
1 |
5813 |
Attitude |
Enthusiasm |
3 |
|
|
Team 1 |
55697 |
|
1 |
5127 |
Attitude |
Optimism |
Moderate |
|
When finished, save the Excel spreadsheet and return to the Customer Attribute Uploader page. Browse for the Excel file you saved, then click Submit to upload it. Finally, open the Customer Attribute Manager to enable any new attributes that you created by entering a number in the Show Order field.
