Overview
Touchpoints help your organization deliver great experiences to your ticketholders. A touchpoint is an interaction that keeps you in touch with a ticketholder: these could be seat upgrades, special pre-game events, autographed memorabilia, or anything else! Each different type of touchpoint is worth some number of points. Often, organizations set touchpoint goals for certain types of ticketholders—for example, you might want to ensure all your season ticketholders receive 50 “points” worth of attention and extras. You can also set a touchpoint goal for an individual contact.
Sometimes, a ticketholder might have a poor experience that you’d like to make up to them. You can use touchpoints with negative point values to account for this. For example, suppose venue security unfairly hassled a fan who did nothing wrong. This could be assigned -10 points, which you could try to make up to them with an in-seat visit from your rep at the next game, an autographed ball, or anything else. Of course, some people just love to complain—if a contact’s list of touchpoint activities contains several negative experiences, you can investigate whether they’re just taking advantage or if there’s a serious problem.
CRM managers configure touchpoints specifically for your organization’s needs and preferences.
Log a touchpoint activity
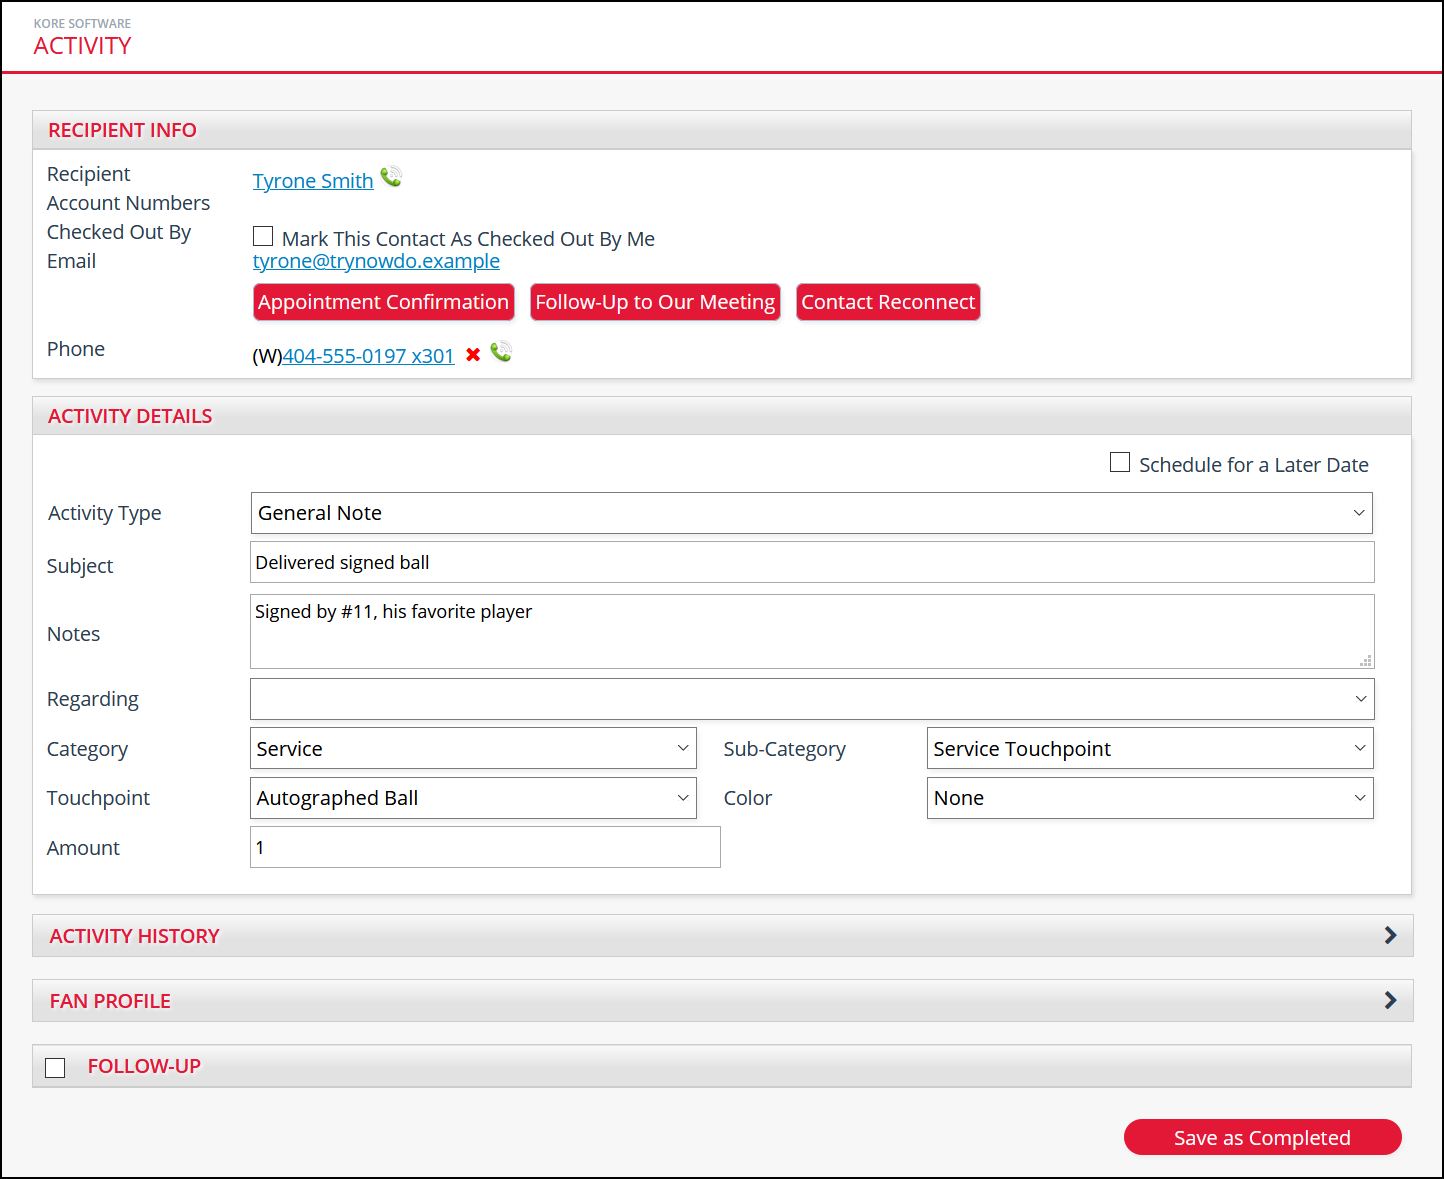
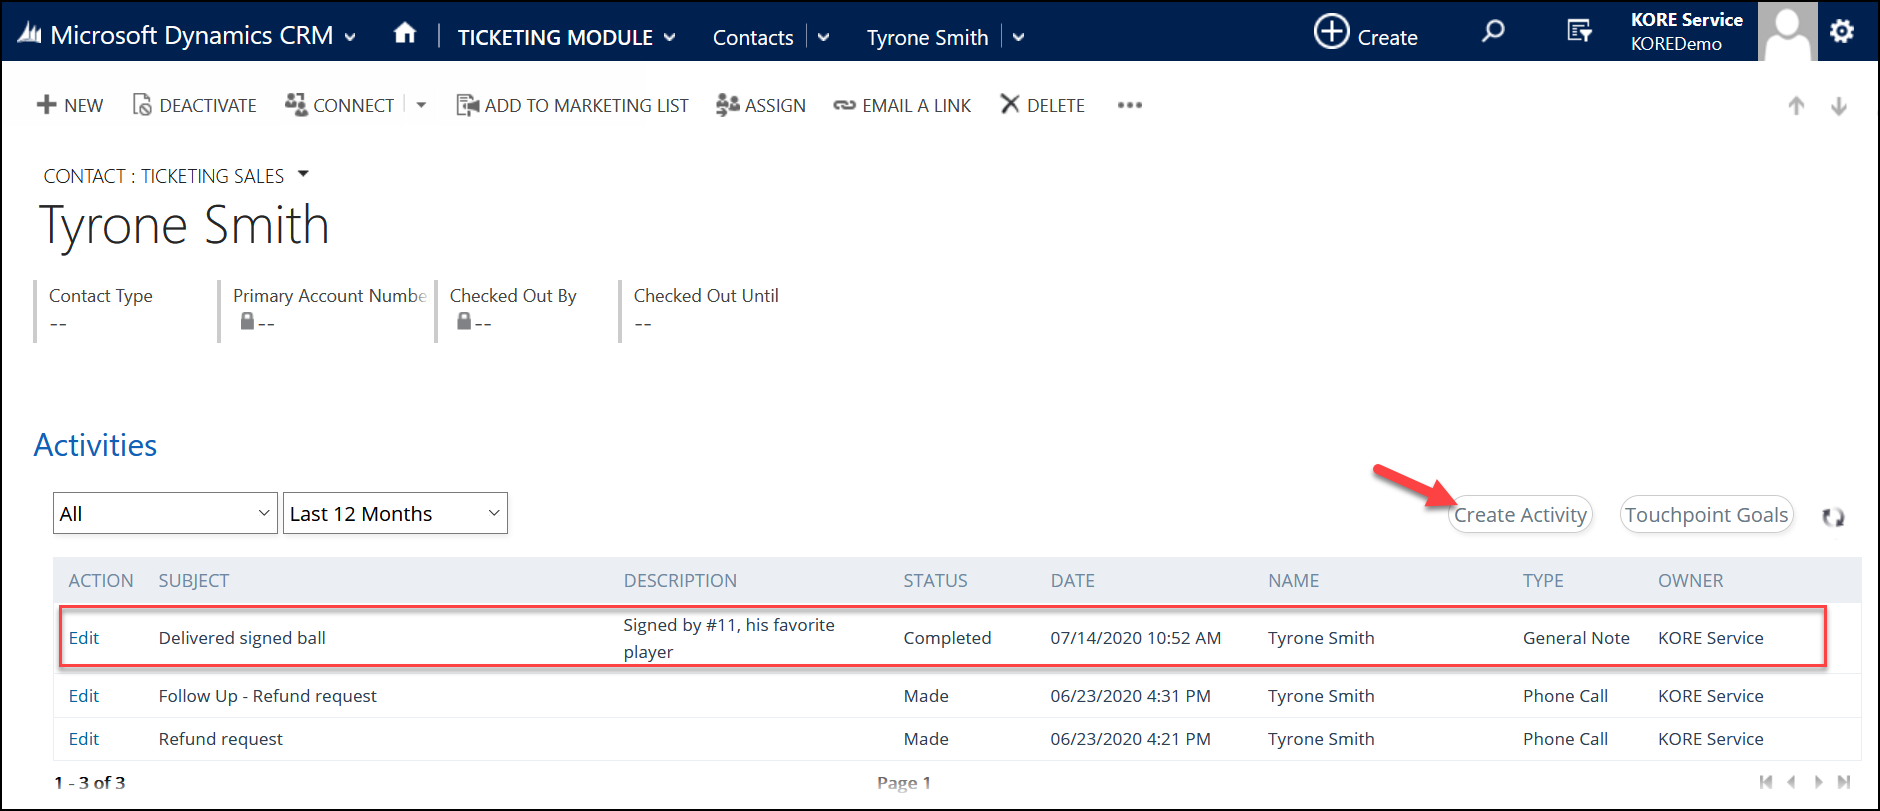
To log a touchpoint, open a contact page, find the Activity grid, and click the Create Activity button. In the new Activity window, select the appropriate touchpoint from the drop-down menu in the Activity Details section. Fill out the rest of the Activity form as usual and click Save As Completed. The touchpoint activity will then be shown in the Activity grid.


Bulk upload touchpoint activities
A lot of touchpoint activities happen when you’re away from the computer. To speed up entry, you can enter them in an Excel sheet to upload. First, open the Configuration Records page and find Touchpoint Importer in the KORE category.
Next, download the bulk touchpoint template offered on the page and save it. Open the file in Excel—if the file opens in Protected View, click the Enable Editing button. Fill out the spreadsheet with one touchpoint activity per line. When finished, save and upload the sheet.

After uploading, a progress window will open. (If your browser blocks the pop-up, click the provided link.) If there are any errors, use the View Results link to see them.
Note: There are three ways to identify the contact you had a touchpoint with: AccountID, Email, and ContactID. You only need to enter one of them. If you enter more than one, the system will only save the touchpoint activity if all the identifiers map to the same contact. Otherwise, an error will be reported for that line.
View progress toward a single goal
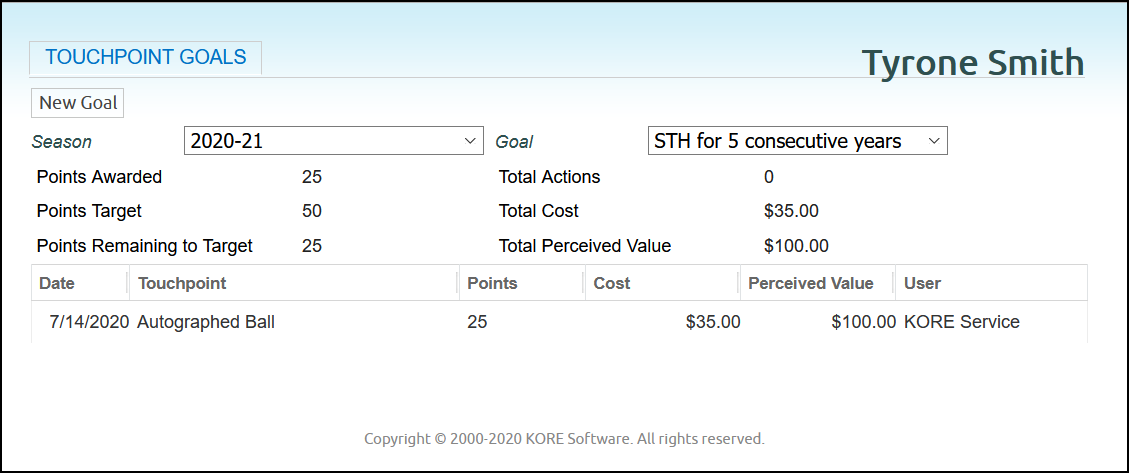
Click the Touchpoint Goals button to open a window and check your progress. Use the drop-down menus to select a different season or goal, if needed.

View progress toward multiple goals
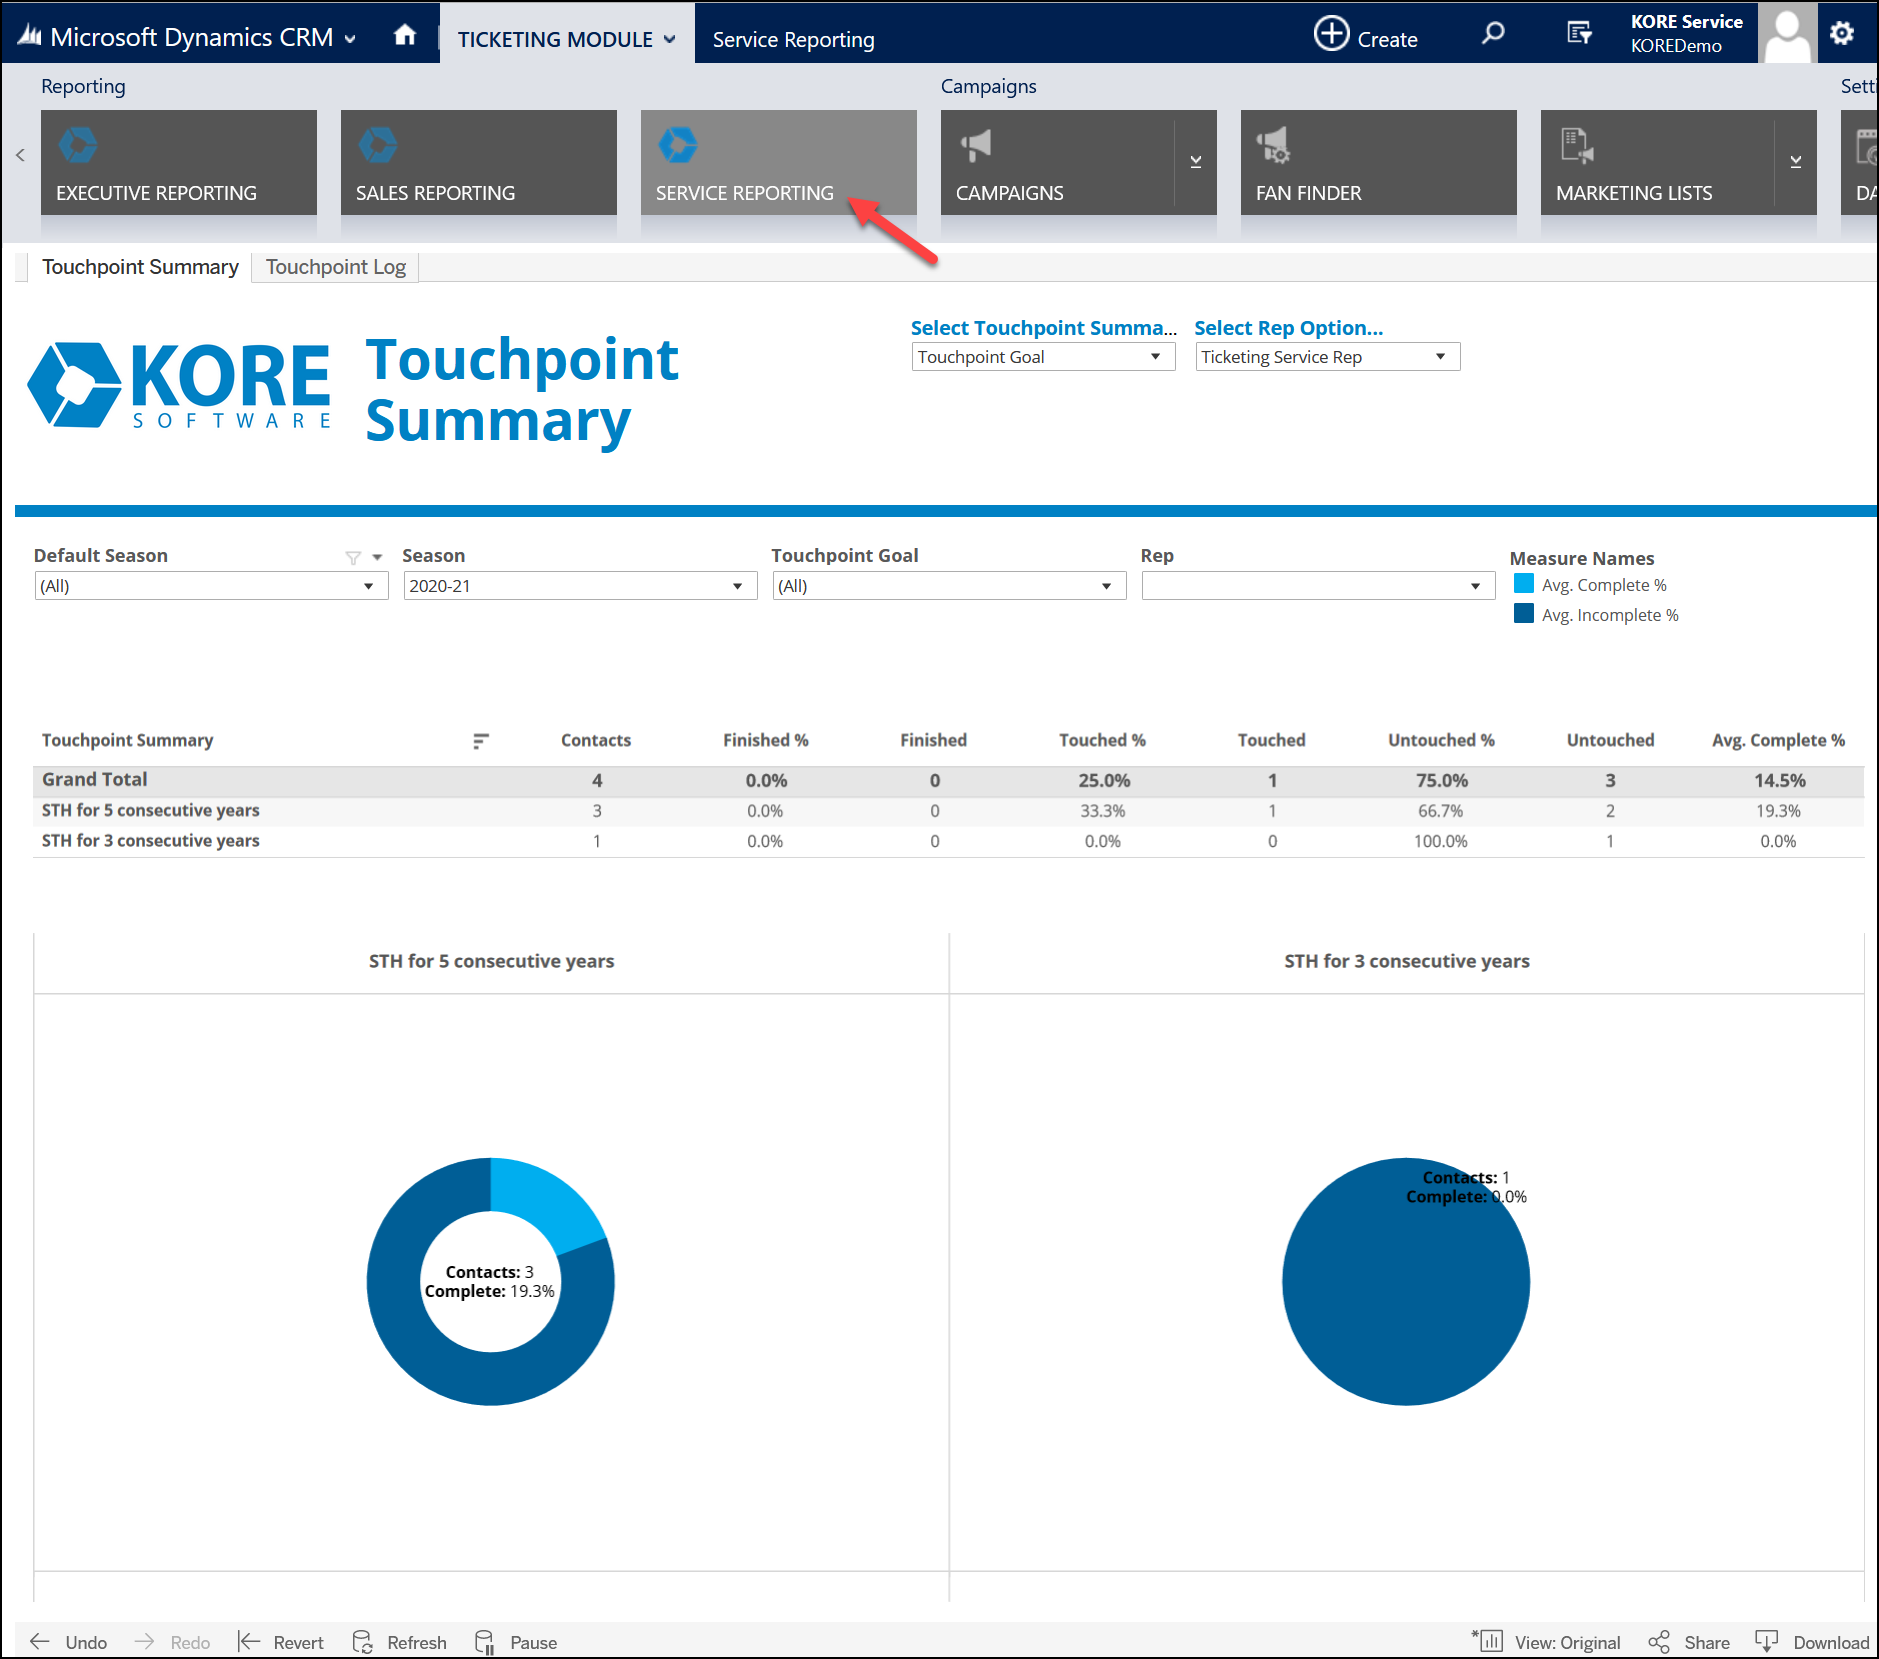
To view a summary of all your touchpoint goals, open Service Reporting within the Ticketing module. Here, you can use filters to view different sets of goals and overall progress. The report is powered by Tableau and uses cached data refreshed daily.
There are three levels of permission for accessing the report:
- Ticketing Reps: Only able to view their own data
- Ticketing Managers: Able to view data for any ticketing rep or manager
- Power Users: Able to view all data for all of your organization’s users, download workbooks and data sources, and publish content to Tableau Server
These user groups are managed by KORE. If you don’t have access to the report, ask your CRM manager to send a request to your KORE Success Consultant.

