Overview
Ticket groups let you select segments of your customers using data from your ticketing system. For example, you might create a ticket group for existing season ticket holders. You can also use more than one data point, such as single-game buyers who have spent over $1000 this season. You can target a campaign or marketing list using the ticket groups you set up.
Note: Ticket group memberships are updated once per day. New ticket groups and changes to existing ticket groups may not be available to use until the following day.
Create a ticket group
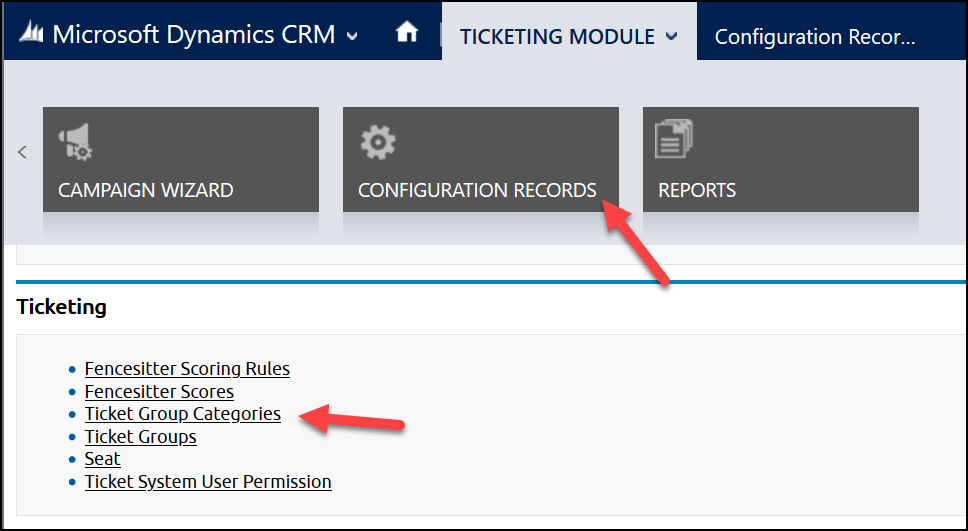
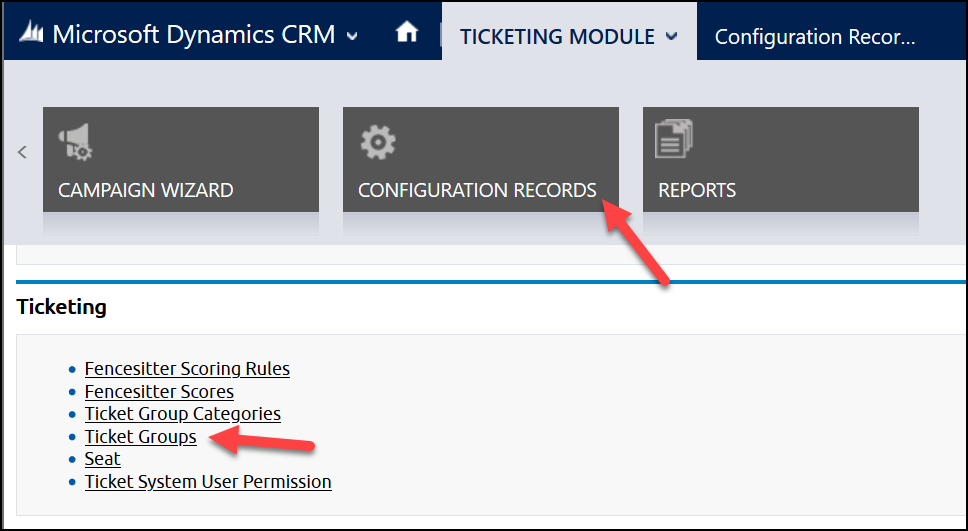
Begin by opening the Configuration Records page and selecting Ticket Groups. Then click the Create New Ticket Group button on the following page.

This will bring you to a form:
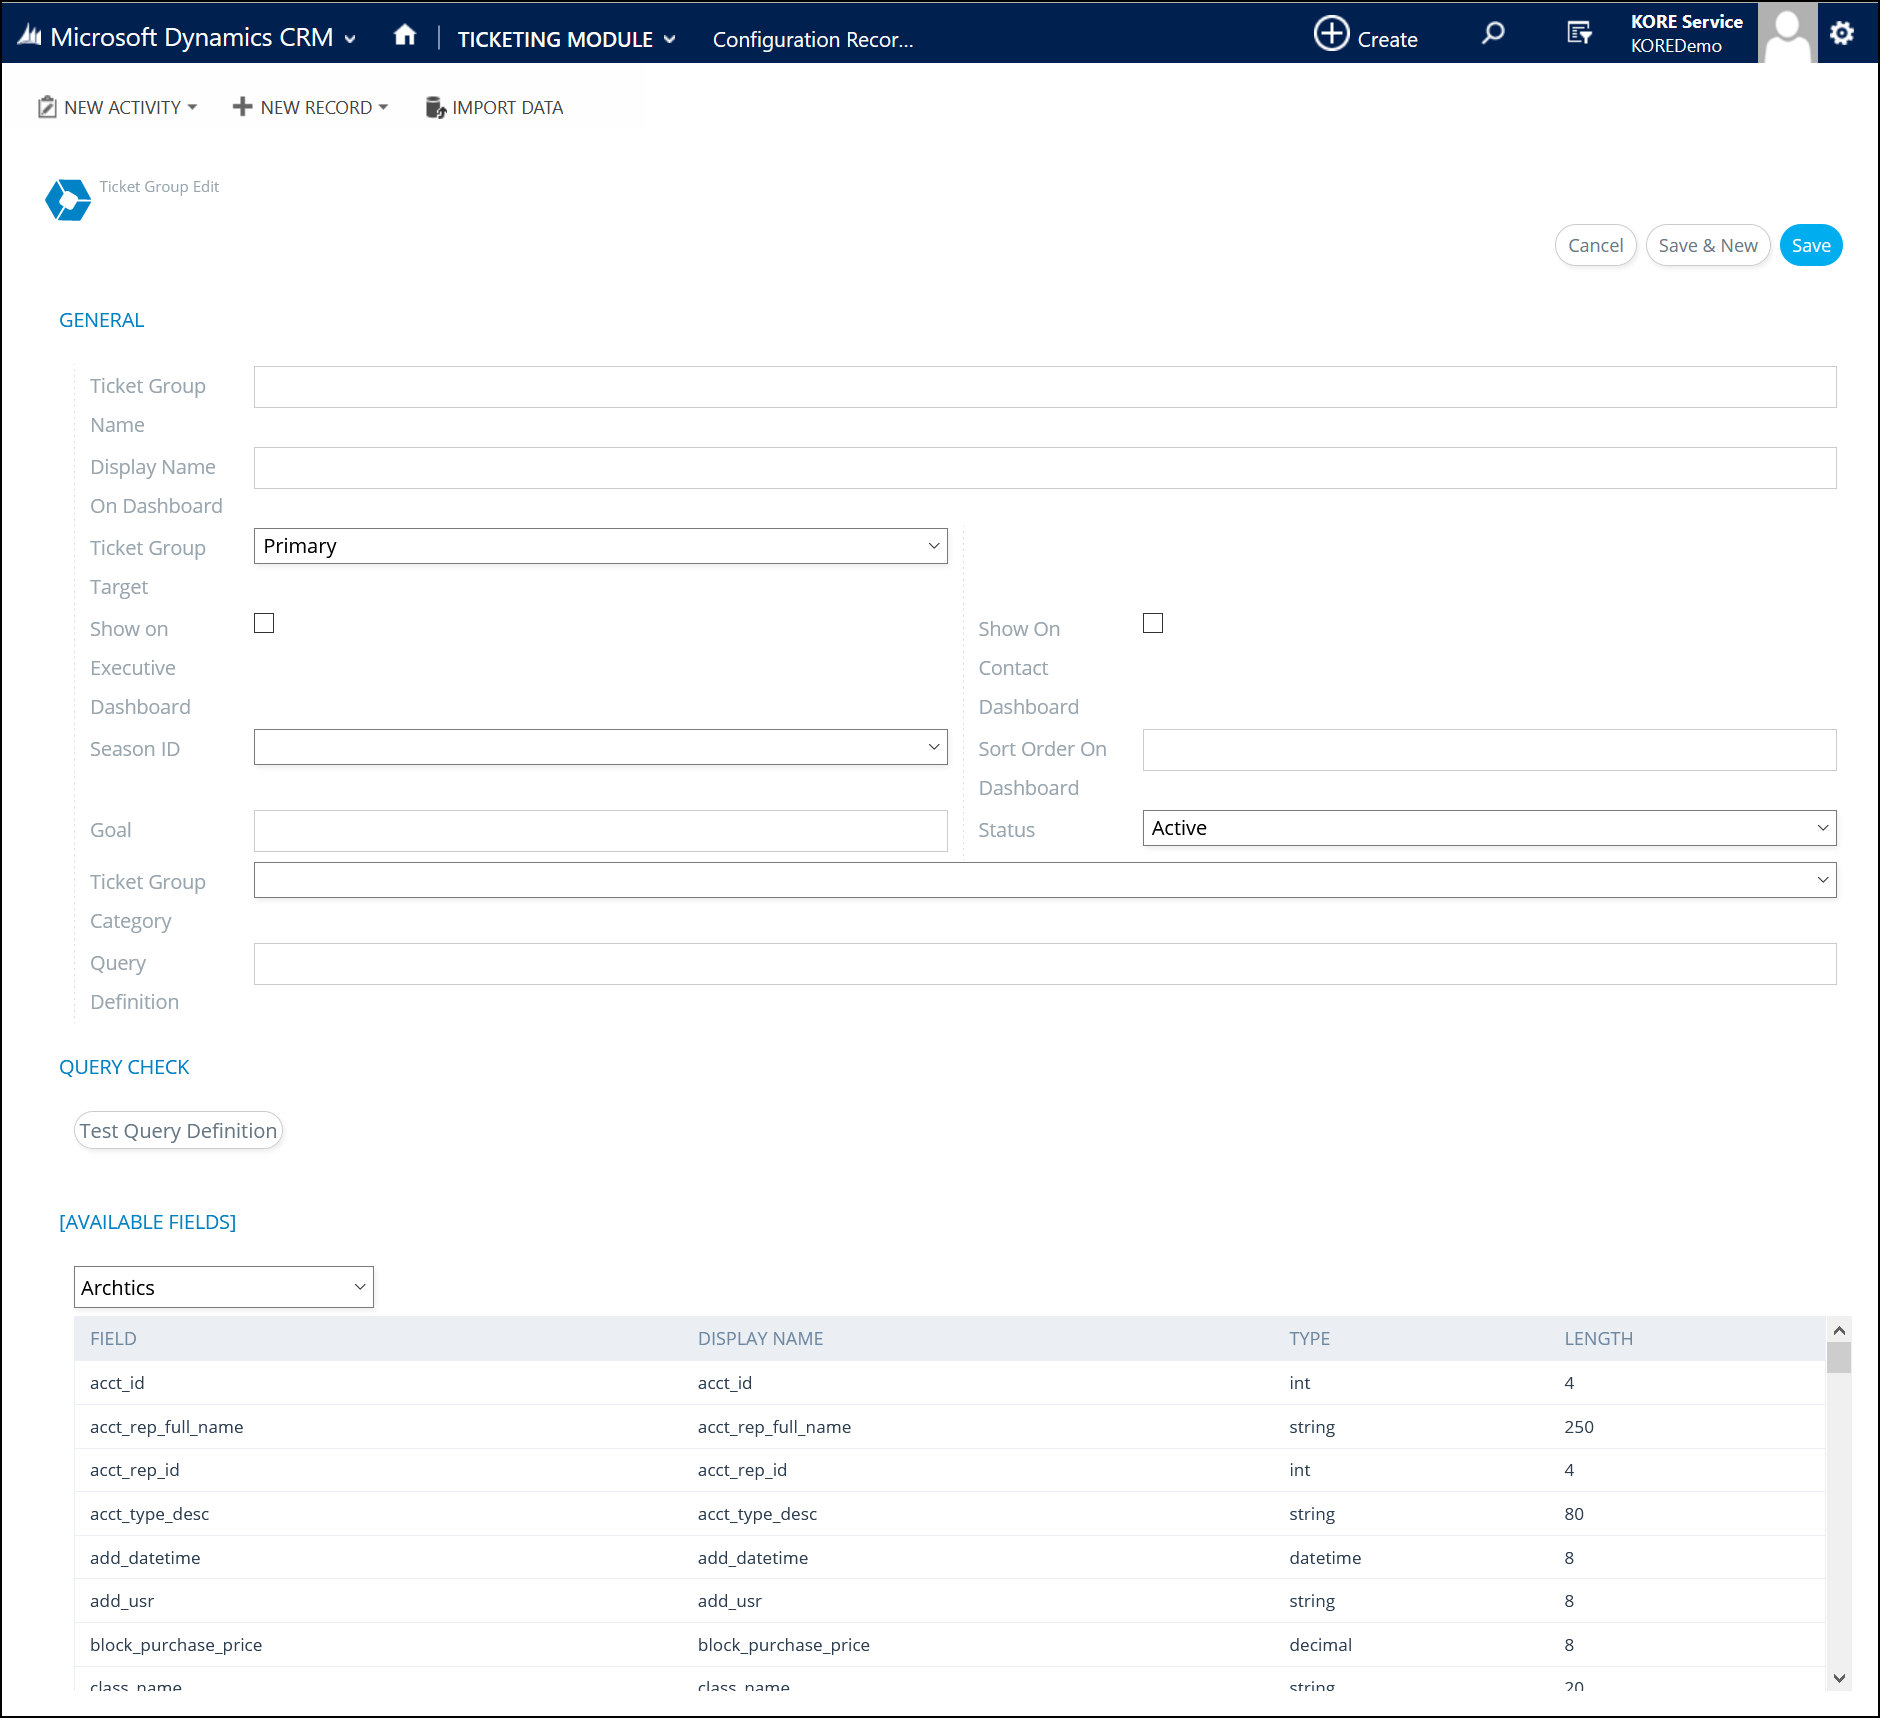
First, give the new ticket group a name. Next, enter a display name for the group—this is often the same as the ticket group name, but sometimes is a shortened version. The display name is shown on contact pages.
Next, select the ticket group target. This controls which ticketing system database you’ll use data from. Most often, this will be “Primary”. If you change it, the “Available Fields” reference at the bottom of the page automatically updates.
After that, check the boxes if the ticket group should be displayed on the executive dashboard and/or the contact dashboard (on each contact’s page). This depends on your use case:
- If the ticket group will just be used to create a focused campaign, leave these unchecked.
- If it’s useful to know whether or not someone is a member of this ticket group when viewing the contact page, check the contact dashboard box.
- If you have access to the Executive Dashboard and want to view revenue figures for this ticket group, check the executive dashboard box.
Use the Season ID drop-down menu to choose which season this ticket group will be displayed under. This does not affect or limit the query results.
Ensure that the status field is set to “Active” for the ticket group to be visible. If you stop using this ticket group in the future, you can set this to “Inactive” to hide it without losing any data.
The “Goal” field is deprecated and may be removed in the future; please leave it blank.
Finally, if any ticket group categories are configured (see below), you can optionally assign this new ticket group to one of them.
Query definition
The Query Definition field is where you set the criteria for membership in this ticket group. Write the definition using SQL syntax, but do not include any SQL commands such as “select” or “where”. The format to use is:
- Field name
- Available fields are listed in the table
- Contact your ticketing system vendor for specific details on these fields
- Comparison operator
- Use a symbol for equals, less than, etc…
- Use the word LIKE for wildcard comparisons
- Value to test for
- For strings, use single quotes
- For integers or decimals, do not use quotes
- Some numbers may be stored as strings (such as ‘2019’ for a season year) so rely on the “Type” column in the table
- Any additional conditions (AND, OR, NOT)
When using additional conditions, you can use parenthesis to ensure additional conditions apply in the way you intend. The available fields are shown in a table at the bottom of the page. Use this to find the field name and the type of data it contains.
Aside: The length column tells you the maximum length of data, in bytes, that field can contain. For strings, this matches the number of characters—each byte can hold one letter, digit, or symbol. But for integers (“int”), this is not the number of digits it can contain. The maximum number is much, much larger. The formula is 28×L, so a 4-byte int can hold 28×4 (that is, 232) different values. That means the maximum number is 4,294,967,295 (since we start counting from zero, not one).
The query searches KORE’s deduplicated copy of the “All Tickets” table. The results will include data from all seasons, regardless of which Season ID you specified above. If you need to limit results by season, it must be specified in the query using a suitable field.
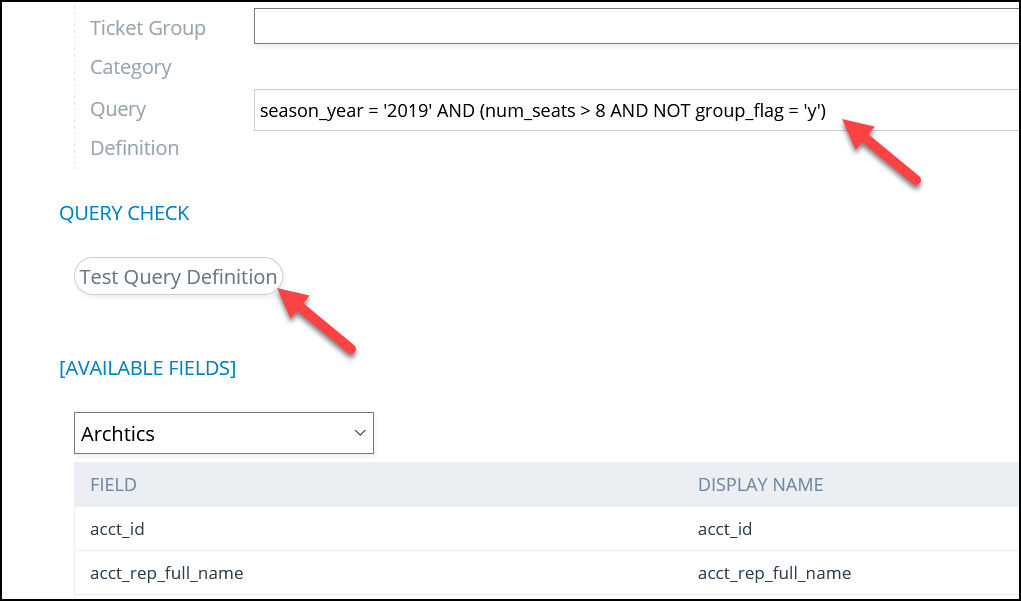
For example, suppose you want to create a ticket group containing people who bought more than eight tickets for a single event during the 2019-20 season but who didn’t contact you for a group rate. You might use a query definition such as:
season_year = '2019' AND (num_seats > 8 AND NOT group_flag = 'y')
After entering your query, use the Test Query Definition button to ensure the definition is valid and see how many accounts or contacts it will contain. This may take some time. The number of active contacts (CRM contacts) may be lower than the number of ticketing accounts due to deduplication and/or deactivation.

Once everything looks good, click the Save button at the top of the page. The new ticket group will be populated during the next daily update—it may not be available to use until the next day.
Where to use ticket groups
Ticket groups are surfaced on contact pages. You can also use them with the Contact Search Wizard (CSW) and Fan Finder. Additionally, the auto-closing TSO feature depends on ticket group campaigns.
On a contact page, find the “Ticket Groups” section and choose the season you’re interested in. The various ticket groups will be listed along with whether or not that contact is a member of each group.
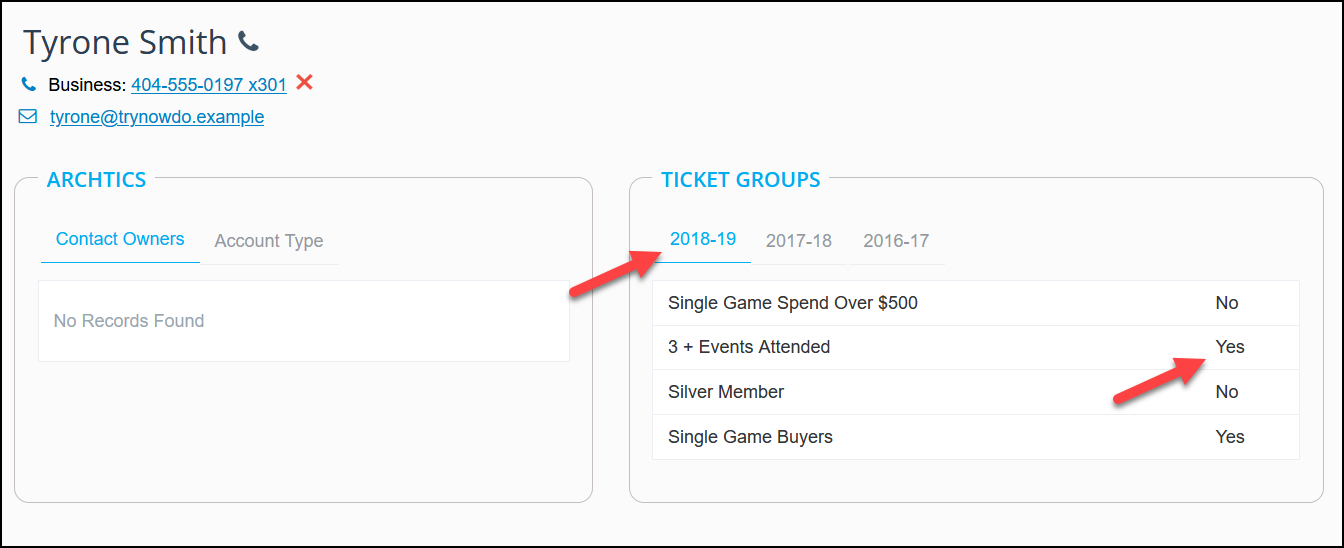
Note: If your organization uses a large number of ticket groups, you may want to list only the groups that a contact is a member of. Contact your KORE Success Rep to enable this setting.
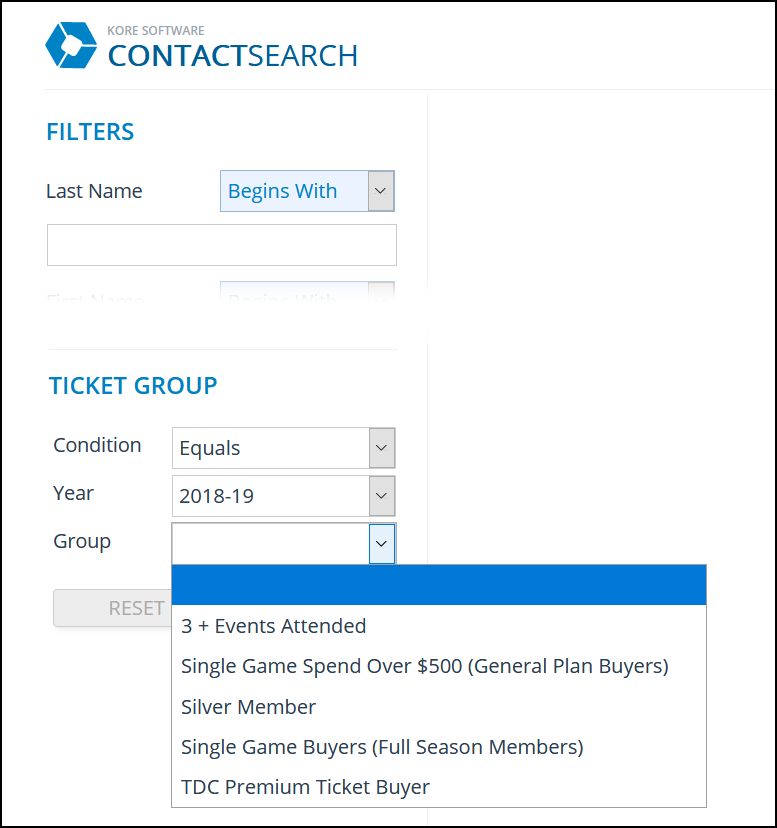
In the CSW, use the Ticket Group section to limit results to members of a particular ticket group. You can also set the condition to “Does Not Equal” to instead exclude members of a group. This can be combined with any other criteria the CSW supports.
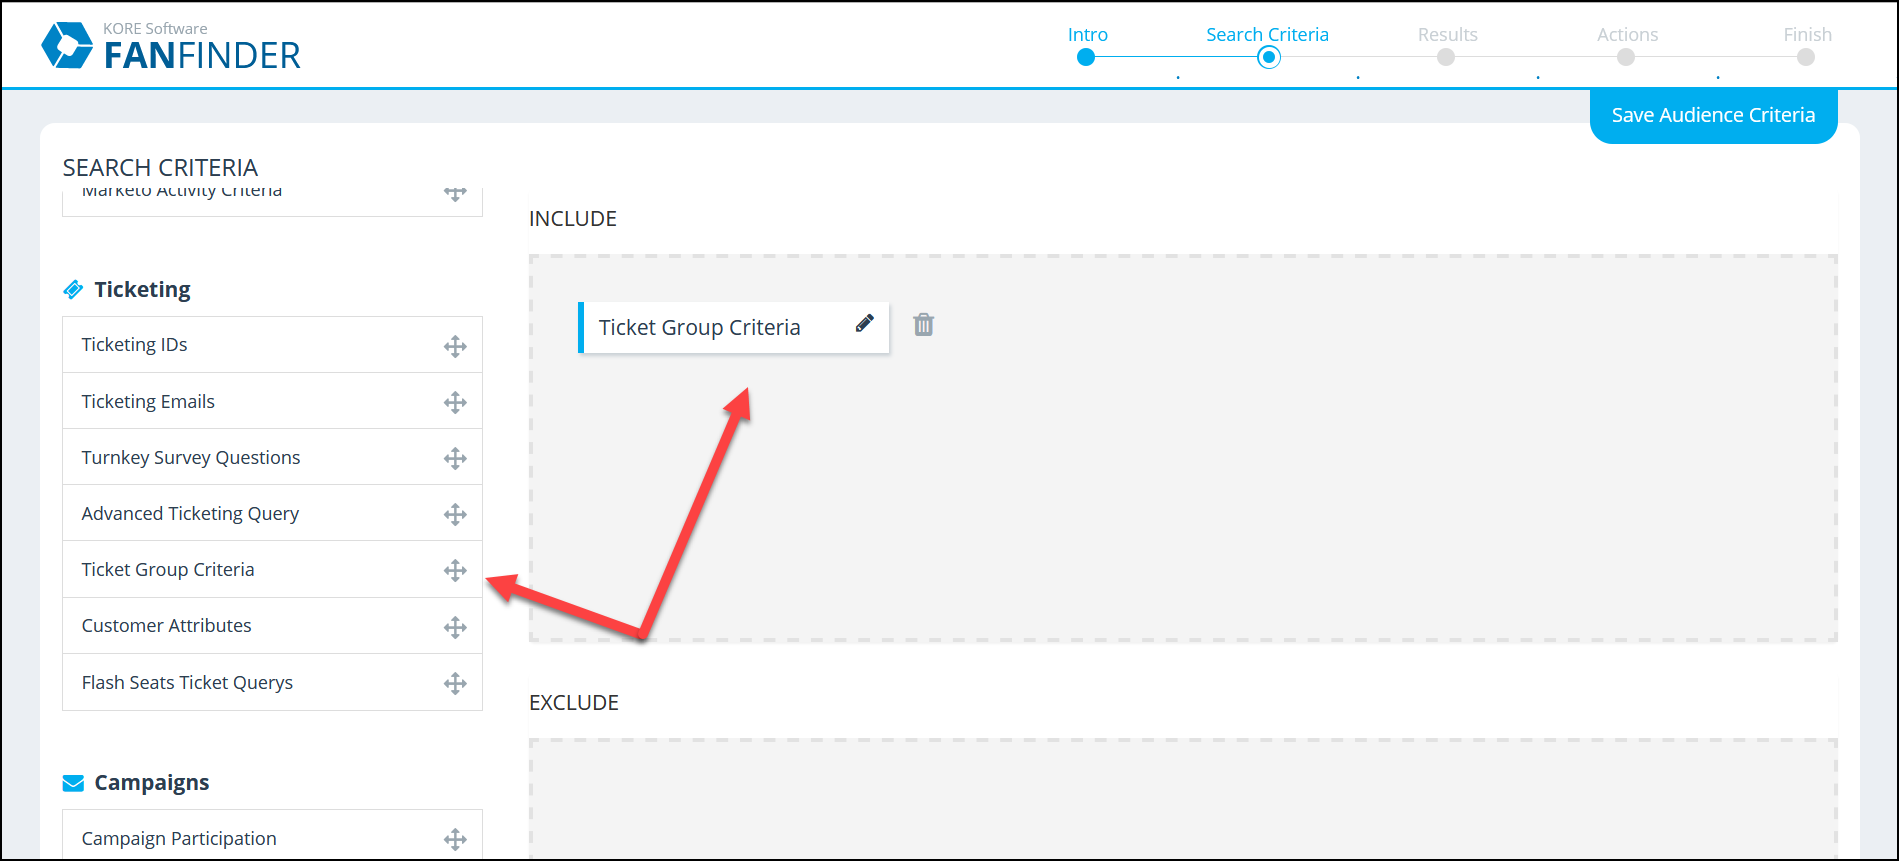
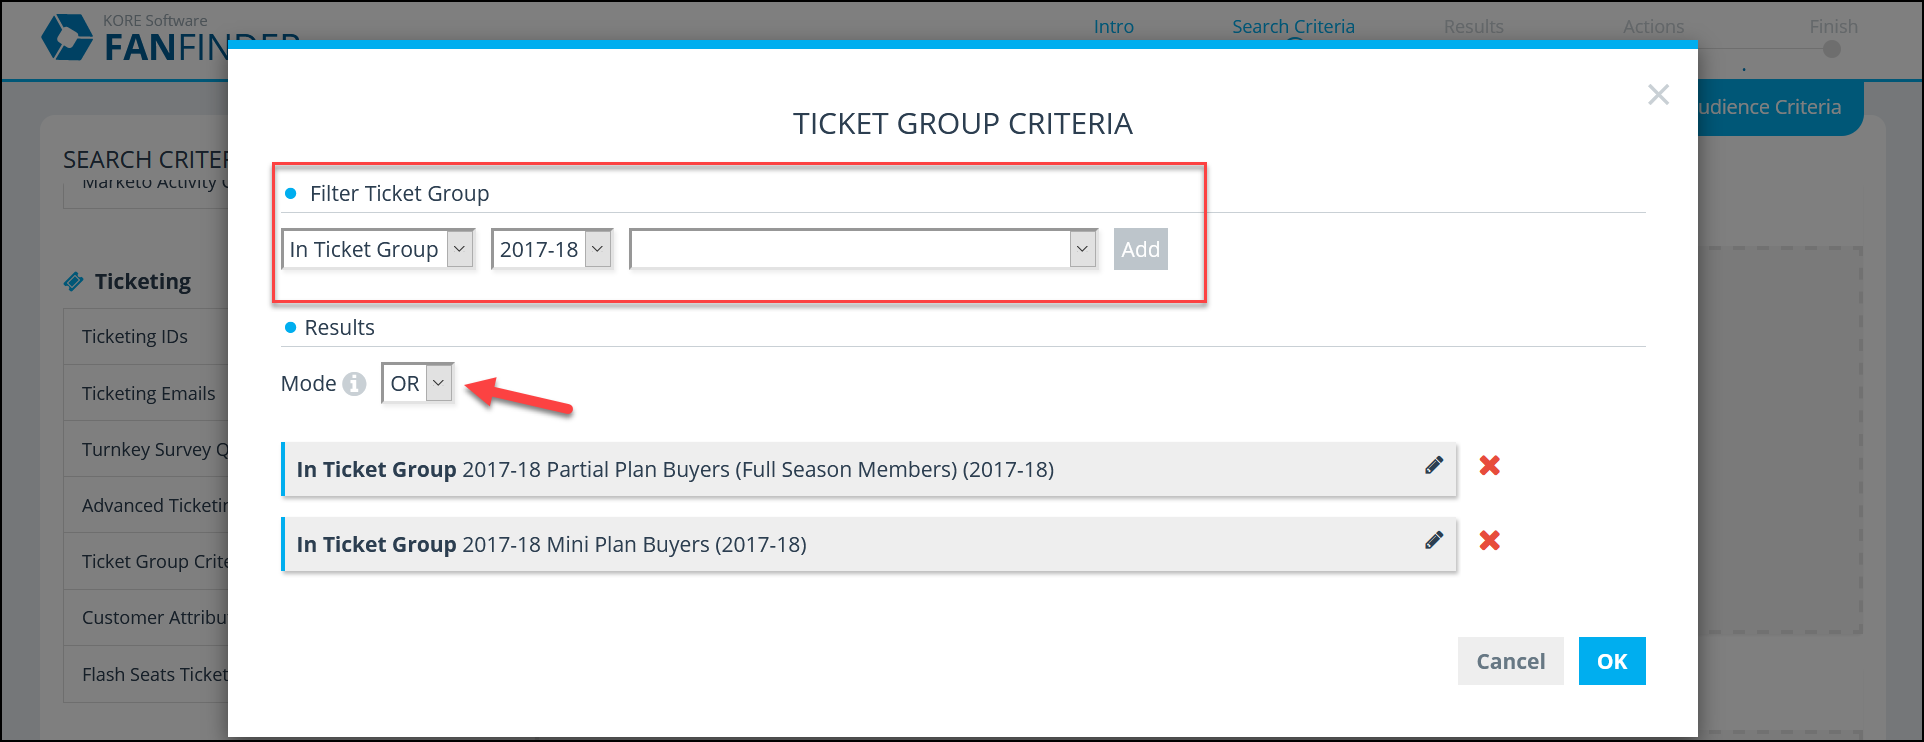
In Fan Finder, find “Ticket Group Criteria” in the Ticketing section. Drag the label into either the Include or Exclude area, then configure the criteria. You can specify whether you want to find contacts in or not in a ticket group. You can also specify multiple groups—“AND” mode selects contacts that are in every group listed, while “OR” mode selects contacts who are in at least one of the groups listed.
Create a ticket group category
Ticket group categories let you consolidate ticket groups together for better organization. Begin by opening the Configuration Records page and selecting Ticket Group Categories.
Next, click the Create New Ticket Group Category button.
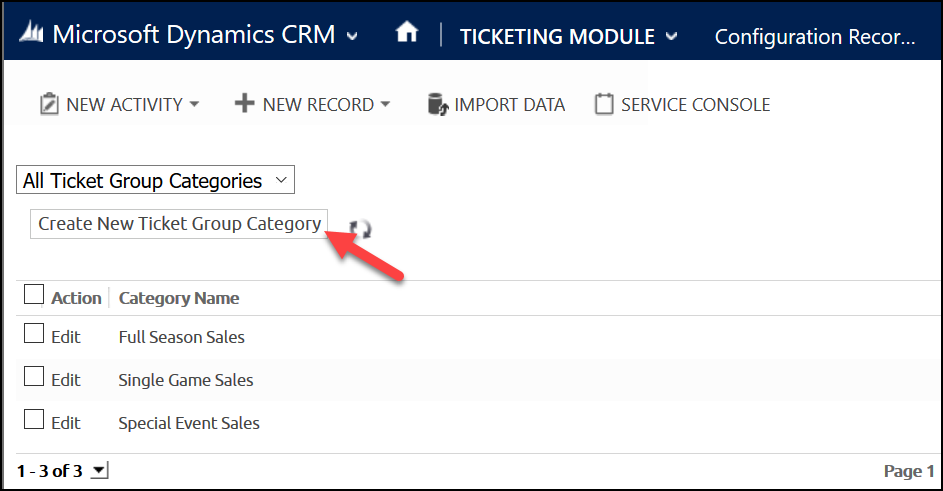
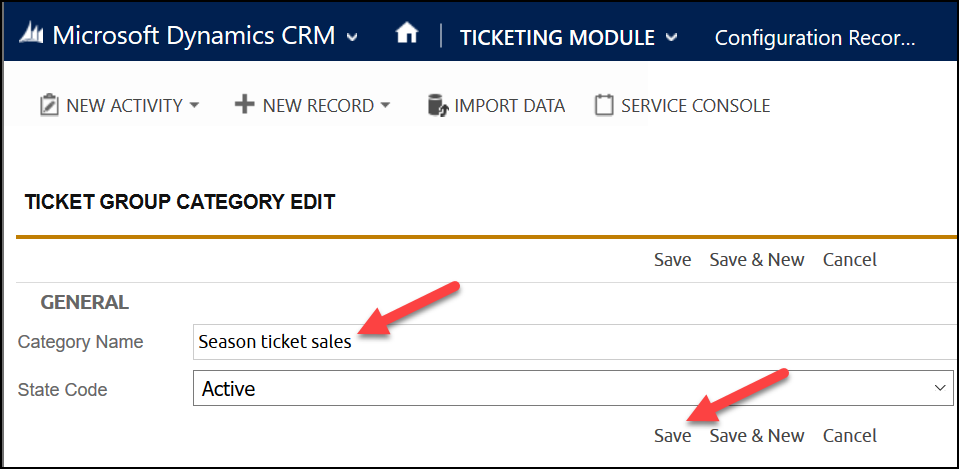
Enter a name for the ticket group, then click Save.
