Overview
The Approval Workflow is a series of steps followed from the time a deal sheet is first created until it reaches an end state. Most approval steps take place prior to a contract being signed, but there may also be steps after a deal is fully contracted. Approval steps are not always followed in the same order—some steps may only apply to deals which meet certain criteria, and you can skip to a different next step depending on which option an approver selects.
An individual approval step has several components, some of which are dependent on other configuration records.
To add a new step (or edit an existing one), navigate to Configuration Records > KORE > Approval Steps.

Then click the Create New Approval Step button (or an existing step's Edit link).

Create a step
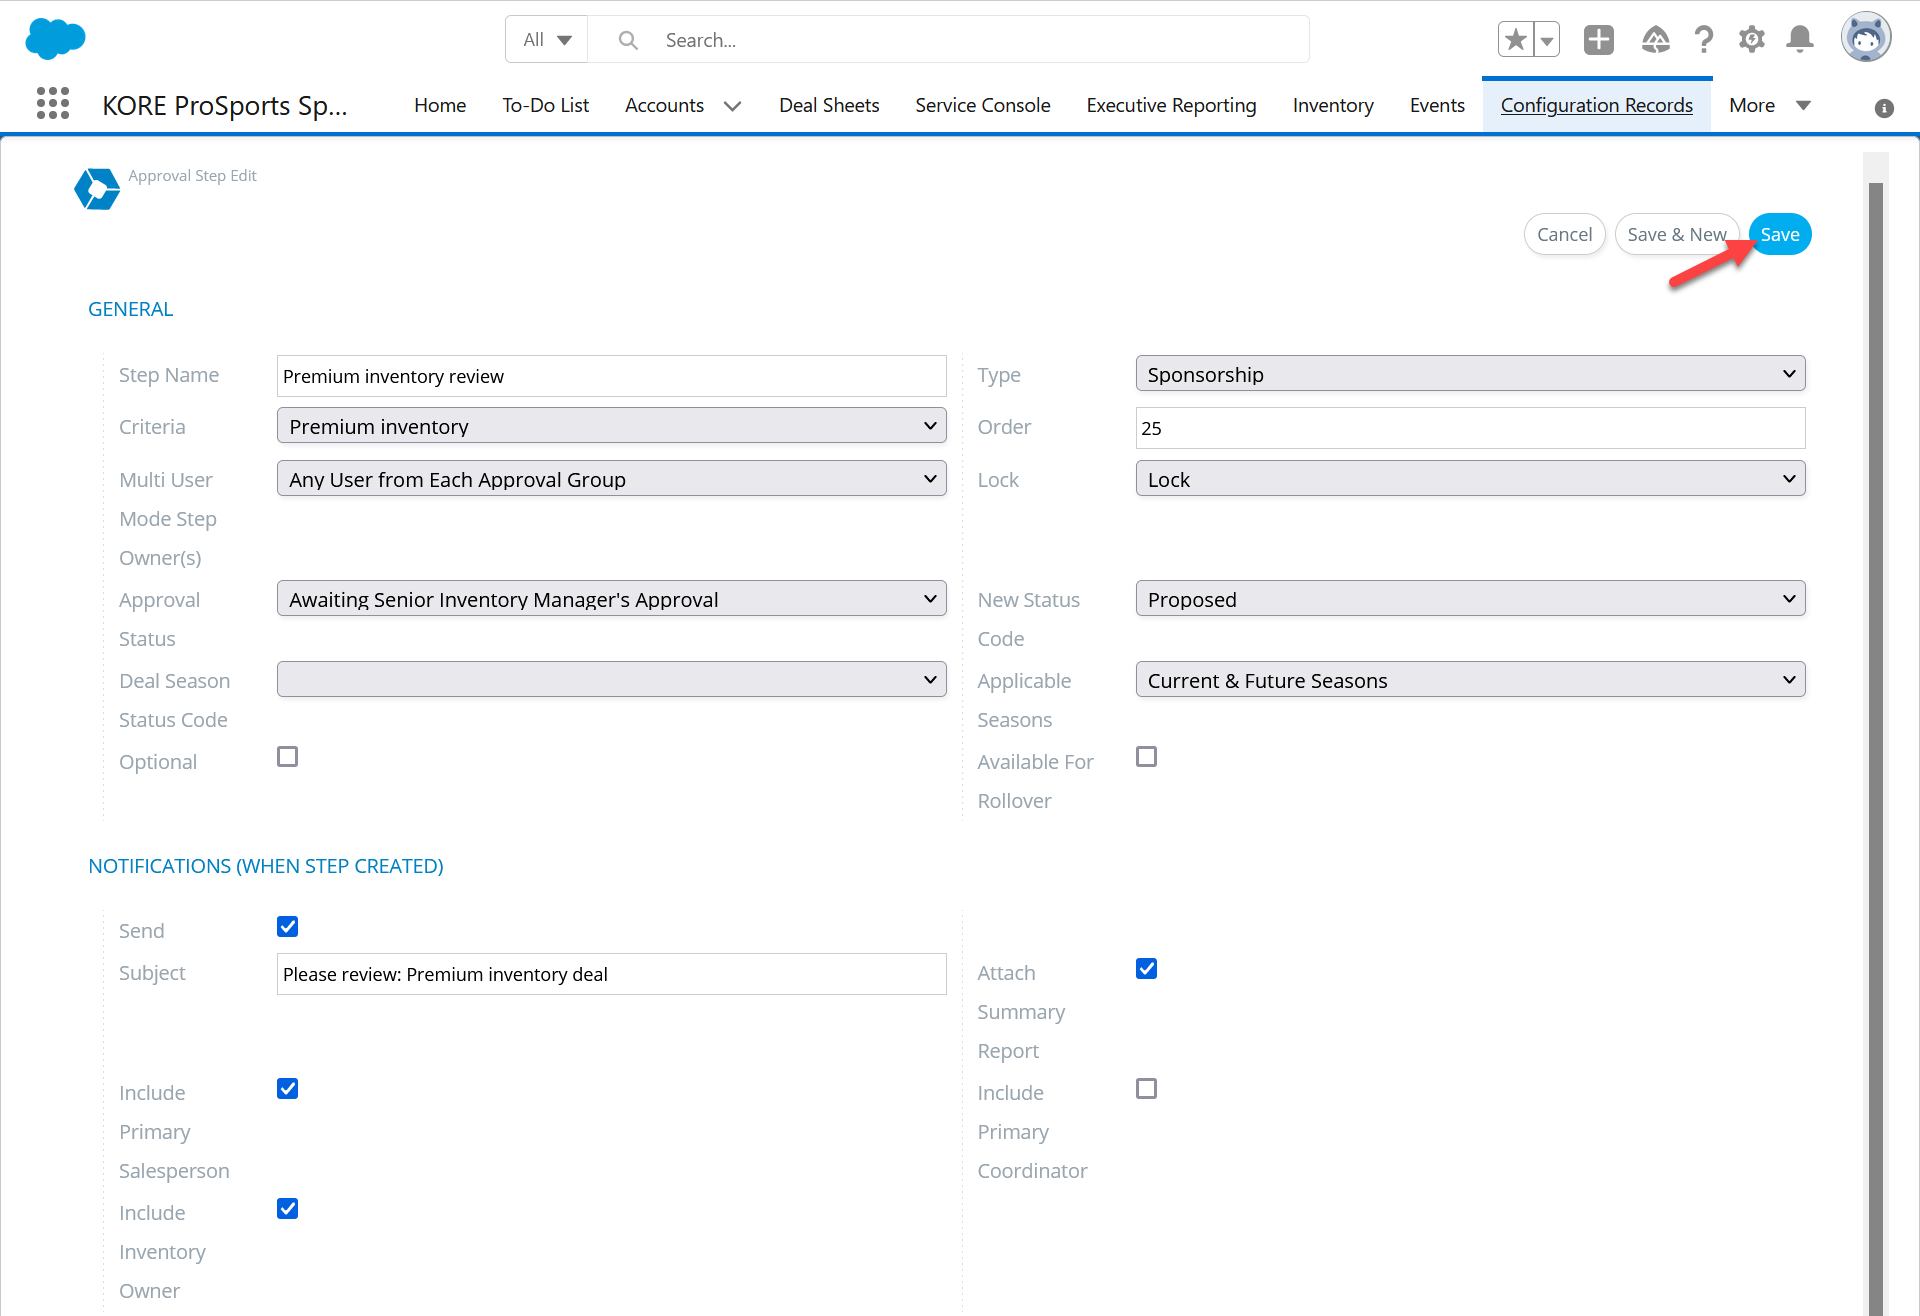
After clicking Create New Approval Step, complete the form to create a CRM record for the new step. (Additional configuration options will be available after saving the new step.)
General
This section defines key details of an approval step.
- Step Name—We recommend a brief description of the step's purpose.
- Type—Select "Sponsorship". KORE Suites and Premium can also use the Approval Workflow but a step can only be used by one product, not both.
- Criteria—Leave blank if this step should always apply, otherwise select a criteria rule.
- Order—Enter a number to control where this step is shown in the list of approval steps. We recommend counting by tens (i.e., 10, 20, 30, etc...) to allow for future insertions. Note that this is the order steps are listed in, not necessarily the order they are completed in (see below).
- Multi User Mode Step Owner(s)—This controls who can act on the step. See below.
- Lock—A locked deal sheet cannot be edited by users. You can lock a deal sheet when it enters a step to ensure it doesn't change while awaiting approval. Once locked, the deal sheet remains locked during future steps also until it is explicitly unlocked.
- Approval Status—Select an approval status to display while this step awaits completion.
- New Status Code—In addition to the approval status, a deal also has its own status which is displayed in the list of deals. This can be "Draft", "Proposed", or "Contracted". Leave blank to make no change, or select "Deactivate" if reaching this step means the deal has been lost.
- Deal Season Status Code—Optional, see below if your organization uses this field.
- Applicable Seasons—Optional, applies to the Deal Season Status Code (see below.)
- Optional—Not recommended. If checked, the Approval Workflow can end at this step and the email notification (if enabled, see below) will contain no action buttons. This is not the same as an approval option (see below). An approver can still open the deal sheet's CRM record and select a provided approval option if any exist, such as an option to amend a deal.
- Available for Rollover—See below.
Step owner(s)
The "Multi User Mode Step Owner(s)" dropdown list controls who can take action on an approval step. After initial creation of an approval step, you can add any number of approval groups to the step (see below). An approver takes action by selecting an approval option (see below).
The most commonly used options are:
- Primary salesperson
- Primary coordinator
- Any user from each approval group
- If a step has exactly one approval group, any member of the group can choose an approval option and it will immediately take effect. This is the most common scenario.
- If a step has more than one approval group, at least one member of each group must select an option before an option will take effect. If any approvers select different options, the option with the highest rank (see below) takes effect. This is a much less common scenario.
- All users from each approval group
- Every approver from every approval group must select an option. If any approvers select different options, the option with the highest rank (see below) takes effect.
Deal season status code
Some organizations use this optional field to indicate the revenue status of a deal's current season. The options are:
- Pending—Revenue is projected but not yet confirmed. (Deal is not yet contracted or, when the deal's current season is later updated to another season, revenue should not "hit the books" yet.)
- Actualized—Revenue is confirmed for the season and will be included in reports. This is the default behavior when an organization doesn't use deal season status codes.
- Opted-Out—Not recommended; use the Deal Opt-Out tool* instead. In some contracts, a customer may have the right to cancel a multi-year deal before its conclusion. This status disables revenue reporting for the current and future seasons without affecting historical data about prior seasons.
- Deal Lost—Not recommended; use the Mark As Lost tool* instead. If a deal is lost after contracting (such as when a customer enters bankruptcy), this status disables revenue reporting for the current and future seasons without affecting historical data about prior seasons.
The Applicable Seasons field allows you to choose whether this status code should apply to the current season only, or to both current and future seasons.
* available at the top of a deal sheet page (not the Deal Manager)

Available for rollover
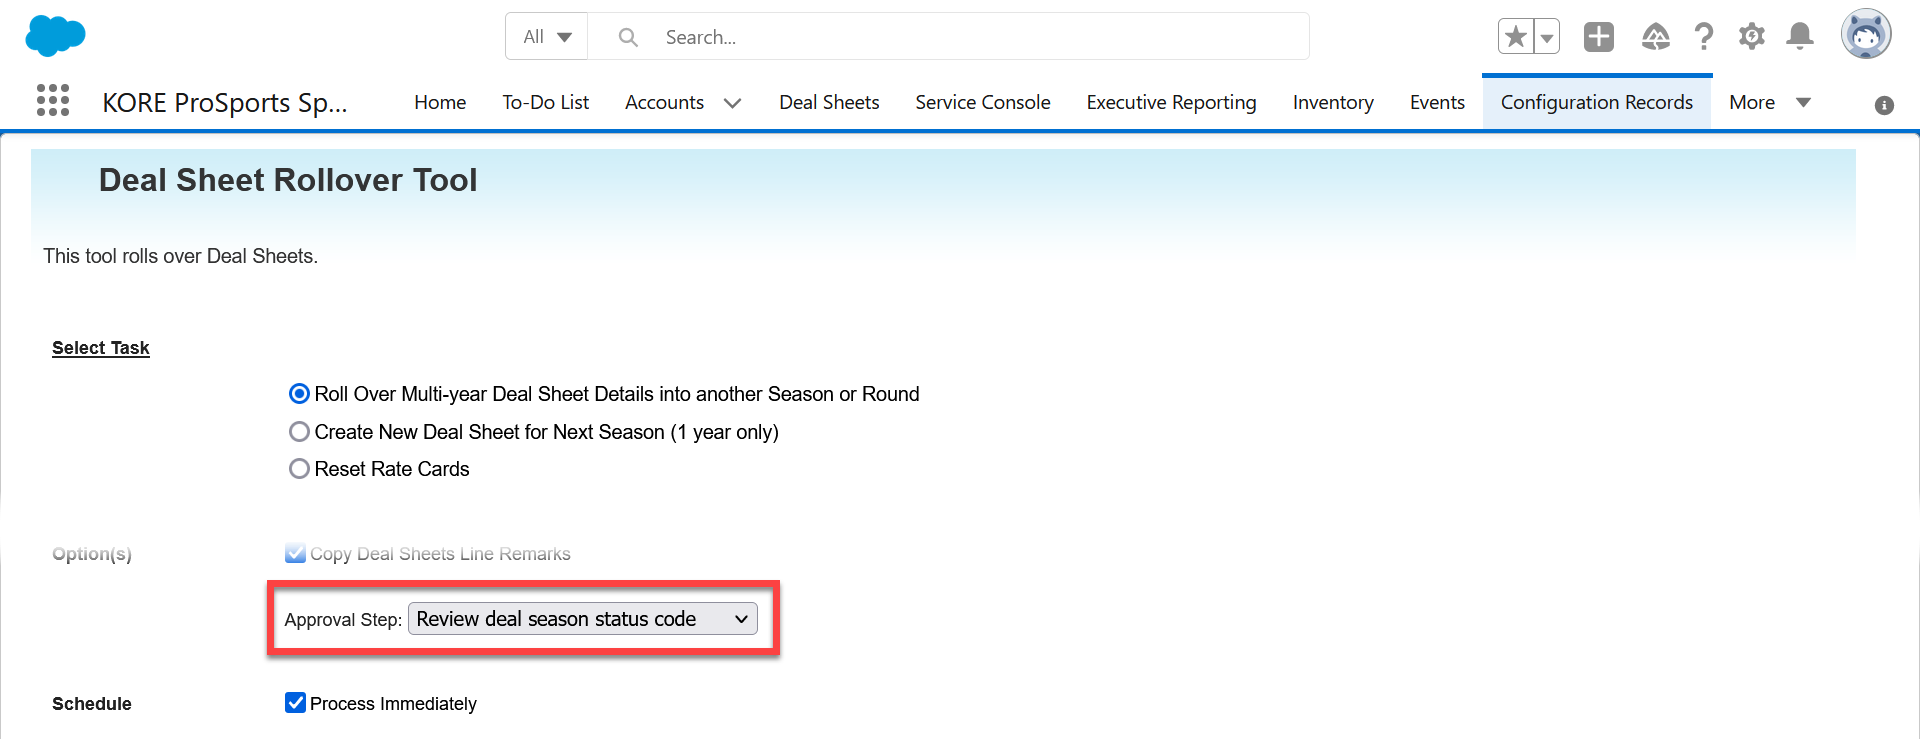
A deal sheet can only have one default season at a time. If there are post-contract approval steps which need to be carried out per-season, you can make such steps available for rollover. Each deal sheet selected for rollover will enter an approval step selected during the process.
Warning: If any approval step is available for rollover, you must select an approval step for all deals during the rollover process. Only use this checkbox if you're certain your organization wants to use the feature.
This is frequently used in conjunction with deal season status codes—since a deal can only have one current season, a contracted deal may stay in a "Wait for rollover to next season" step. When an admin changes the default season and rolls over deal sheets, the rollover tool could then change each deal's approval step to a rollover-available step such as "Review deal season status code" during the process.
Notifications
When an approval step is activated, the system can send email notifications to the people able to approve it. Optionally, you can also send email notifications to other members of your organization. (See the notification users section below.)
- Send—Check this box to enable the email notification.
- Subject—Provide a subject line for the email notification.
- Attach Summary Report—If checked, the email will include a PDF summary of the deal.
- Include Primary Salesperson—If checked, also send an email to this user.
- Include Primary Coordinator—If checked, also send an email to this user.
- Include Inventory Owner—If checked, also send an email to this user.
Click the Save button when finished, then continue on to further configure the step.
Email notifications are only sent when a deal sheet enters a step, not when an approver selects an option. An organization may therefore create an approval step such as "Fully approved" in order to send notifications even when no further approvals are needed.
Additional configuration
Options (actions)
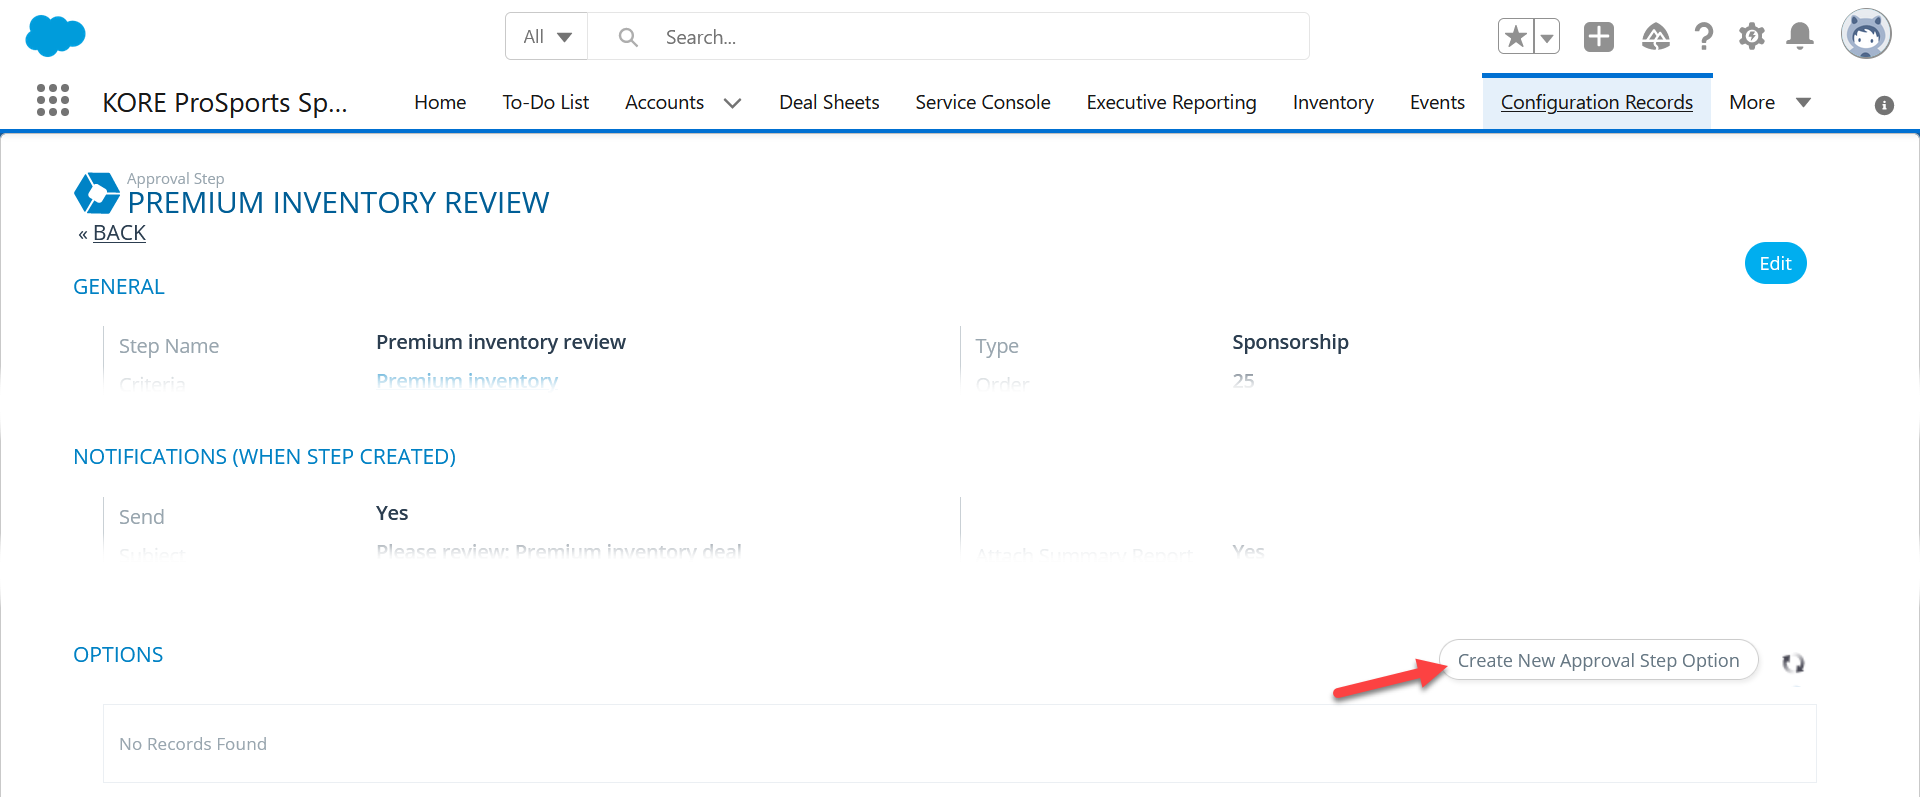
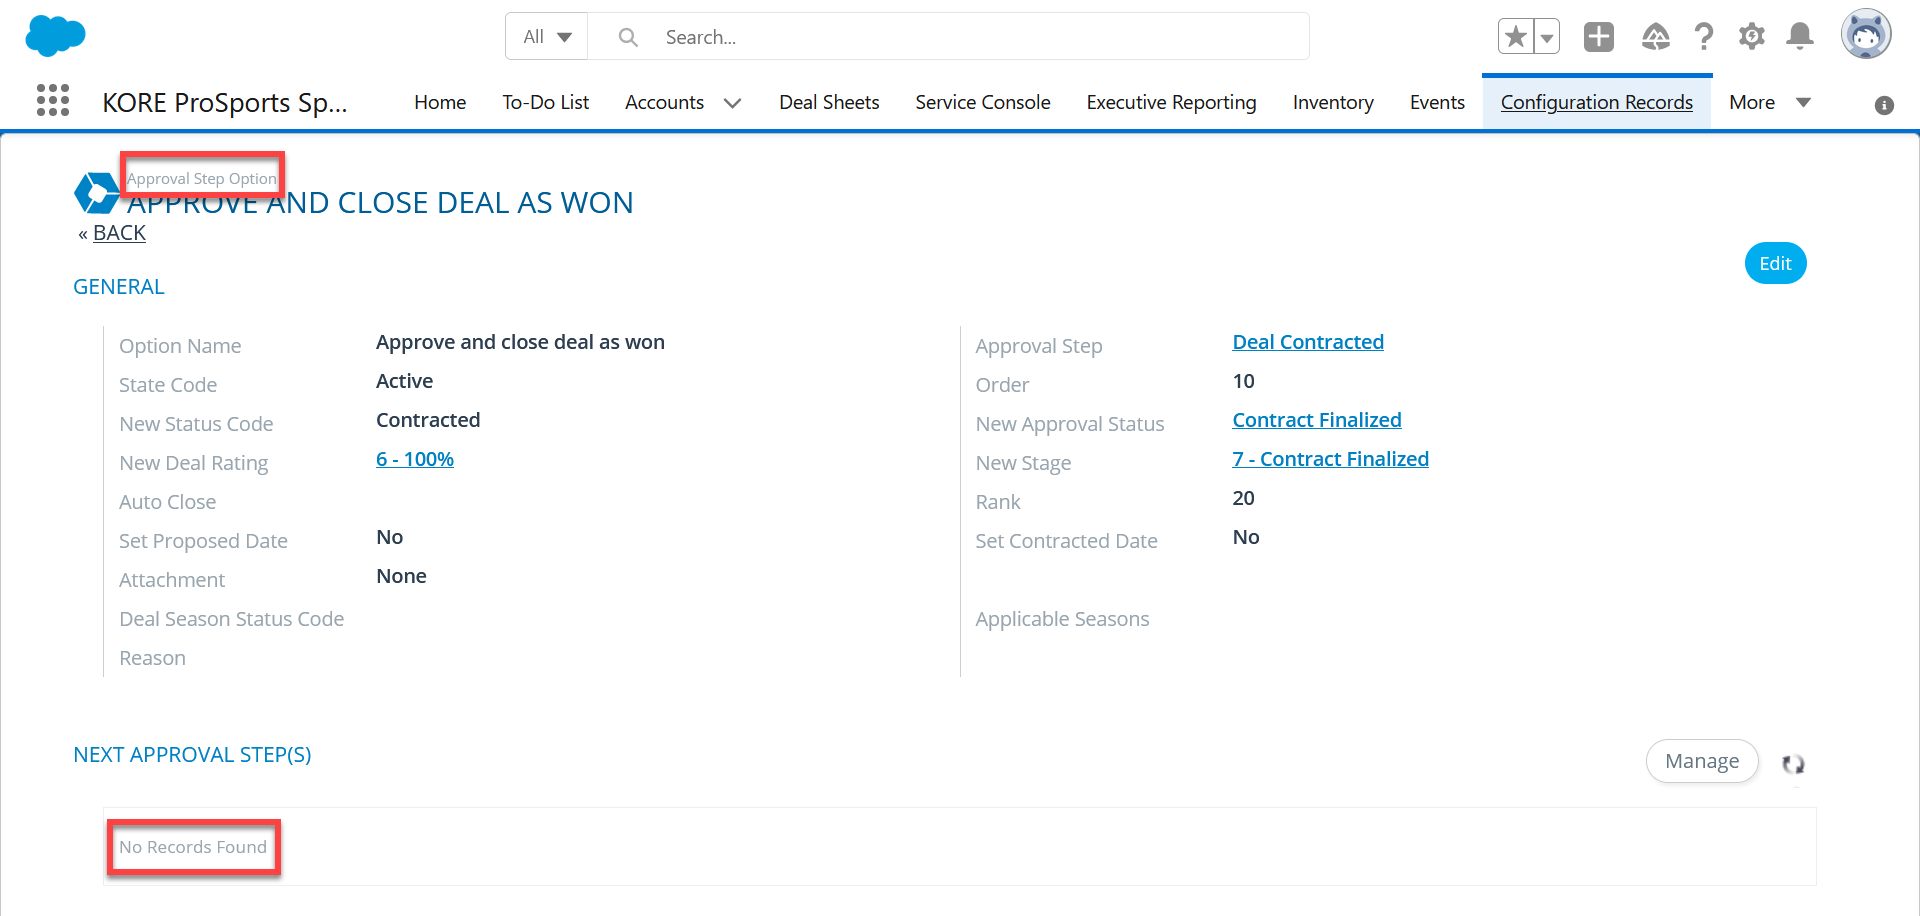
After saving an approval step, you can configure the options (actions) available to approvers. Begin by clicking Create New Approval Step Option.
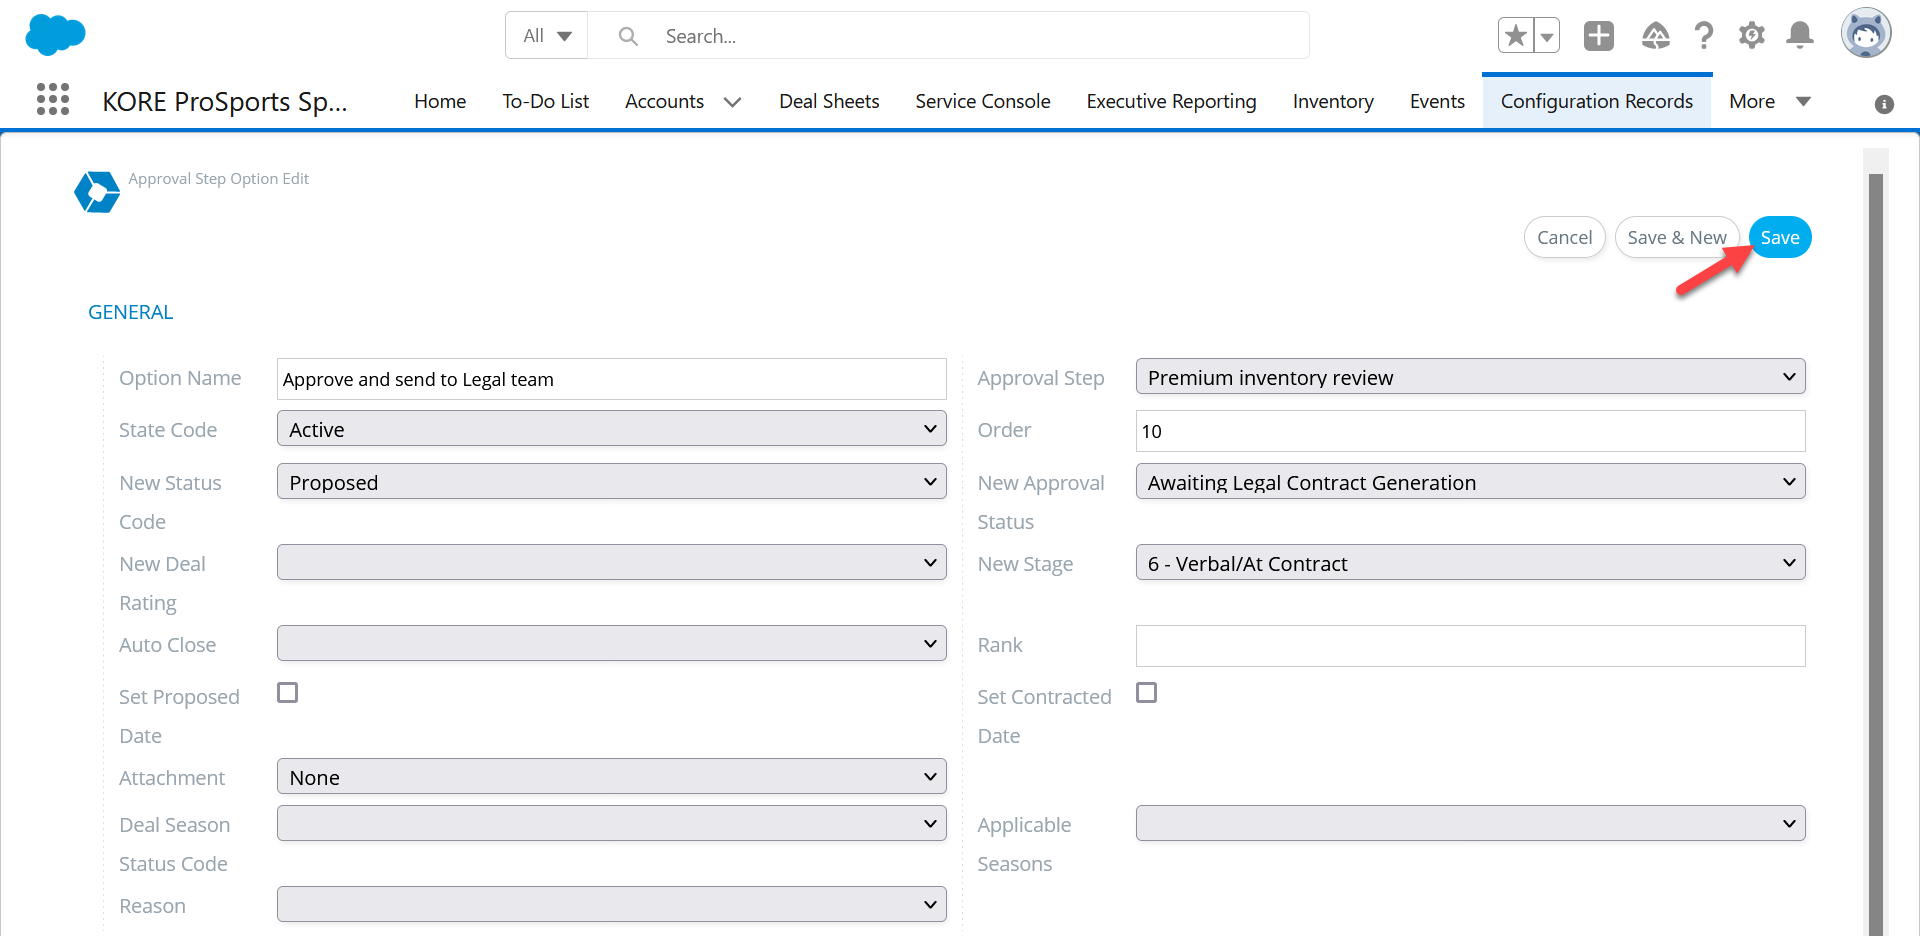
This opens a form where you can enter details for the option.
- Option name—This text will be displayed on the approver's button.
- Approval step—The step this option is attached to; automatically set to the step you're creating it from.
- State code—Set to "active" to make this option available for approvers. Set to "inactive" to disable and hide the option.
- Order—Number controlling the order that options are shown in. We recommend counting by tens (10, 20, 30, etc...) to allow for future insertions.
- New status code—The status of the deal sheet; may be "draft", "proposed", "contracted", or "deactivate". (Only use "deactivate" if choosing this option indicates the deal was lost.) Leave blank for no change.
- New approval status—Change the deal's approval status when this option is selected. Leave blank for no change.
- New deal rating—If your organization uses this field to indicate the likelihood of a deal closing, change the deal's rating when this option is selected. Since this overwrites a human's judgment call, we recommend only setting this when a deal is contracted or lost.
- New stage—If your organization uses this field, change the deal's stage when this option is selected.
- Auto close—If multiple approvers must take action during this step, checking this box will override that requirement and immediately execute this option. Useful for when there is no reason to wait for other approvers to act, such as if the first approver chooses the option with the highest rank (see below) which will be executed regardless of the other approvers' choices.
- Rank—If multiple approvers choose different options, this controls which option is used (see below).
- Set proposed date—If checked, insert the current date as the deal sheet's proposed date.
- Set contracted date—If checked, insert the current date as the deal sheet's contracted date.
- Attachment—The option can be configured to require an attached file upload. This can also be optional or disabled. (Blank and "None" disable attachments for this option.)
- Deal season status code—The option can change the status code if your organization uses this feature, described above.
- Deal season status reason—If your organization uses deal season status codes, you can also select a reason for changing the code. Reasons are configured at Configuration Records > Sponsorship > Deal Season Status Reason.
- Applicable seasons—If you use deal season status codes, you can choose whether it applies to just the current season or to both current and future seasons.
Rank
If the Multi User Mode Step Owner(s) setting (see above) requires more than one person's approval, the option an approver selects is not acted upon immediately. Instead, the system waits until the approval requirement is met and then evaluates the options selected by approvers.
If all approvers selected the same option, then it takes effect. If different approvers chose different options, however, the rank determines which option will take effect. Only one option can take effect per approval step instance. (That is, if you return to this same step later in the Approval Workflow, it is a new instance of the step and a different option can be selected.)
The option with the highest rank (closest to the number 1) will be selected. This allows for creating a safe fallback when approvers choose different options. For example, suppose you have three approvers and two options ranked as follows:
- Send deal sheet back to salesperson for revisions
- Approve and send to next department for further approval
If all approvers select the option with rank 2, then the deal sheet will move forward in the Approval Workflow. But if any approver chooses the option with rank 1, the deal will be send back for revisions—even if that approver was the last one to act.
Important: If two options have the same rank (regardless of if they're numeric or blank values), there is no guarantee of which option the system will execute. Ensure each option for a step has a different rank.
Next approval step(s)
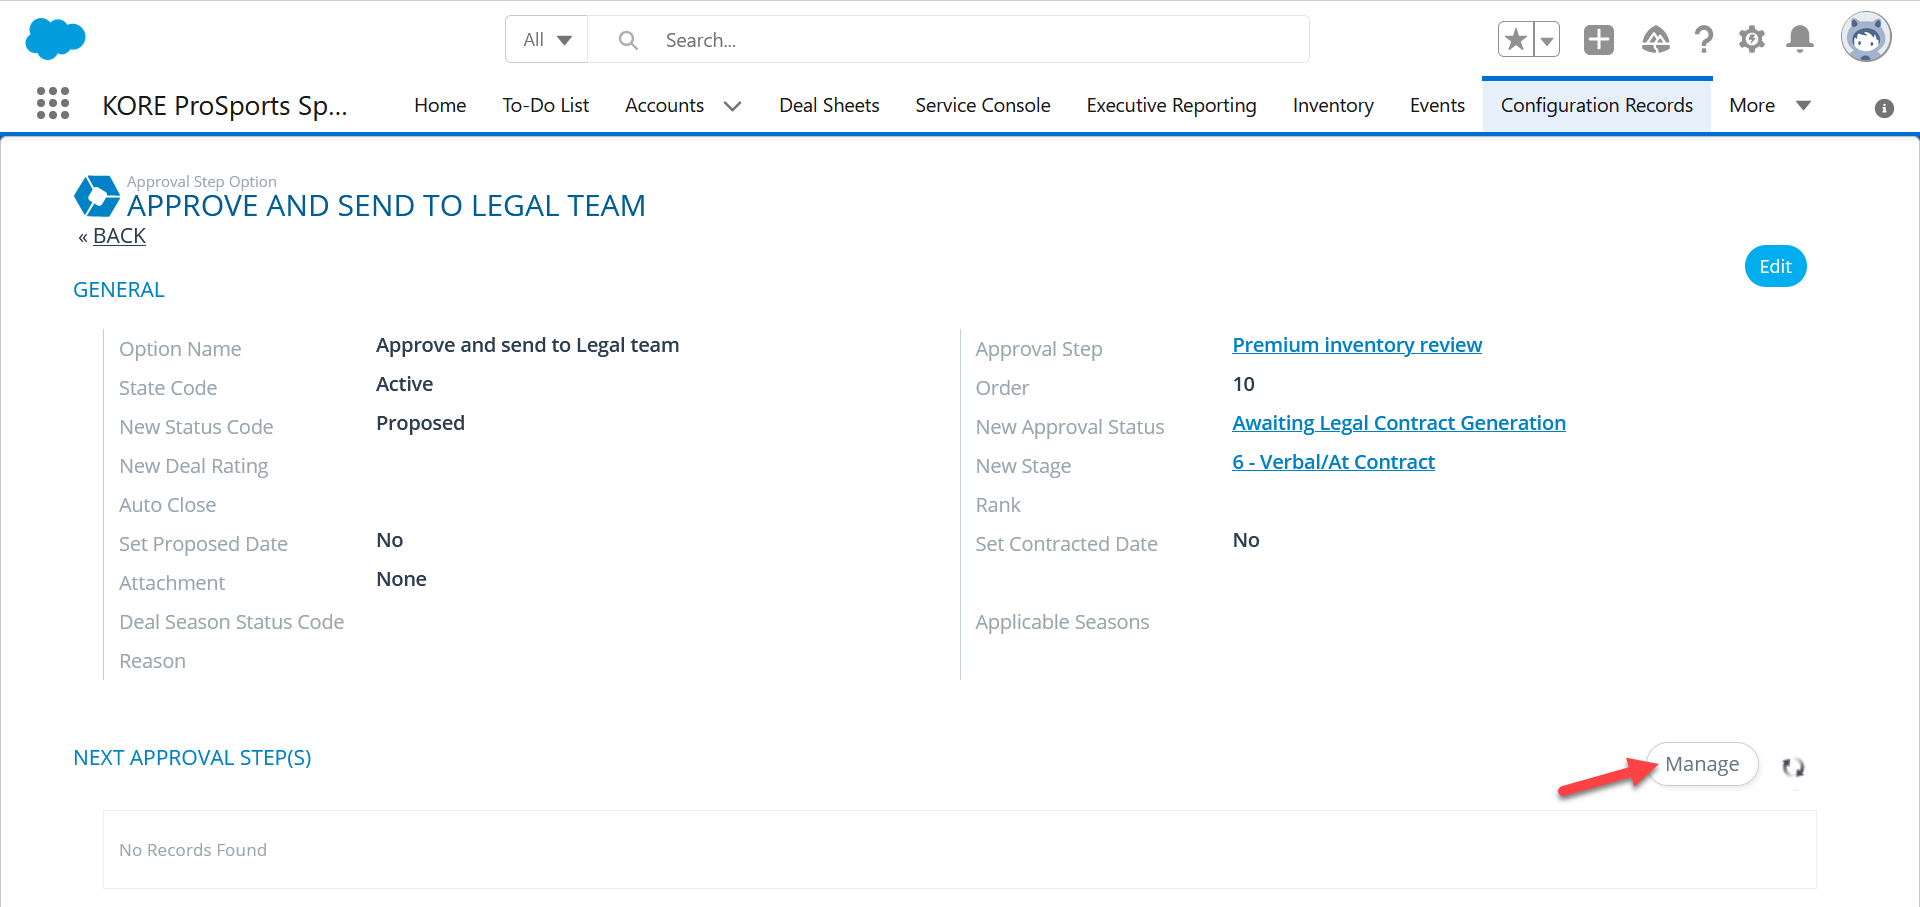
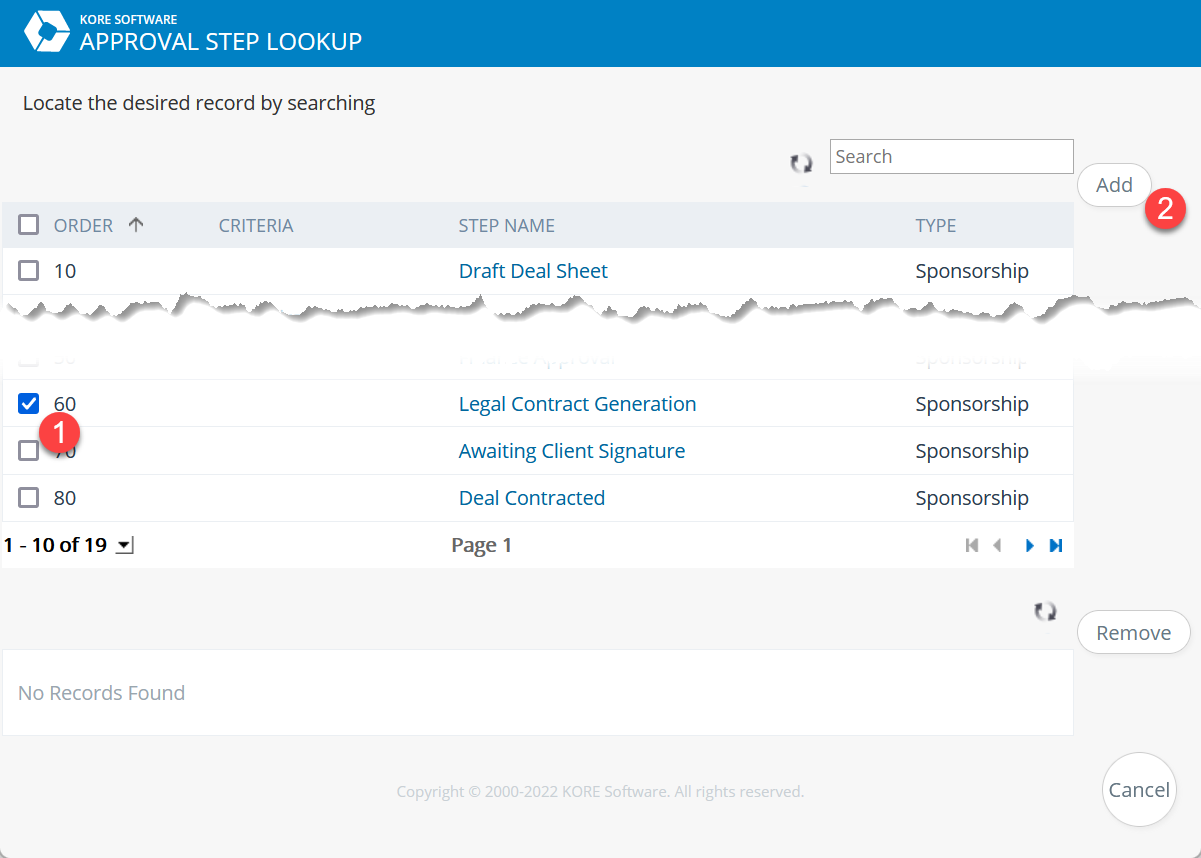
After creating an option, the "Next approval step(s)" section is available. Click the Manage button to open the step selection tool in a popup window, then select at least one step.
The most common choice is the next step sequentially, but it could be a previous step (such as when changes need to be made) or any other step. If the next approval step has approval criteria that may or may not be met, add an additional next approval step.
Caution: If all the next steps are criteria-gated and the deal sheet doesn't meet any of the criteria, the approval step effectively becomes a workflow endpoint (see below).
Warning: If the next step is optional (see above, not recommended), the deal sheet will remain on that step unless someone later chooses to take further action. Because the optional step remains open, the deal sheet does not reach a workflow endpoint (see below) and cannot be rolled over.
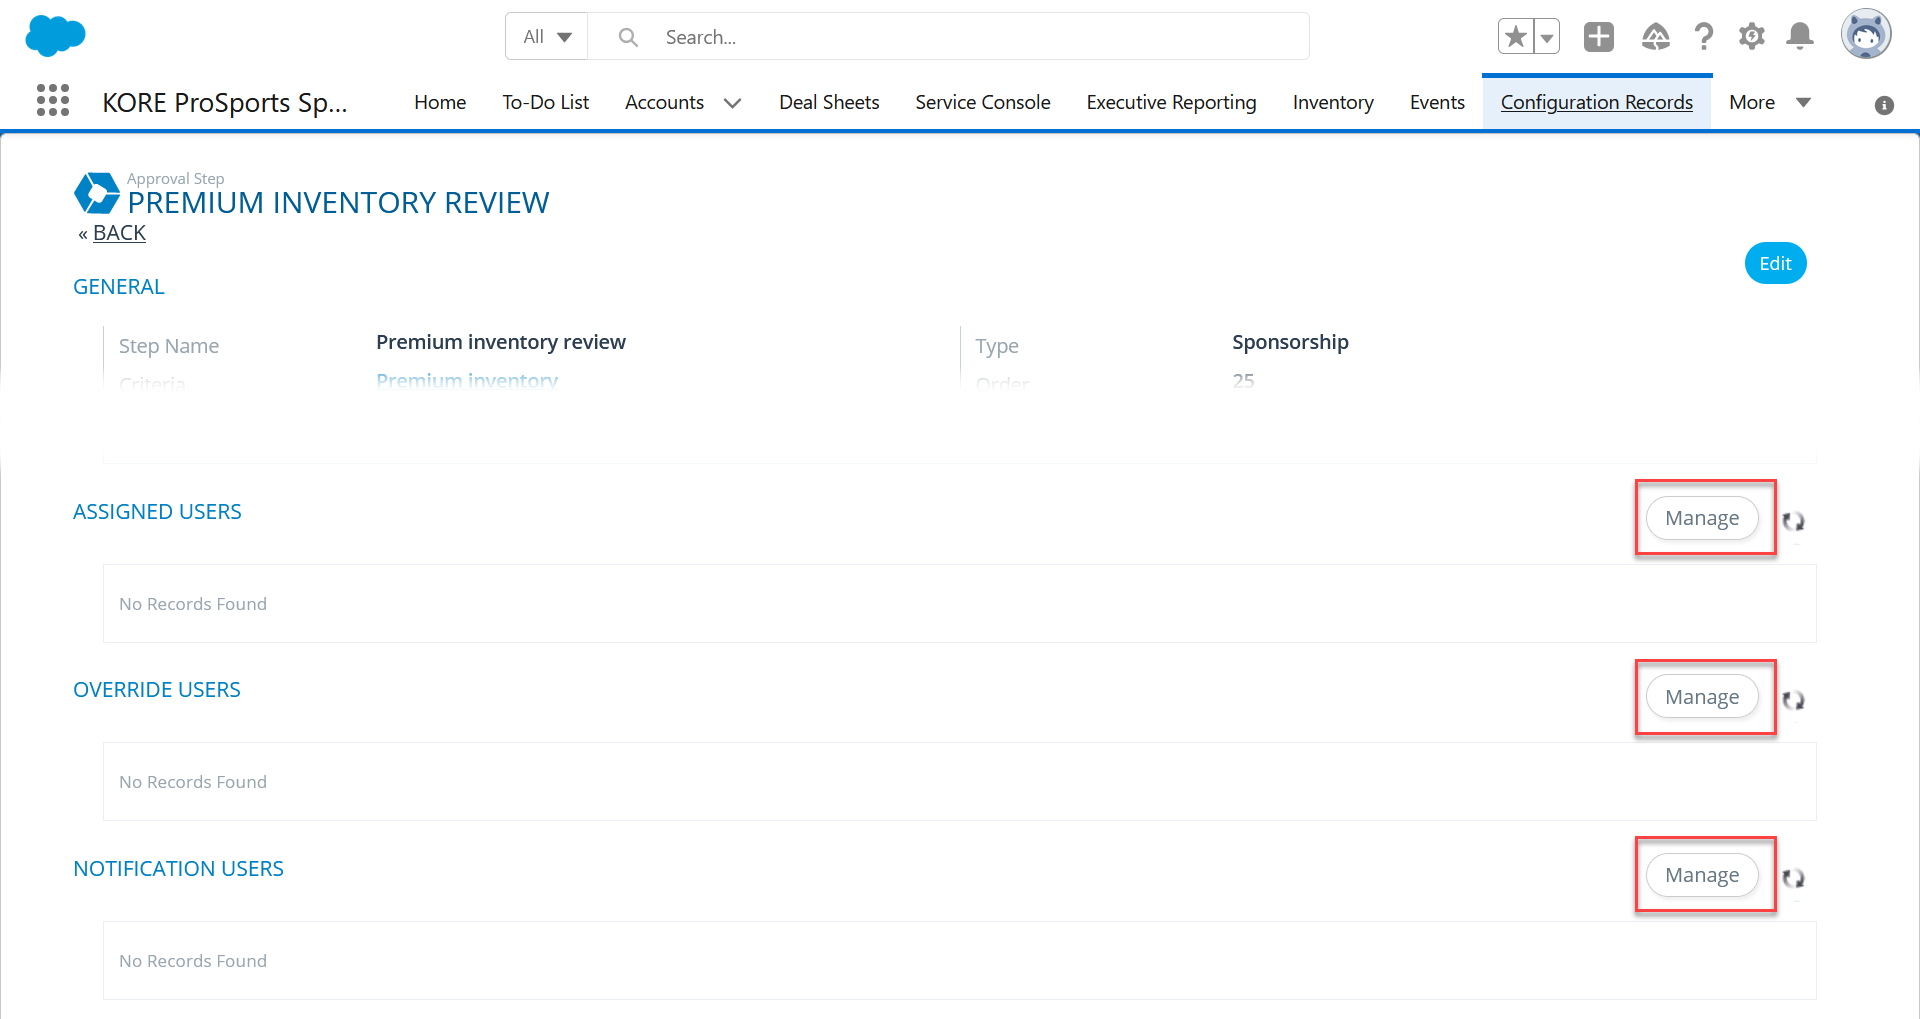
Assigned, override, and notification users
In these sections, select the desired approval group(s). An approval group can contain any number of users, and any number of approval groups may be selected here. Although you can leave any of these sections empty, failing to add an approval group to the Assigned Users list may disrupt the Approval Workflow.
Assigned users are those primarily responsible for approval during this step.
Override users can take action but do not receive notifications. This is useful for assigning back-up approvers when the primary approver(s) are unavailable.
Notification users receive an email (if enabled, see above) when the step becomes active. Unlike assigned users, these users will not have buttons to select one of the options.
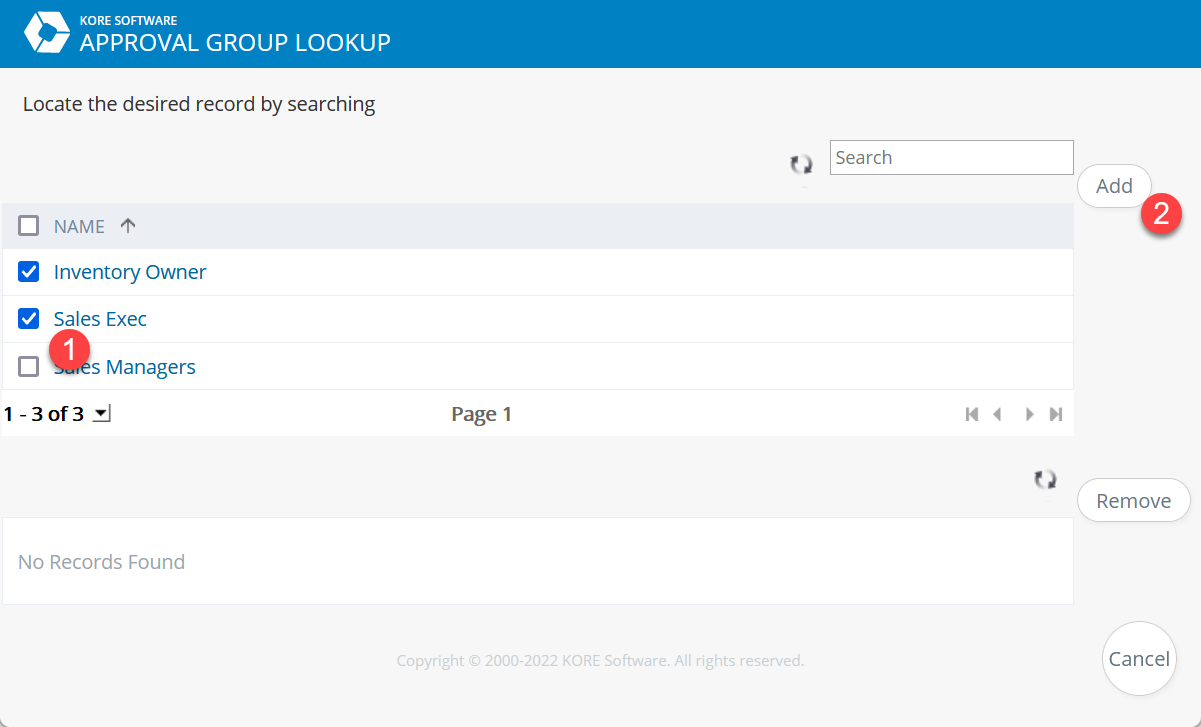
Click one of the Manage buttons to open the group lookup tool in a popup window.
Use the checkboxes to select one or more approval groups, then the Add button. The group(s) will then move to the bottom section. You can also remove groups if necessary. Changes are saved automatically—close the window when finished.
To view the updated list, click the Refresh button (next to the Manage button).
Workflow endpoints
A deal sheet should eventually reach an end state, whether the deal is contracted or has been lost. A deal sheet exits the Approval Workflow when an approval option that has no next step(s) defined is executed.
Best practice is to lock the deal sheet upon reaching a potential final step, then use the endpoint approval option to set the final approval status (e.g., Contract Finalized or Deal Lost) and status code (i.e., Contracted or Deactivate).
Warning: Because email notifications are only triggered by approval steps and not options, some organizations create a dead-end step with no options in order to send notifications at a workflow endpoint. However, this creates an approval step that can never be closed and which will prevent the deal sheet from being rolled over. Always provide and use an approval option at endpoints—if you do need a final step for notifications, you can add an "Exit the Approval Workflow" option to it with no next steps.
