Important: This page does not apply to KORE Sponsorship users. Seasons are managed in your CRM.
To manage deals and seasonal assets, Activate needs to know the start and end dates for each season. Each season can be named—this is typically a year (such as 2024) or two years (such as 2024-25) depending on if the seasons straddle calendar years, but you can name them however you see fit.
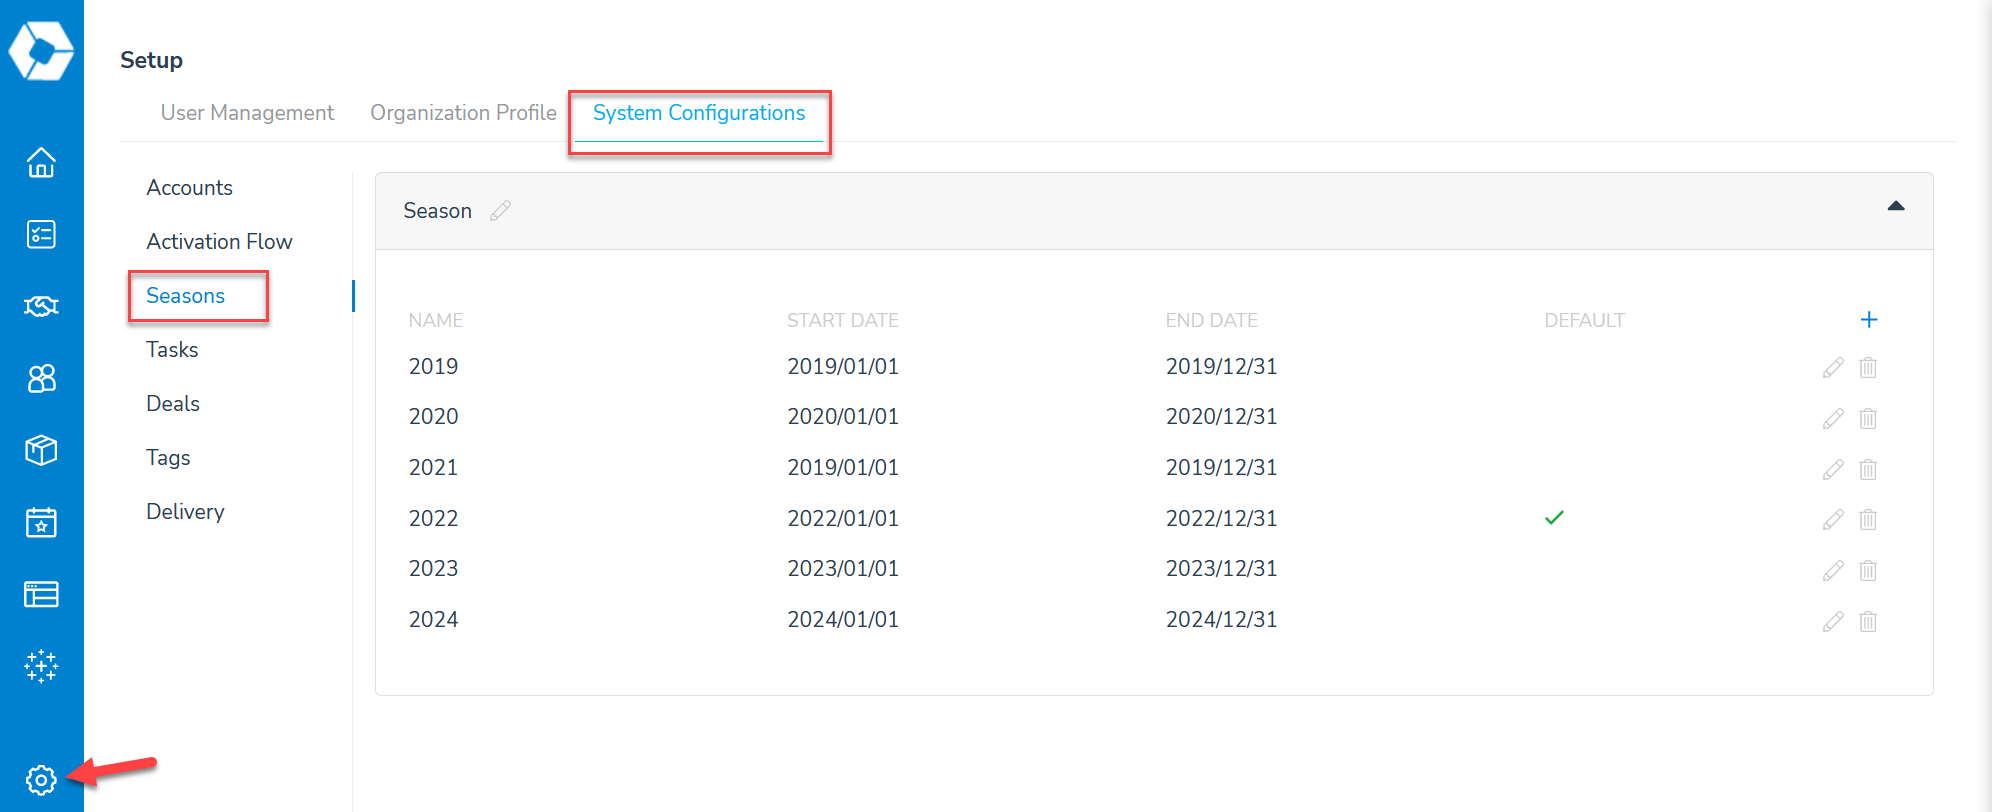
To access your seasons, select Setup from the navigation bar. Then choose the System Configurations tab, and finally Seasons in the left pane. Open the Season box to view existing seasons and make changes.

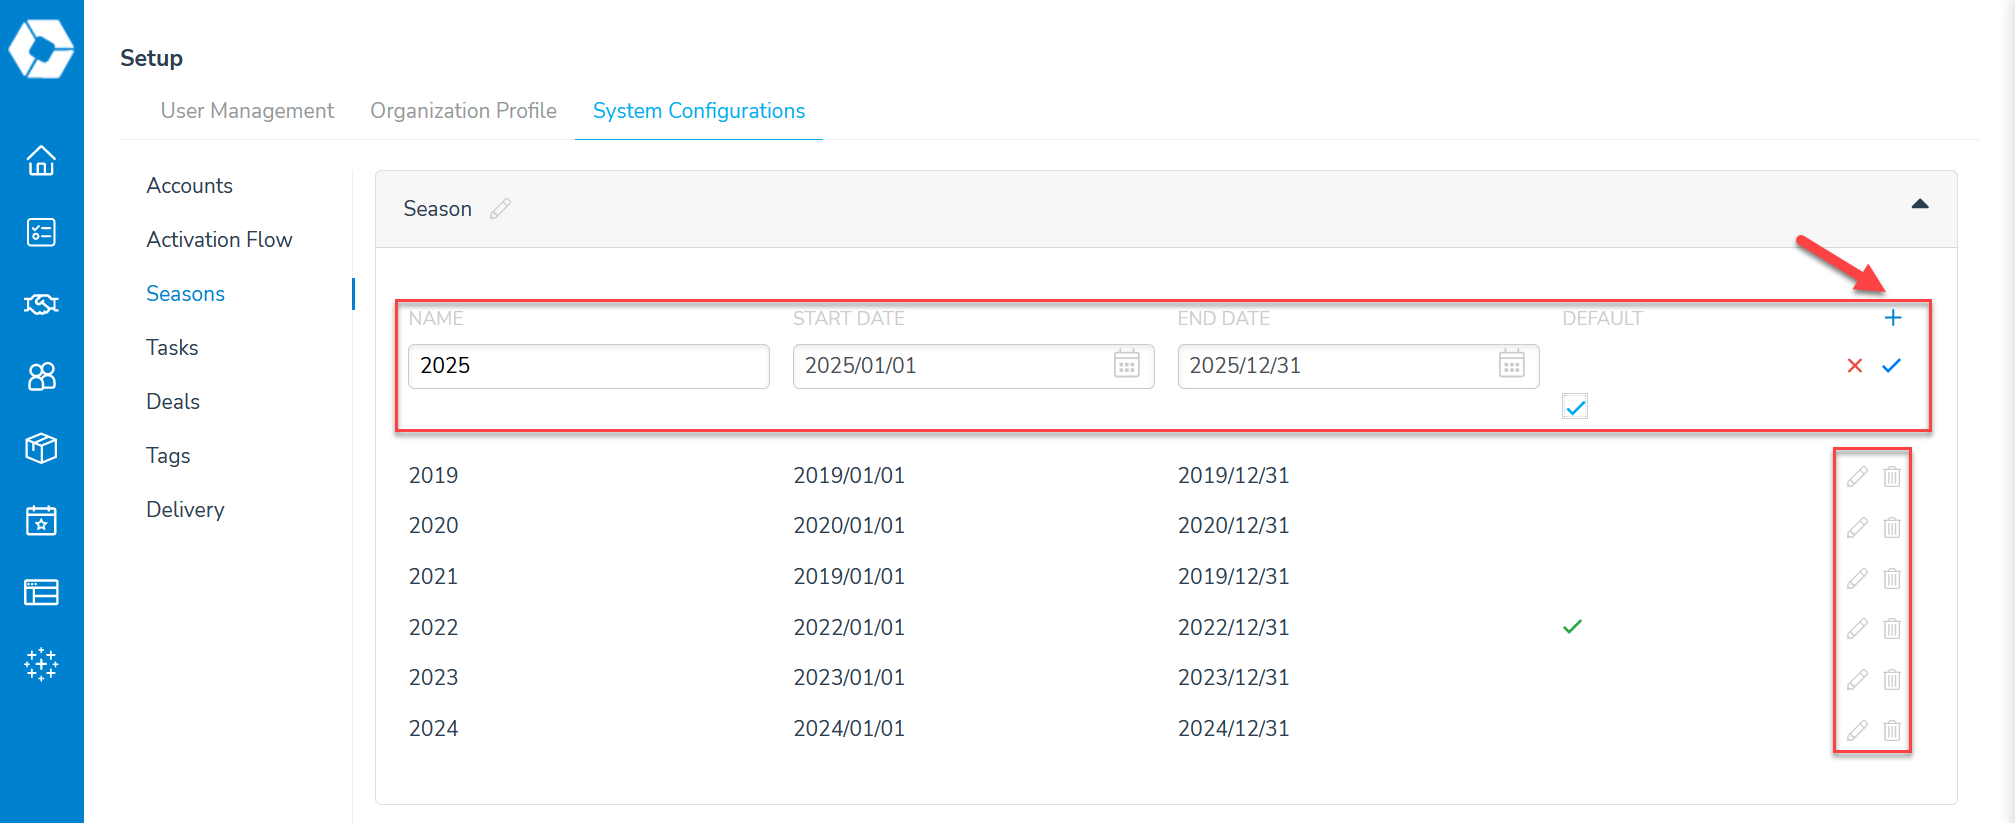
Add: Click the + icon. A new line will be added where you can enter the name and date range. Tick the Default checkbox to make this season the default for each new deal. Click the check mark icon to save the new season, or the x icon to cancel.
Edit: Click the pencil icon on that season's line. You can also tick the Default checkbox to make this season the default throughout Activate. (You'll be asked to confirm.) Click the check mark icon to save your changes, or the x icon to cancel.
Delete: Use the trashcan icon to delete a season. The system will ask you to confirm the deletion. However, you cannot delete a season that has a deal attached to it.

