Overview
Account groups are an optional way for you to categorize the organizations you do business with. They make it easier to find deals within one industry or to quickly see what line of business an unfamiliar name is in. Account groups can also be used with filters.
On an account's page, users can enter the essential details of your contacts at that organization. Contact roles are tags you can apply to a contact. (This feature may be disabled if you also use KORE Sponsorship; ask your KORE Success Manager if you'd like to enable it.)
Configure groups (admins only)
To access your account groups, select Setup from the navigation bar. Choose the System Configurations tab, and finally Accounts in the left pane. Then open the Account Groups box to view the list and make changes.
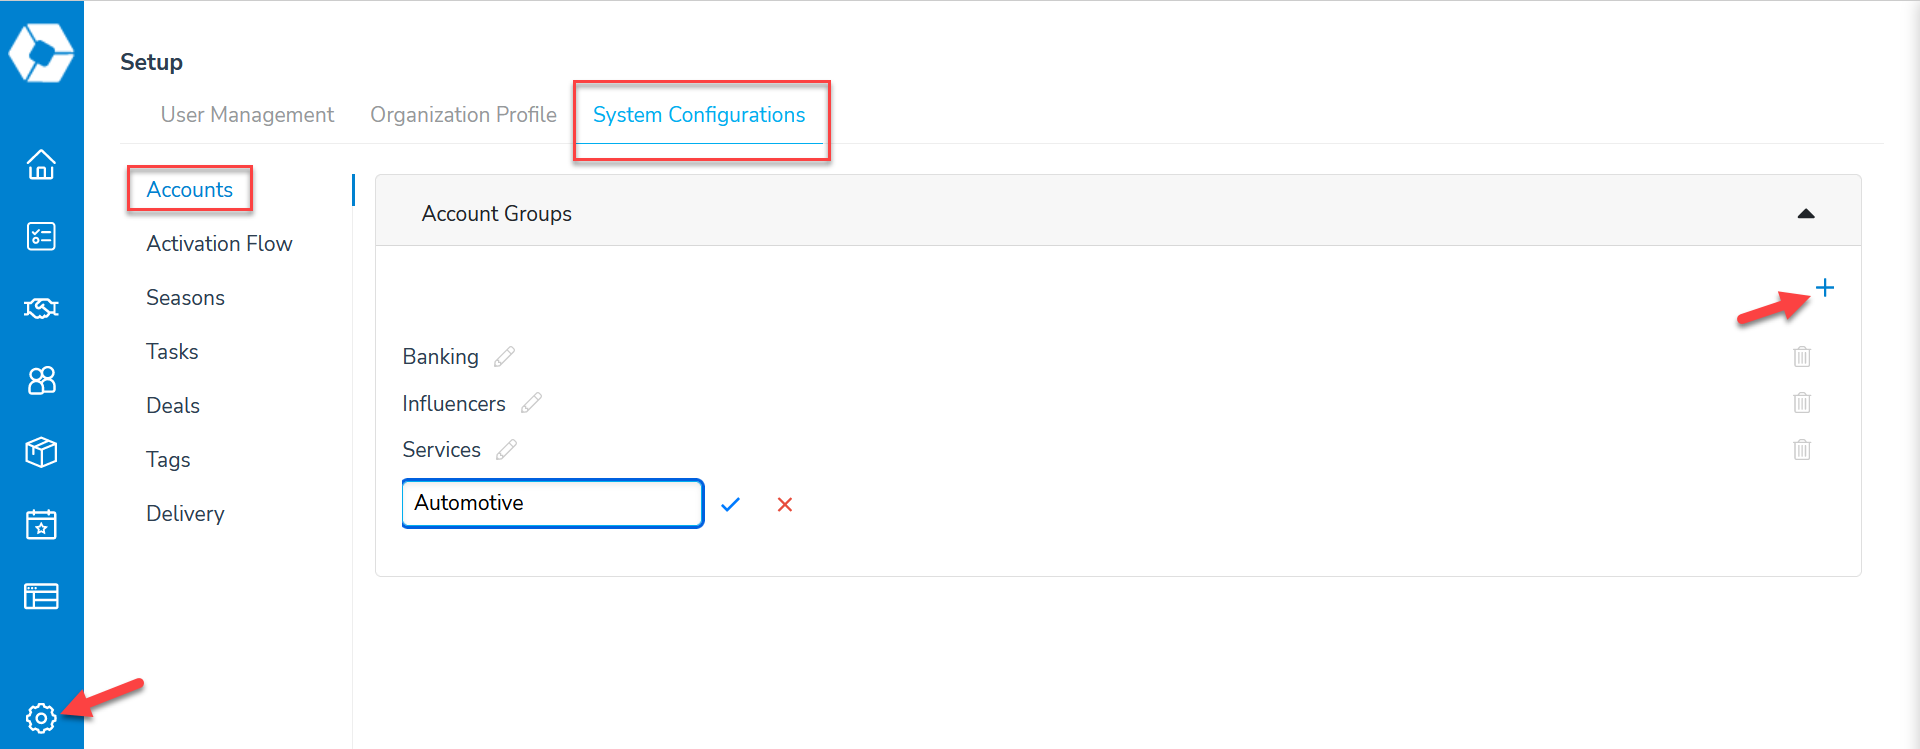
Add: Click the + icon. A new line will be added at the bottom of the list where you can enter the new group’s name. Click the check mark icon to save the new group, or the x icon to cancel.
Rename: Click the pencil icon next to a group’s name, then make the desired change. Click the check mark icon to save your changes, or the x icon to cancel. The updated name will take effect immediately.
Delete: Use the trashcan icon to delete an account group. The system will ask you to confirm the deletion. However, you cannot delete an account group that has active accounts associated with it.
Add accounts to a group (all team members)
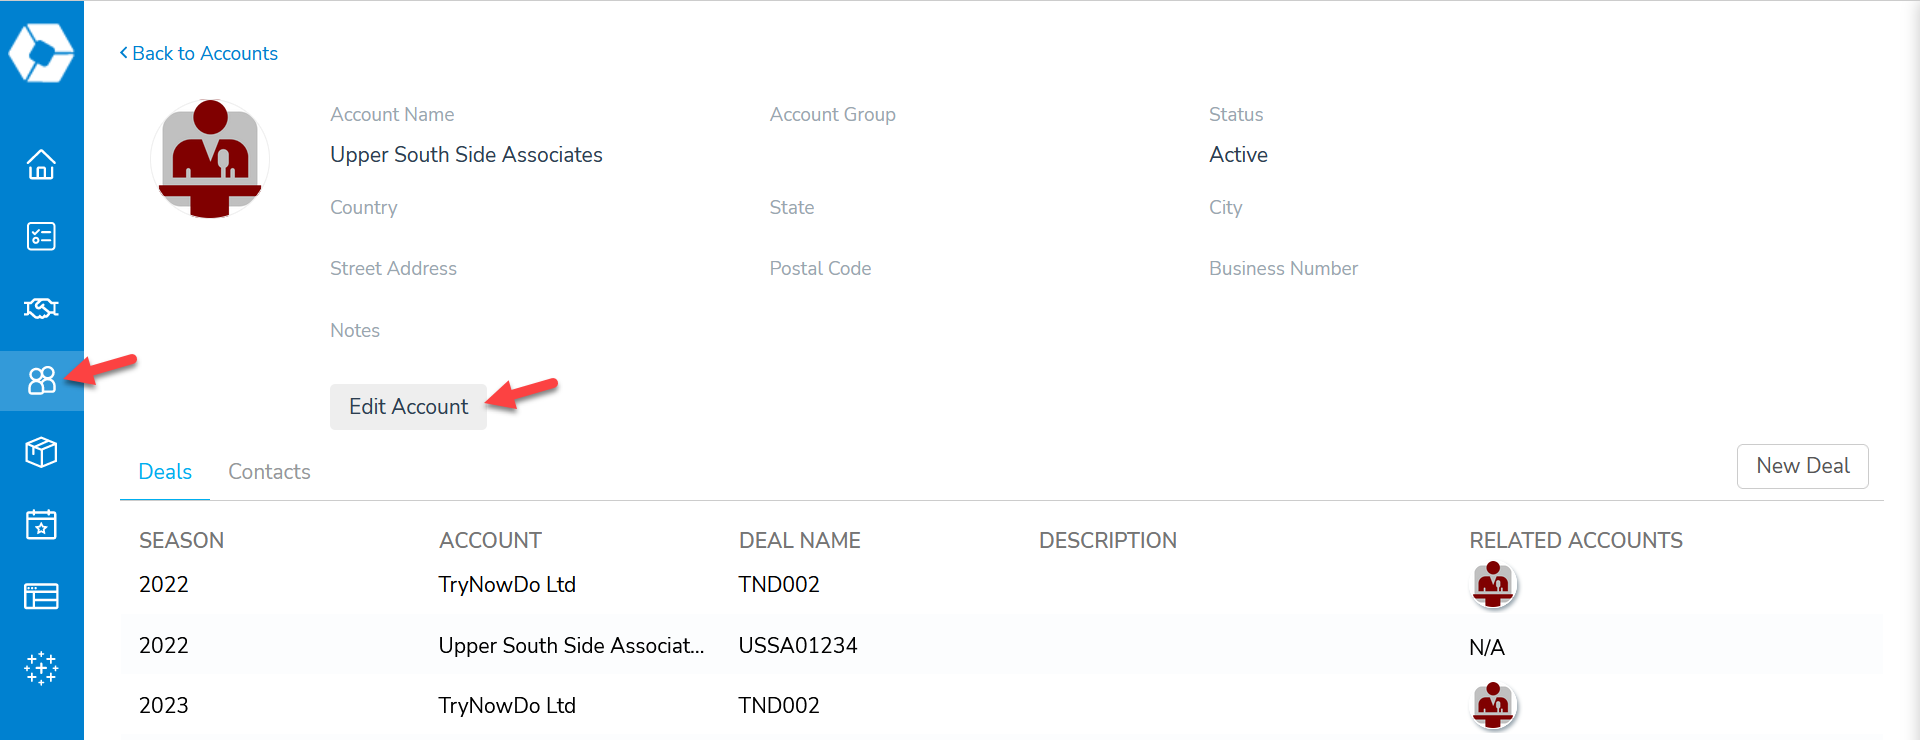
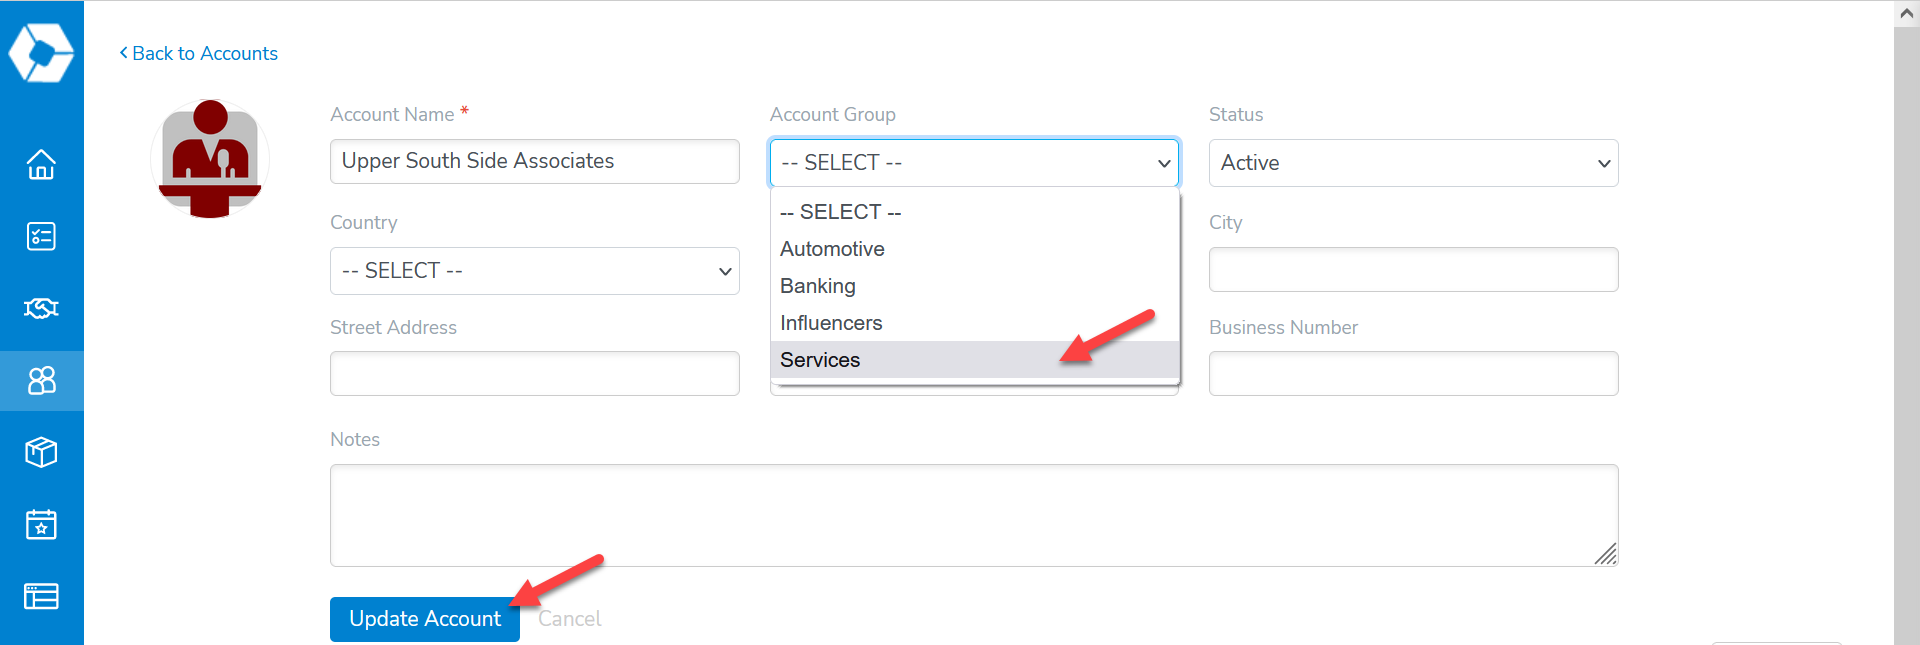
Select Accounts from the navigation bar. The list of accounts includes a column for account groups. To assign an account to a group (or to change the group it’s assigned to), select the account to open it. On the account details page, click Edit Account. Select the desired group from the Account Group picklist, then click Update Account to save the change.
An account can only be in one account group.
Configure contact roles (admins only)
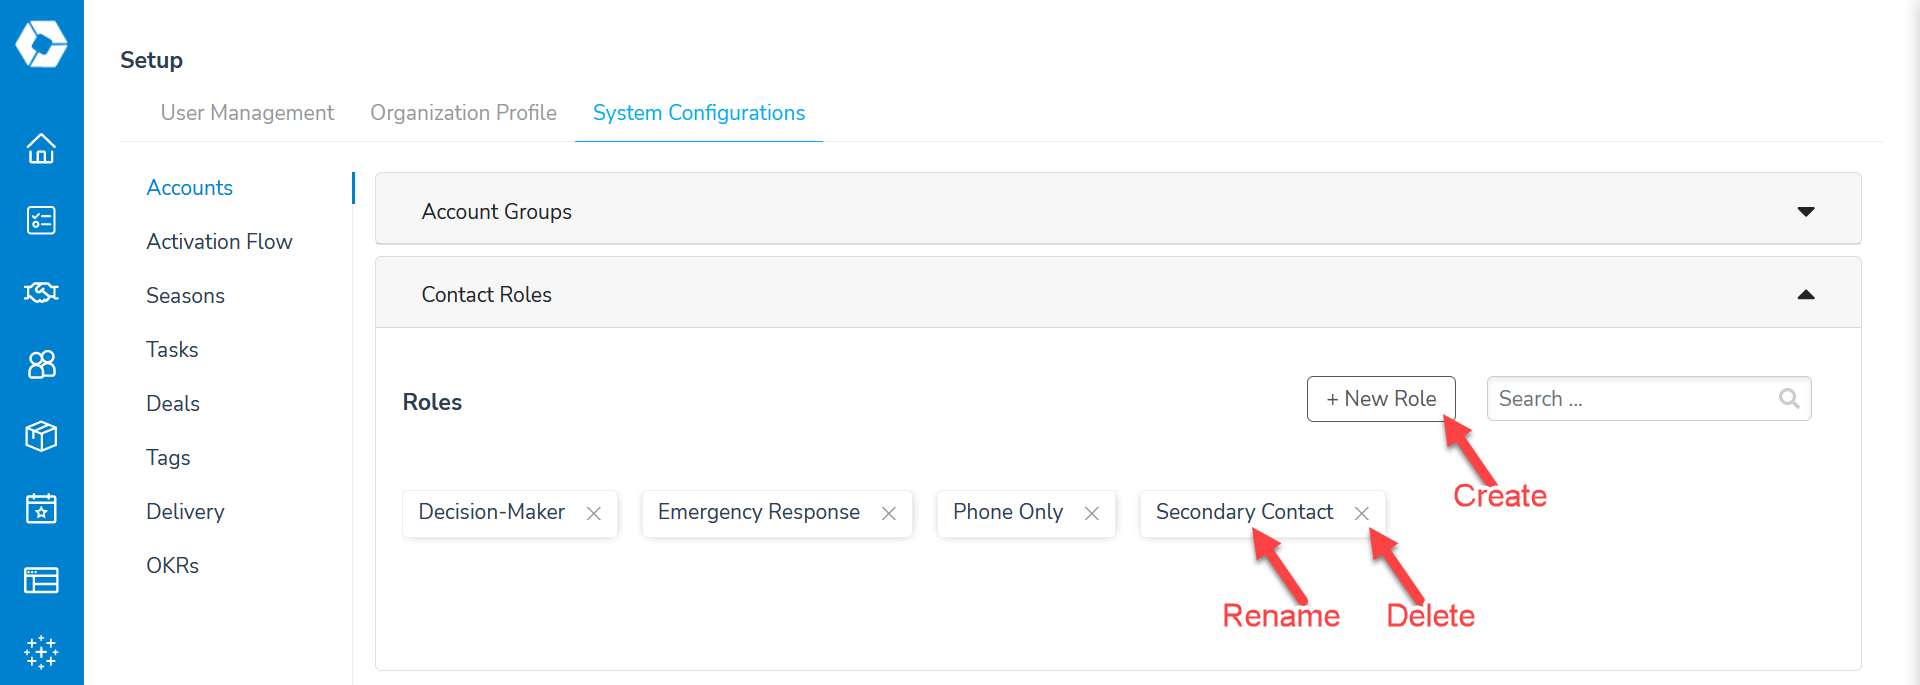
To create or edit contact roles, select Setup from the navigation bar. Choose the System Configurations tab, and finally Accounts in the left pane. Then open the Contact Roles box to view the list and make changes.
Apply contact roles to a contact (all team members)
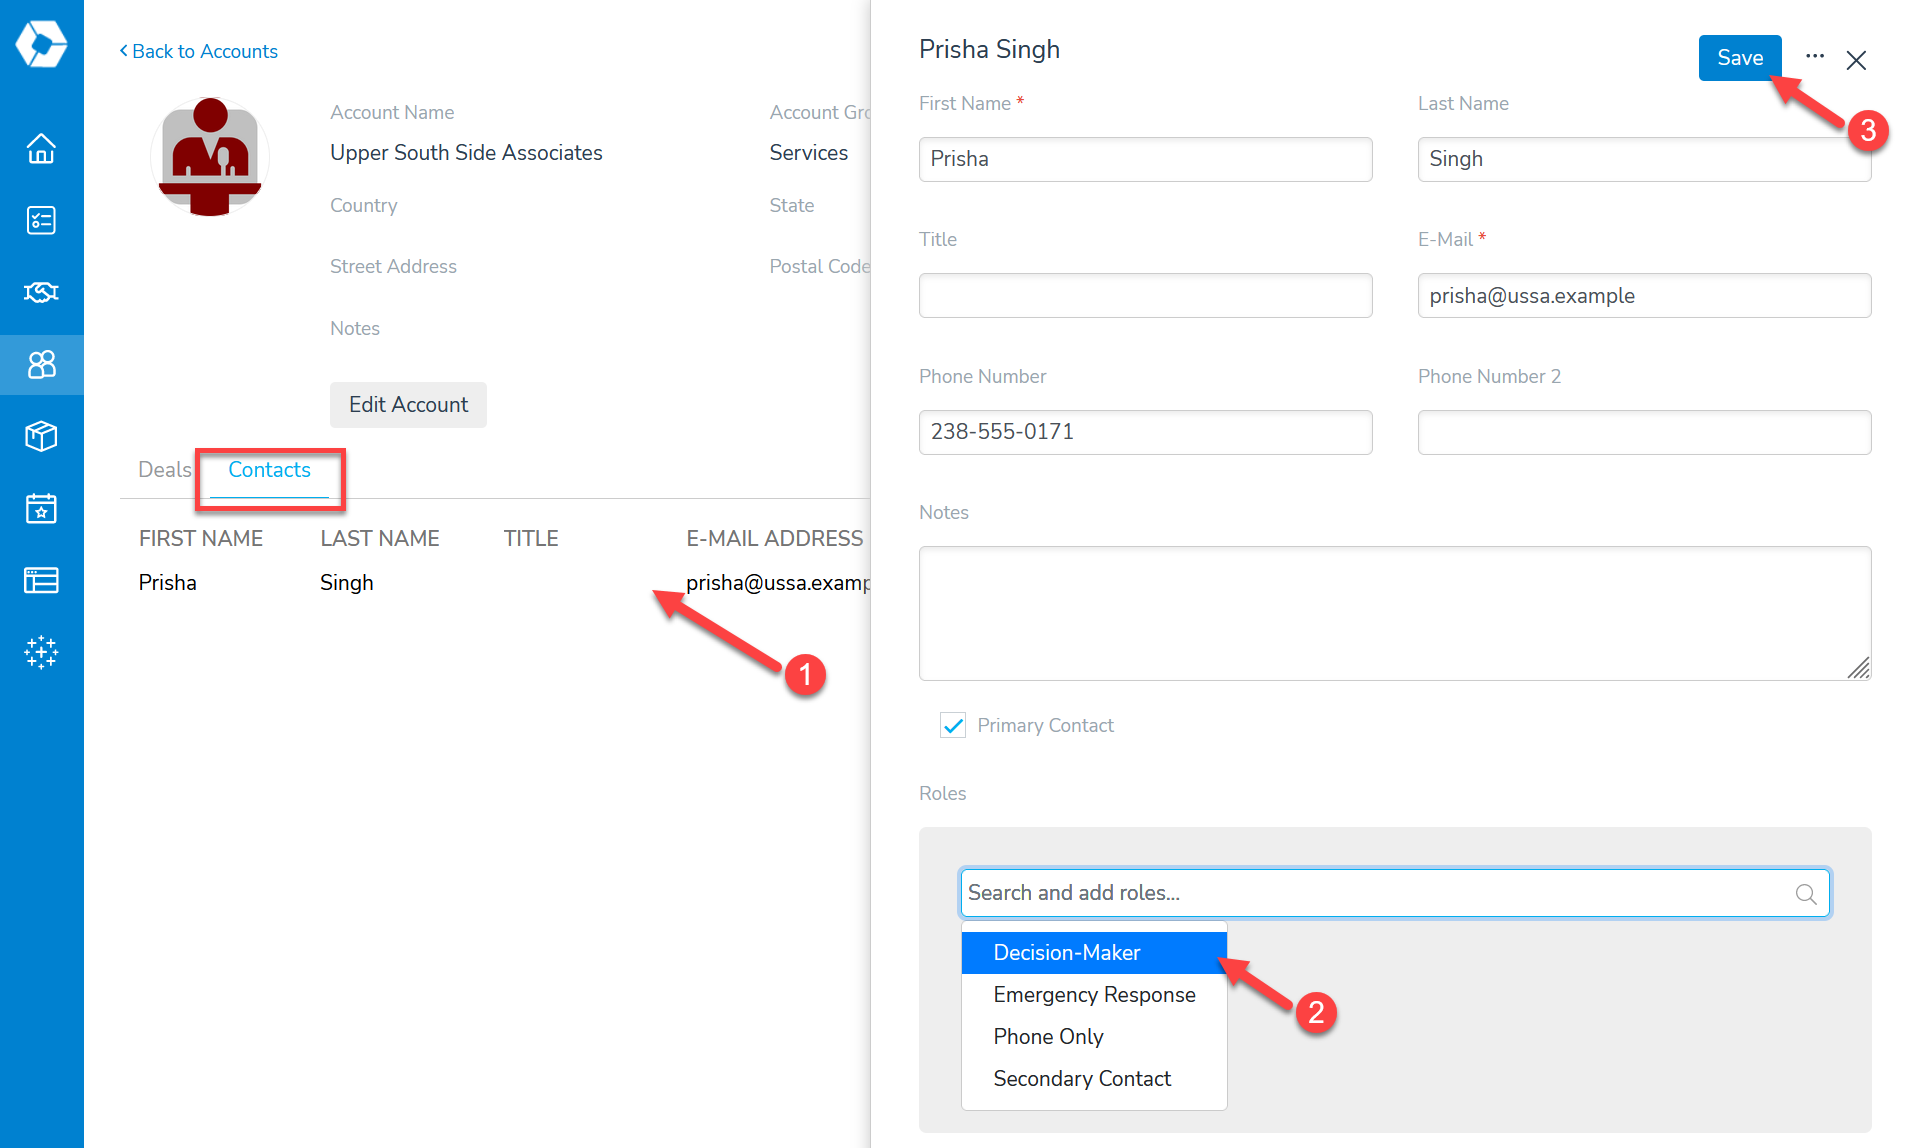
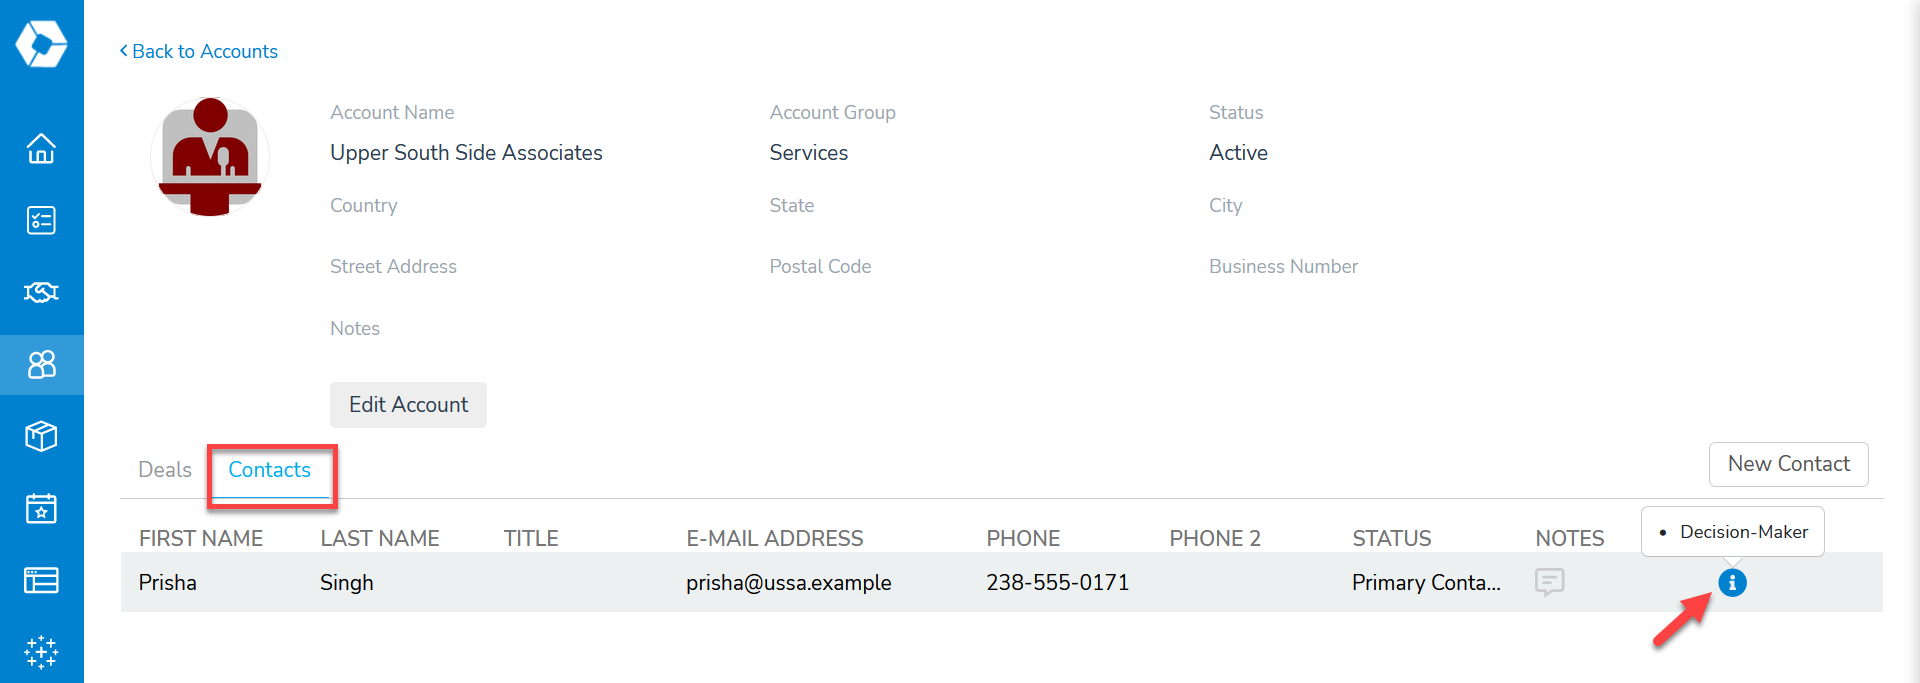
Open the Contacts tab of an account to view or create contacts there. Click on a contact to open the edit pane, then choose role(s) from the selection list. After saving the changes, you can see the contact's role(s) by hovering over the info icon.
