
Note: Intake is in active development. Several new features are planned, and this documentation may not reflect the latest updates.
Overview
Depending on your organization’s sponsorship strategy, there could be a wide variety of criteria that you look for in opportunities. Intake helps you identify the applications which potentially meet enough of your criteria by scoring them.
In addition to scoring the answers, you can also assign the relative importance of each question. Intake will use these weights to calculate a total score. You can then automatically reject applications with a low score and only send those with high scores to human review.
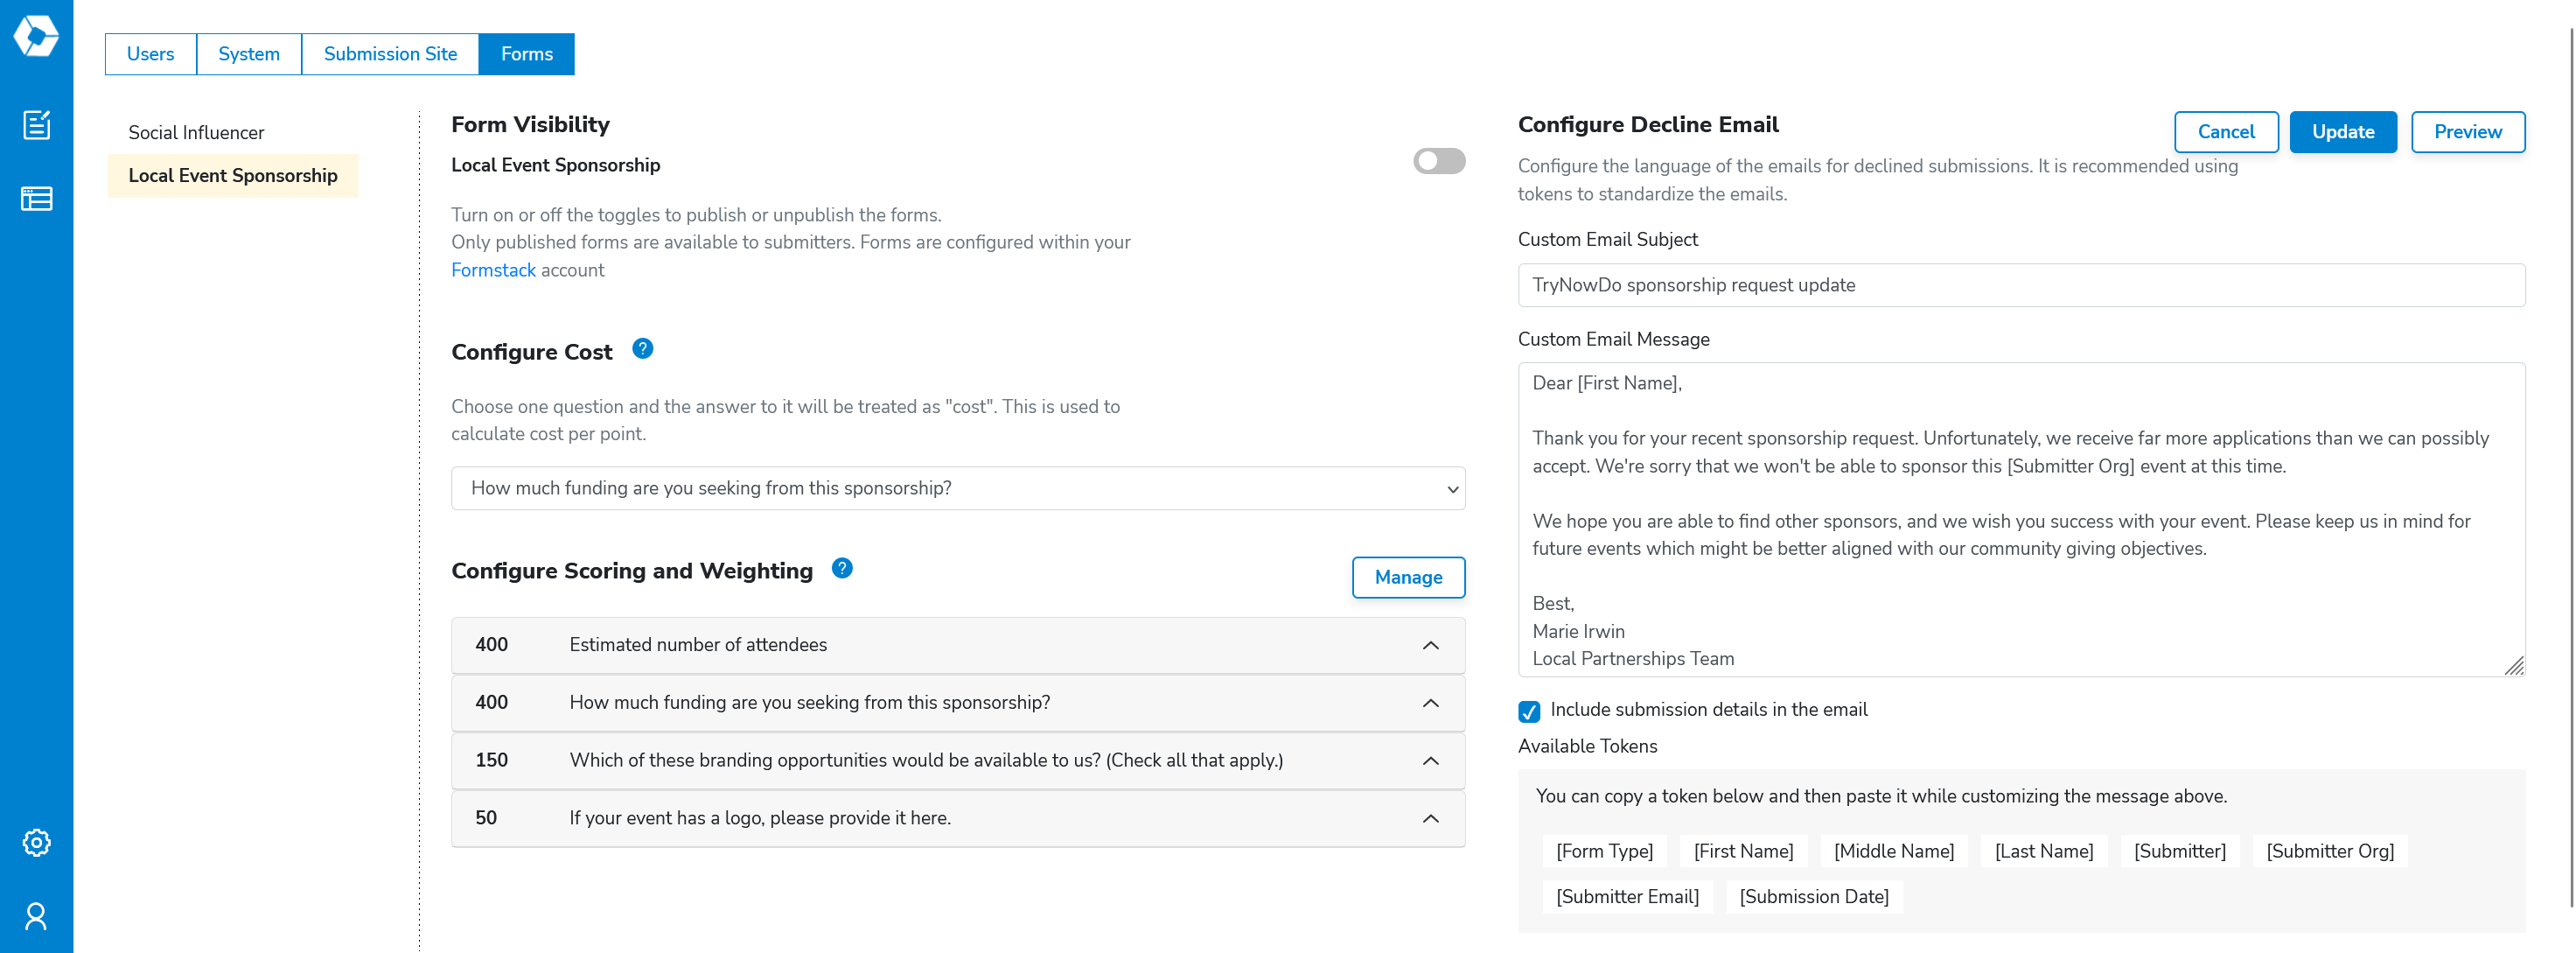
Navigate to Setup > Forms and select a form to edit from the list.
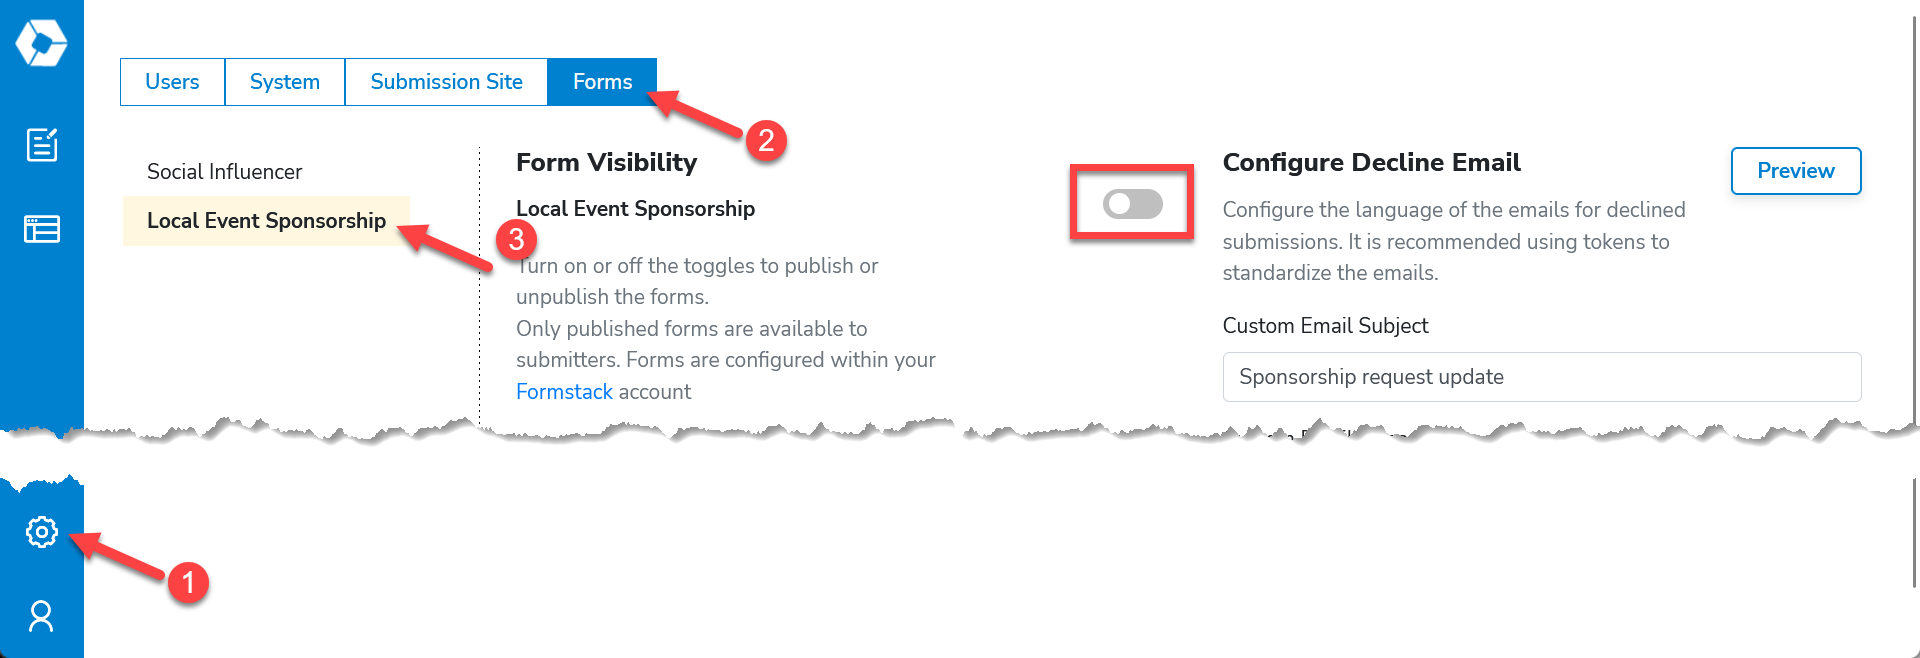
Note: The Form Visibility slider determines whether this form is available through your branded portal. Keep this disabled until you’ve finished the setup steps below.
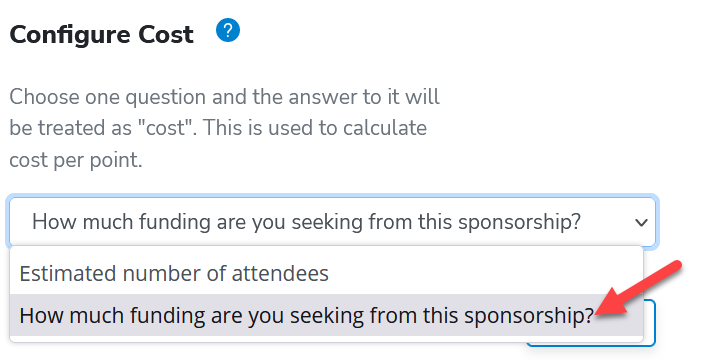
Configure cost
To help you better understand the impact of a sponsorship opportunity relative to others, the system will calculate the “cost per point” by dividing the total number of points by the cost of the sponsorship. In this box, select the question where applicants specify how much money and/or in-kind value they are requesting. (The answer must be a number—it cannot be a text field, checkbox, etc.)
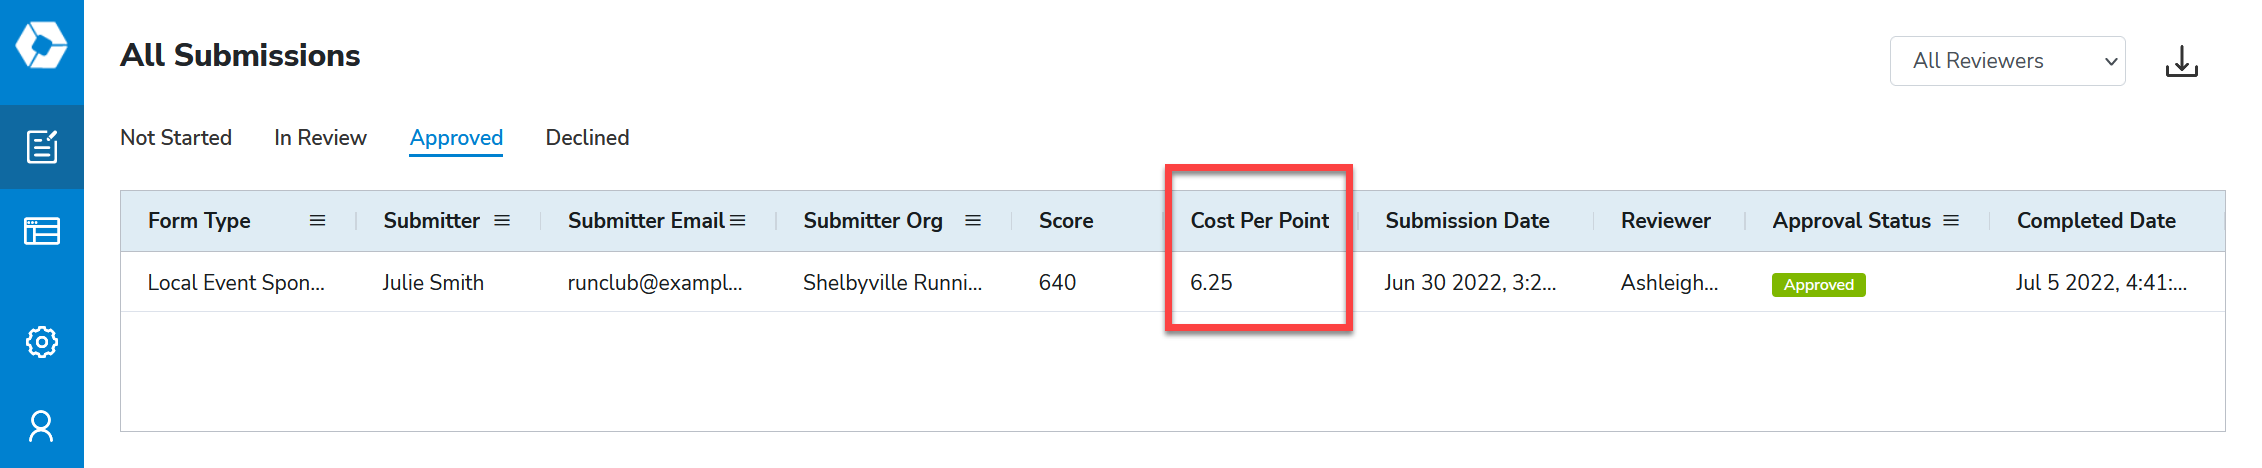
Scores range from 0 to 1000. Note that the score does not have any intrinsic meaning or value. Only compare scores from the same form—the scores from two different forms have no relation to each other. A 600 score on Form A could be a better opportunity for you than an 800 score on Form B, even if they have the same cost per point.
The cost per point is displayed in the submissions table. It is informational only and cannot be used as a factor in auto-rejecting applications.
Configure scoring and weighting
Your form collects a variety of information, much of which may not be useful during the scoring process. In this section, you can choose which questions to consider and how to assign points to the possible answers.
Click the Manage button to begin.
Select questions
Begin by selecting which questions are relevant for calculating a score. Only certain types of questions can be scored:
- Single select—points based on the answer selected
- Multi select—each answer can have points, the points are totaled
- Number—assign points based on the range an answer falls in
- File upload—assign points according to if a file exists or not (not useful if the field is required)
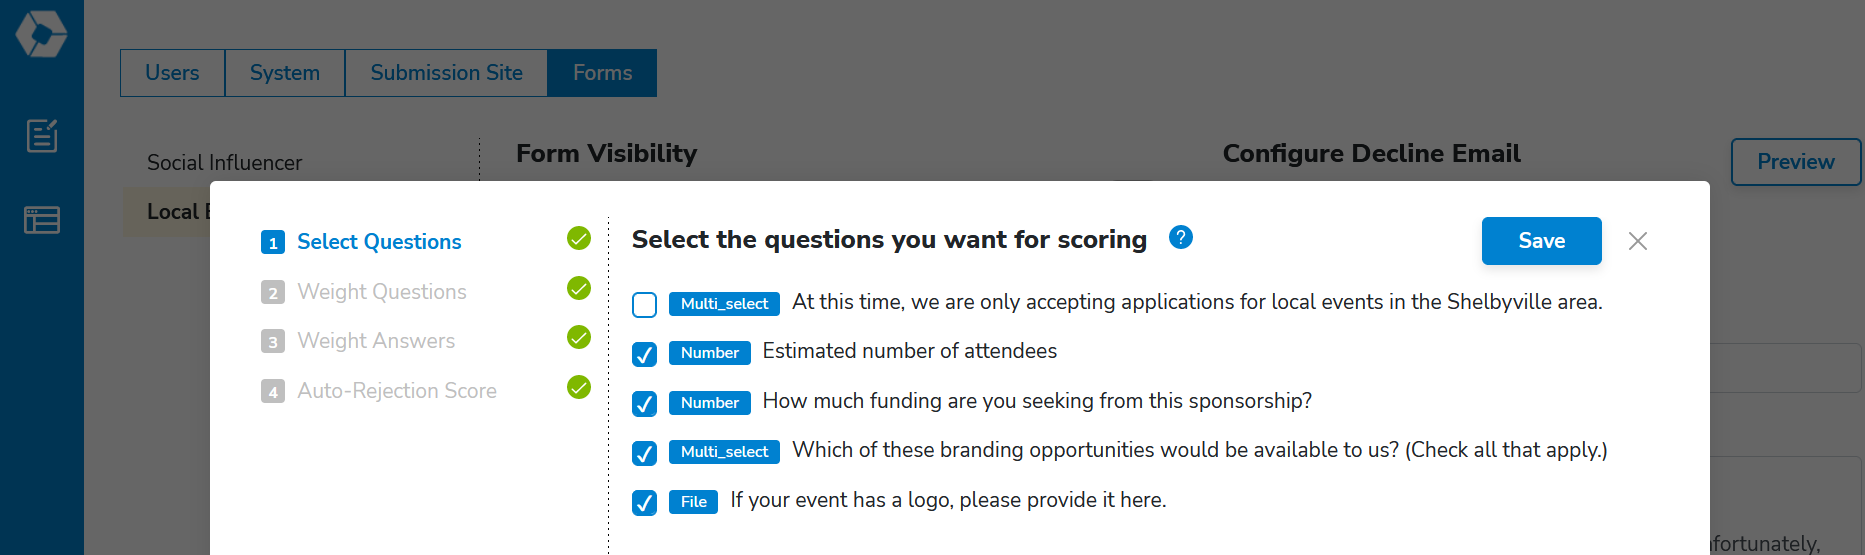
Click Save, then click on the next step to proceed.
Weight questions
Some questions are more important than others. Here, you can specify how much each question should count toward the total score. The percentages you enter must add up to 100%. The system displays the maximum score for each question based on the weight.
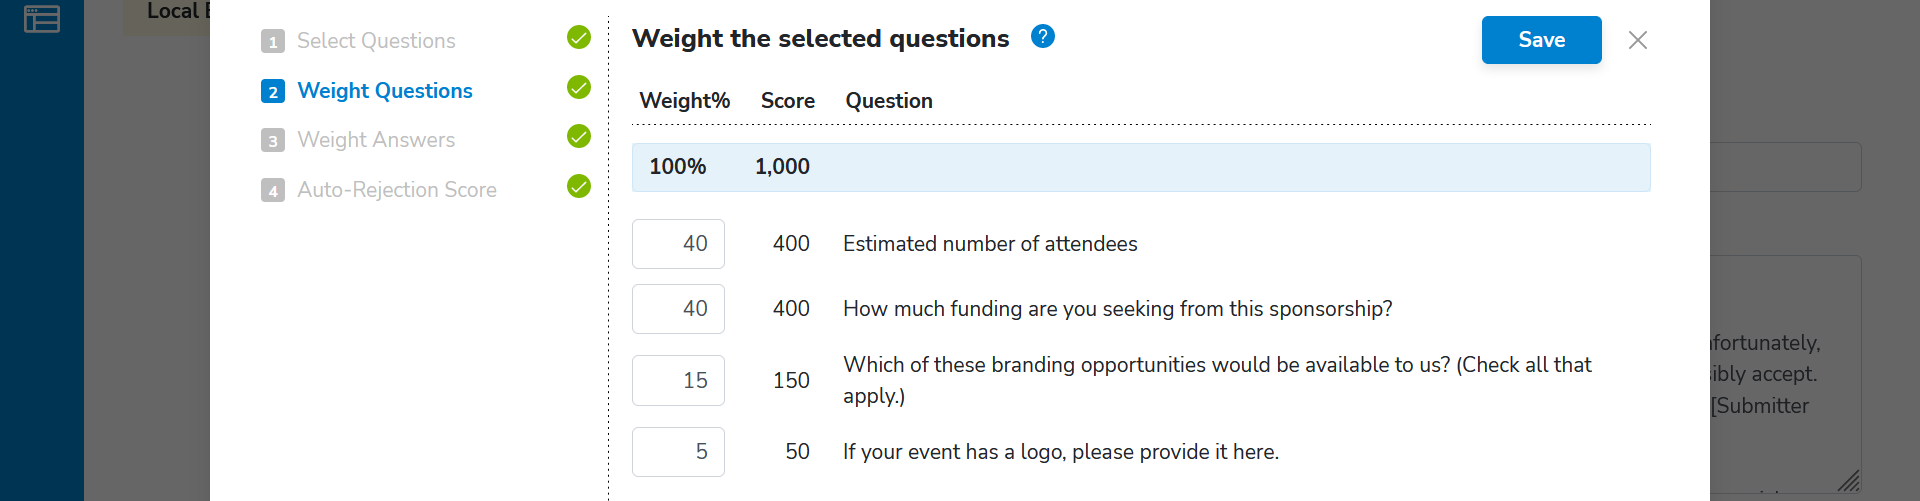
Click Save, then click on the next step to proceed.
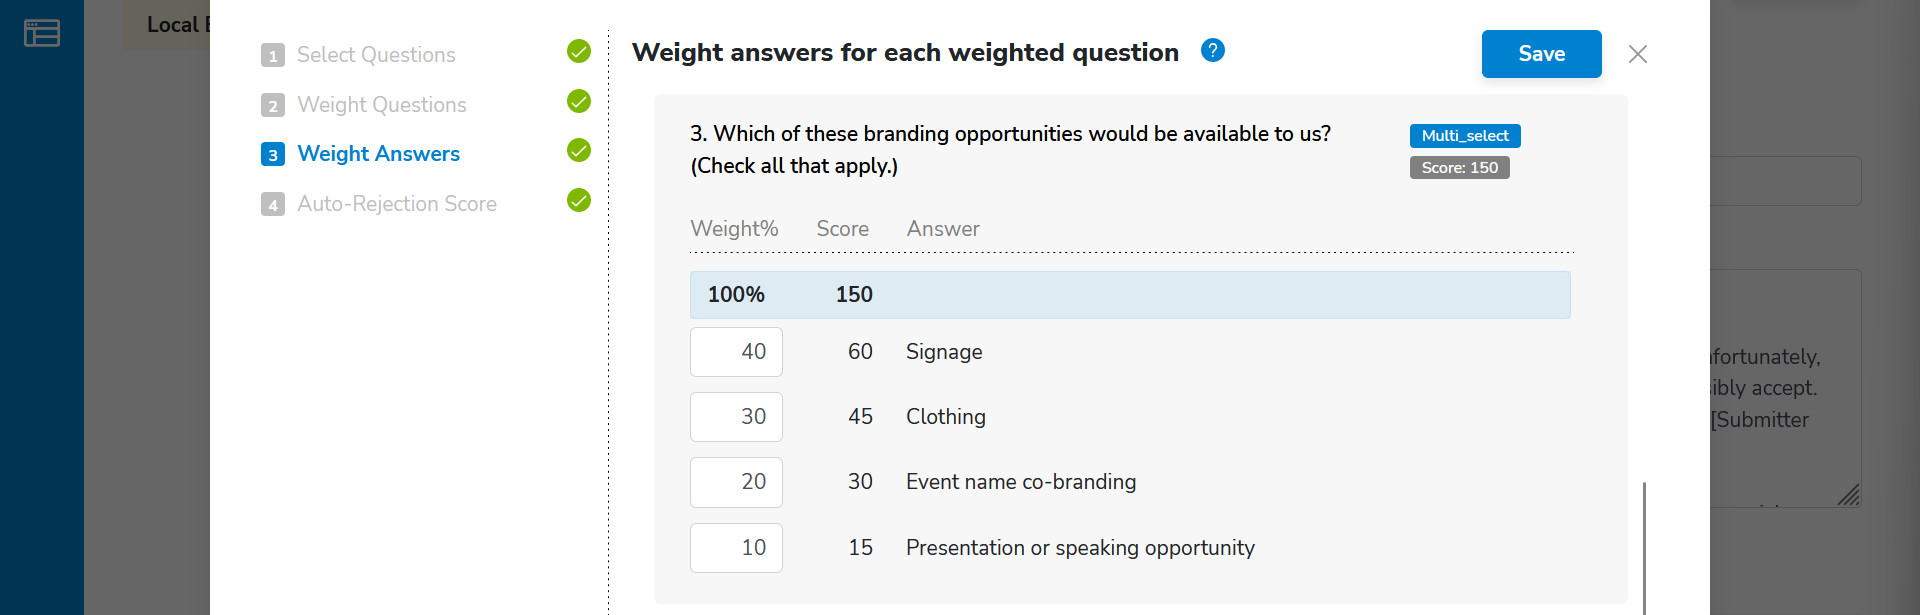
Weight answers
Each question is worth up to some maximum number of points. Here, you will specify the percentage of those maximum points that each answer is worth.
For multi-select questions, the total weight of all answers must add up to 100%.
For all other questions, it is best practice to specify at least one answer per question that can receive 100% of the possible points, although the system doesn’t enforce this. For numeric questions, you can create as many ranges as you need so long as they do not overlap.
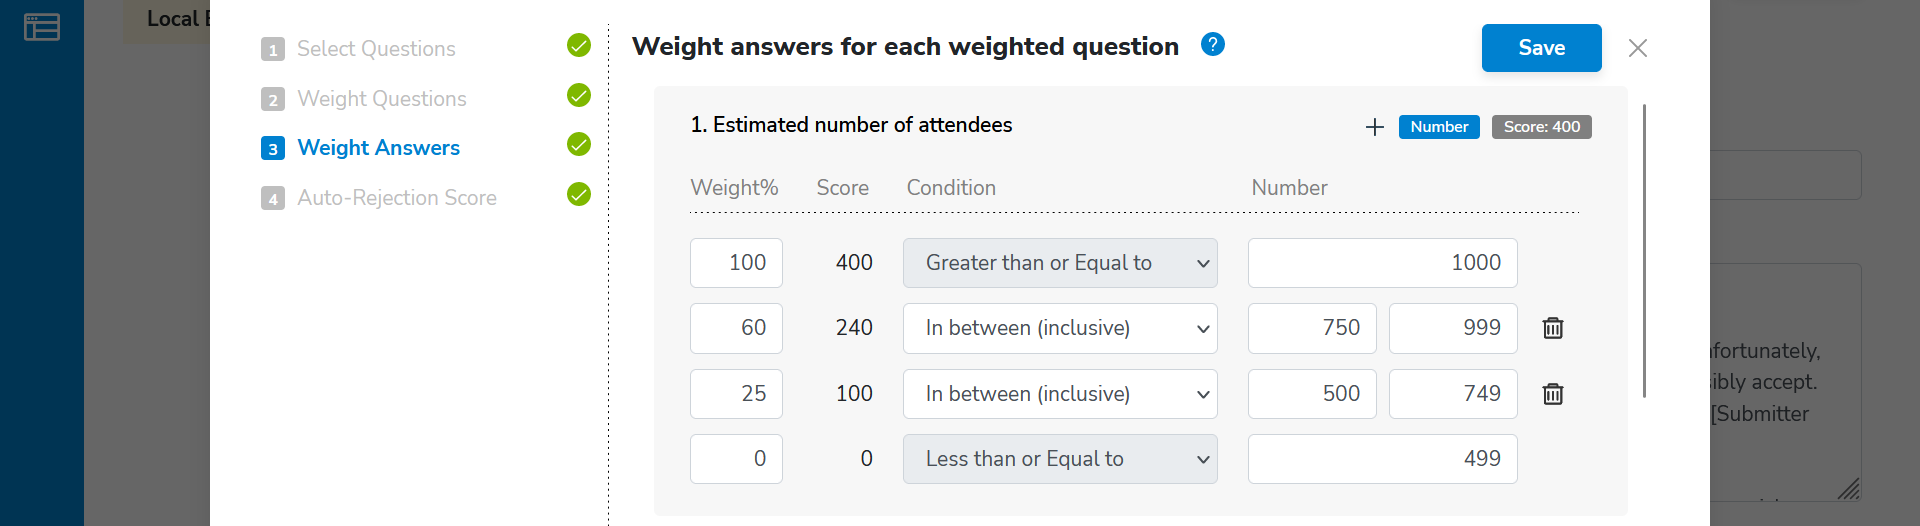
Click Save, then click on the next step to proceed.
Auto-rejection score
Once weights are assigned, you can automatically reject applications that don’t meet a minimum score. Scores range from 0 to 1000 points, so choose a threshold between these numbers. If you aren’t sure what score to enter, leave this disabled for now and manually review applications until you determine the score where applications begin to have a chance at acceptance. You can adjust this setting at any time, but the change will only affect new applications—not previously scored ones.

Click Save, then close the box.
Configure decline email
Since the vast majority of applications must be rejected, Intake can automatically send rejection emails on your behalf. Here, provide the email subject and message to send. Intake provides tokens in square brackets which, if used in the email template, will be replaced with details from the application. The first, middle, and last name tokens are automatically parsed from the form’s Name field.
The rejection email will be sent from no-reply@koresoftware.com, so we strongly recommend including your organization’s name in the subject line.
If you check the Include submission details in the email box, certain metadata will be included with the email:
- Form type (form name)
- Submitter (user’s full name)
- Submitter Org (taken from application)
- Submission Date (form submission timestamp)
- Complete Date (scoring timestamp)
Click the Preview button to view an example email with the tokens replaced, and Update to save the template.
Form visibility
When you’ve completed the setup and are ready to accept applications using this form, enable the Form Visibility slider. You can turn this off at any time to pause submissions without losing your configuration.
Note: If you change the name of the form in Formstack, you must toggle Intake's Form Visibility off and back on to apply the change to your branded portal. Other changes to the form will be reflected automatically.