Overview
Often, a rights holder needs to create the same tasks every time a particular asset is included in a deal. Adding all those tasks one by one can quickly become tedious. Activate’s activation flows lets admins create templates for these situations which team members can apply quickly and easily.
Create a new template
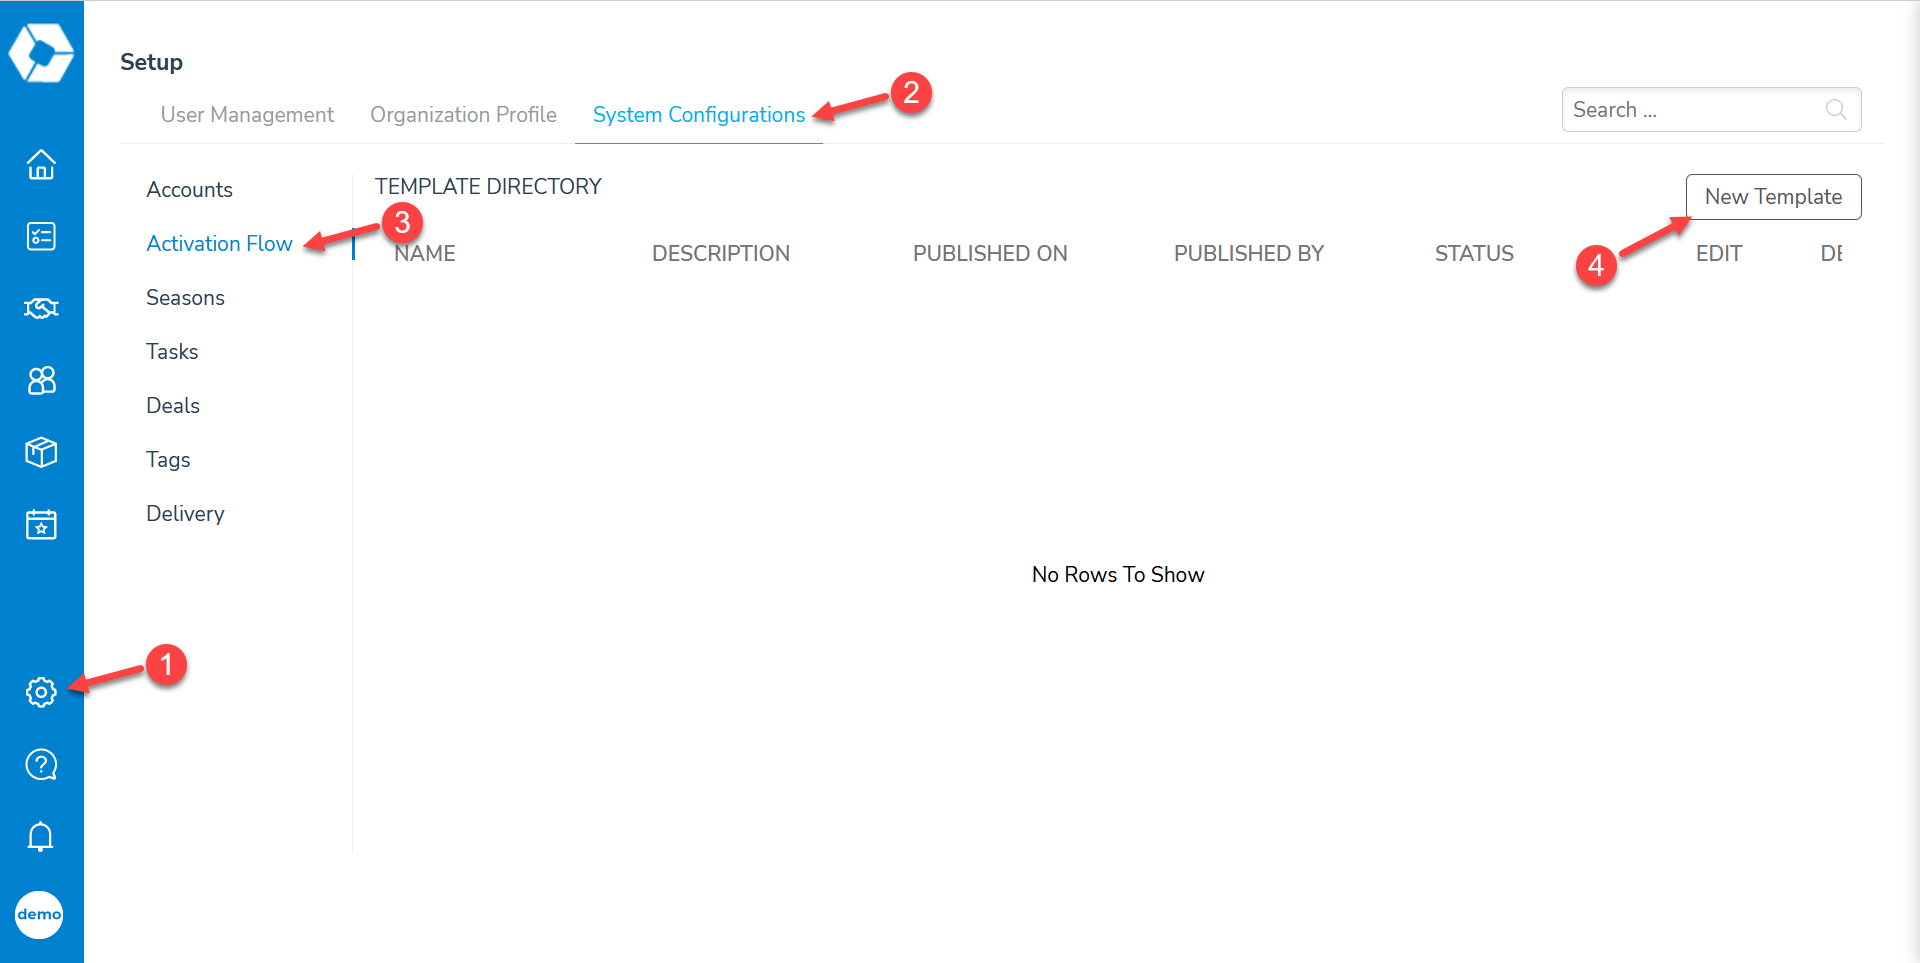
A new template is created on the template directory page. Select Setup in the navigation bar, then System Configurations > Activation Flow. Click the New Template button to begin.

Next, enter a name for your activation flow. The description is optional. Click Save when finished.

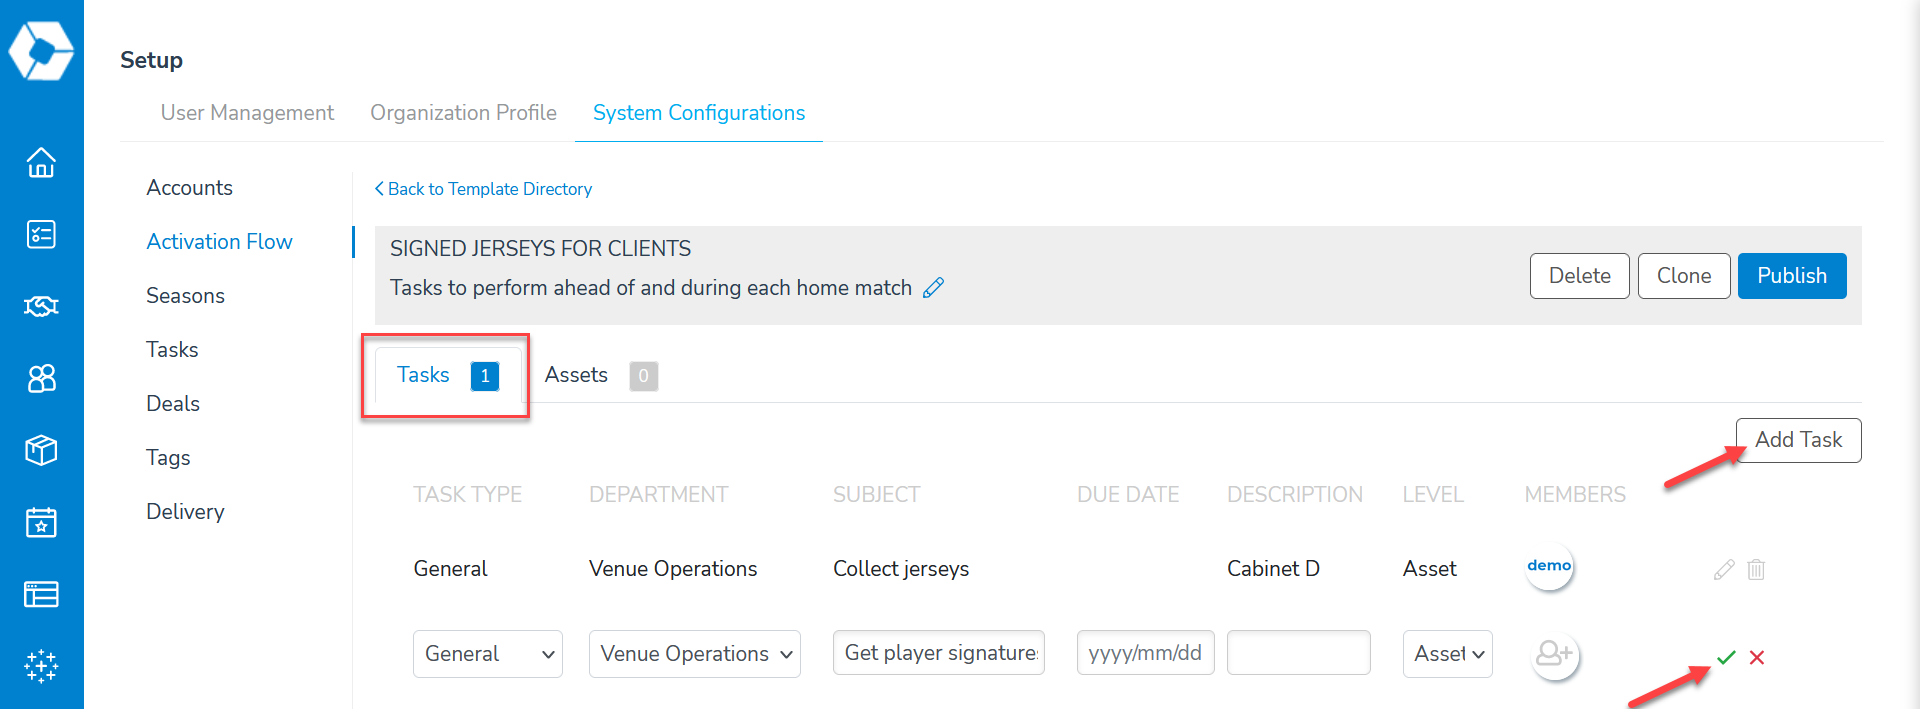
This brings you to the edit screen for your new activation flow. There are two tabs: Tasks and Assets.
Tasks
In the Tasks tab, click the Add Task button to create a new row. It contains the same fields that you would complete when creating a task normally. When team members use this activation flow, the tasks will be pre-filled with the values you enter here.

The Subject field is required, but Due Date and Description are optional within the template. For example, you might create an activation flow for a seasonal signage asset. Since you would install the signage before the season starts, a default due date is useful. But if you create an activation flow for a sponsored social media post, the due dates for tasks will vary based on the scheduled delivery date.
The Level field can be set to "Asset" or "Deal". If set to “Asset”, this task will be created and associated with the asset(s) you list in the Assets tab. If set to “Deal”, the task will instead be connected to the deal as a whole.
Finally, the Members icon lets you optionally select team members who will automatically become task members when this activation flow is used.
When finished with a row, click the green check mark to save the task in the template.
Assets
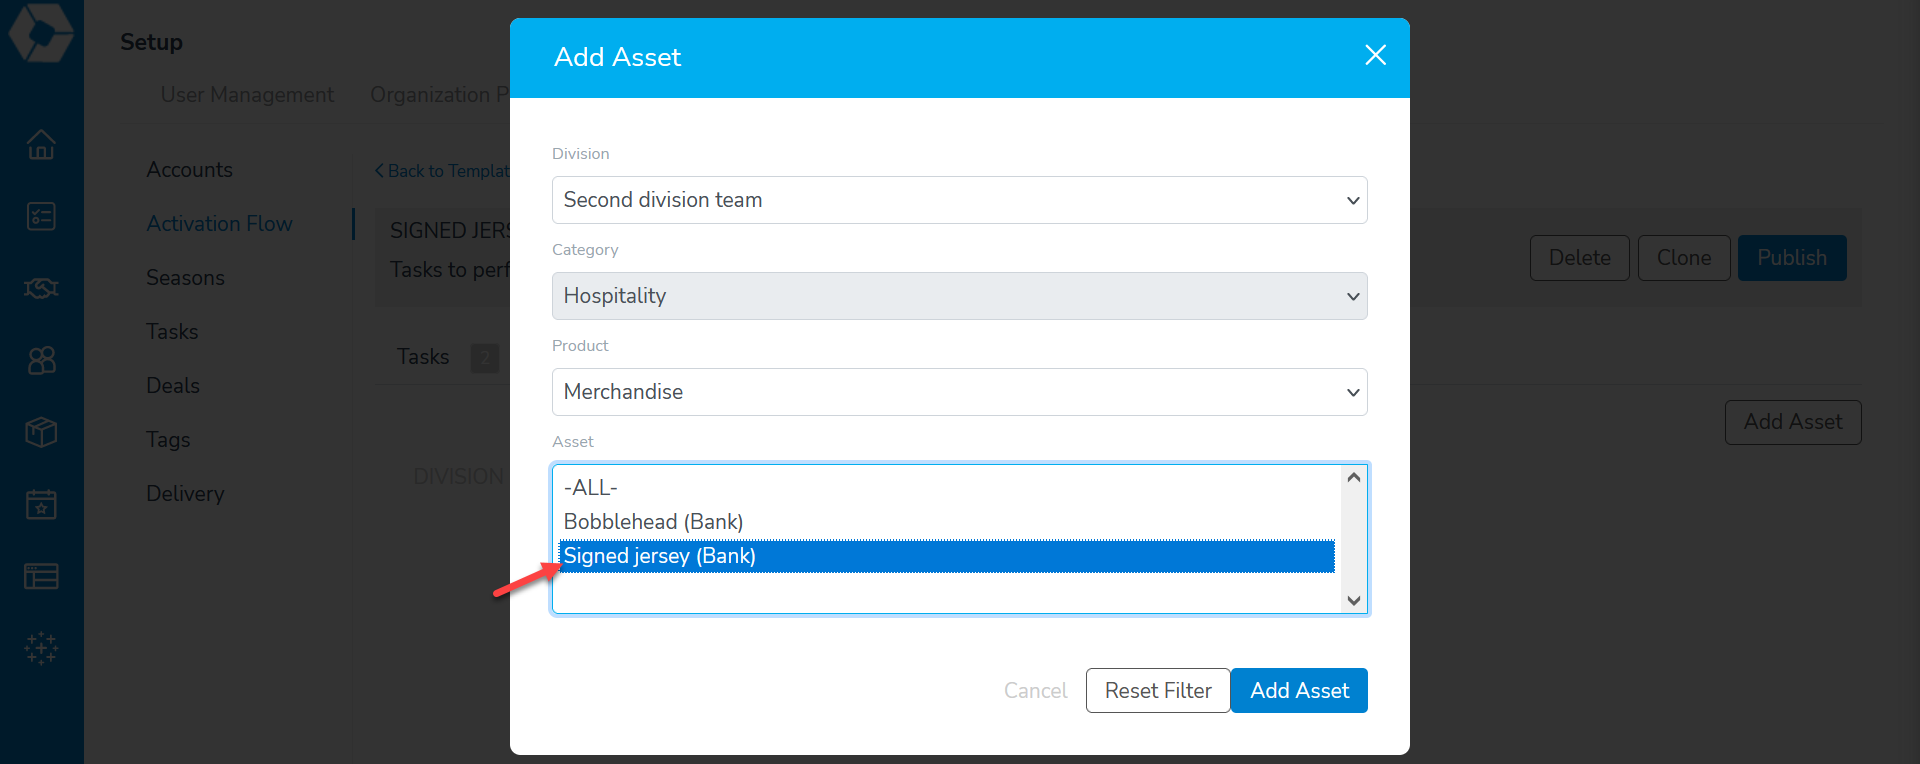
In the Assets tab, select the asset(s) that this activation flow applies to. If a deal contains one of the assets listed here, the specified tasks will be created when a team member applies the activation flow. Click the Add Asset button to begin.

In the Add Asset window, use the drop-down lists to find the asset(s) you want to add. Select it in the Asset field, then click the Add Asset button.

If you select more than one asset here, the asset-level tasks in the template will be created for each asset in the deal that is on this list. For example, suppose you create an activation flow for three different signage assets which all need the same tasks. If a deal contains one of these signage assets, then a team member can apply the activation flow and the asset-level tasks will be created for that signage asset. But if a deal contains two of these signage assets, then the same asset-level tasks will be created for both assets. Deal-level tasks will only be created once.
Publish, unpublish, or edit a template
Before team members can use the template, you must publish it. To do so, click the Publish button after you finish creating it.

If the template is published, the button changes to Unpublish. You can click this to disable the template without deleting it. A template must be unpublished before it can be changed. Use the Unpublish button to edit an existing template.

The Clone button makes a copy of the template, which can be a real time-saver if you need multiple templates for similar uses. The New Template window lets you give it a new name and edit the description if you wish. You can also choose whether to copy the tasks and/or assets into the new template. Click Save to create the copy. It will be in an unpublished state so that you can further edit the new copy.

Finally, you can use the Delete button to completely erase a template whether it’s published or not. A confirmation box will appear. This is irreversible. If in doubt, just unpublish.

